Use Java templates to deploy a service
You want to deploy a Java service to OpenShift.
Description
This How-To shows you how you can use one of the provided Java templates to deploy a service to OpenShift.
Overview
The IBM DevOps Solution Workbench provides three different templates where everything you need to deploy your Java service to OpenShift is already configured. These templates include complete CI/CD pipelines and Kubernetes deployment configurations.
Content of the templates
Each Java template comes pre-configured with the following components:
- GitLab CI/CD Pipeline (
.gitlab-ci.yml): Automated pipeline with four stages:build.app: Compiles the Java application using Mavenbuild.helm: Packages Helm charts for Kubernetes deploymentbuild.and.push.containerimage: Builds Docker images using Buildah and pushes to registrydeploy.helm: Deploys the application to OpenShift using Helm
- Maven Build Configuration (
pom.xml): Spring Boot 3.5.7 with Java 21, including all necessary dependencies - Dockerfile: Multi-stage Docker build
- Helm Charts (
src/main/helm/): Complete Kubernetes/OpenShift deployment configurations
Different types of templates
The templates are based on a project baseline, each with its own purpose:
- JAVATEMPLATEDD (Domain-Driven Design): Domain service with Java/Spring Boot based on domain driven design terminology
- JAVATEMPLATEINTSVC (Integration Service): Integration service with Java/Spring Boot for providing and consuming REST APIs
- JAVATEMPLATEBASIC (Basic Service): General purpose service with Java/Spring Boot
How to work with a template
In this example we will use the "JAVATEMPLATEINTSVC" asset to create a Hello World API that gets deployed to the OpenShift cluster.
Step 1: Create a new project from the template
- In the IBM DevOps Solution Workbench navigate to "Assets" and select "JAVATEMPLATEINTSVC" from the asset catalog.
- Create a new project from the asset.
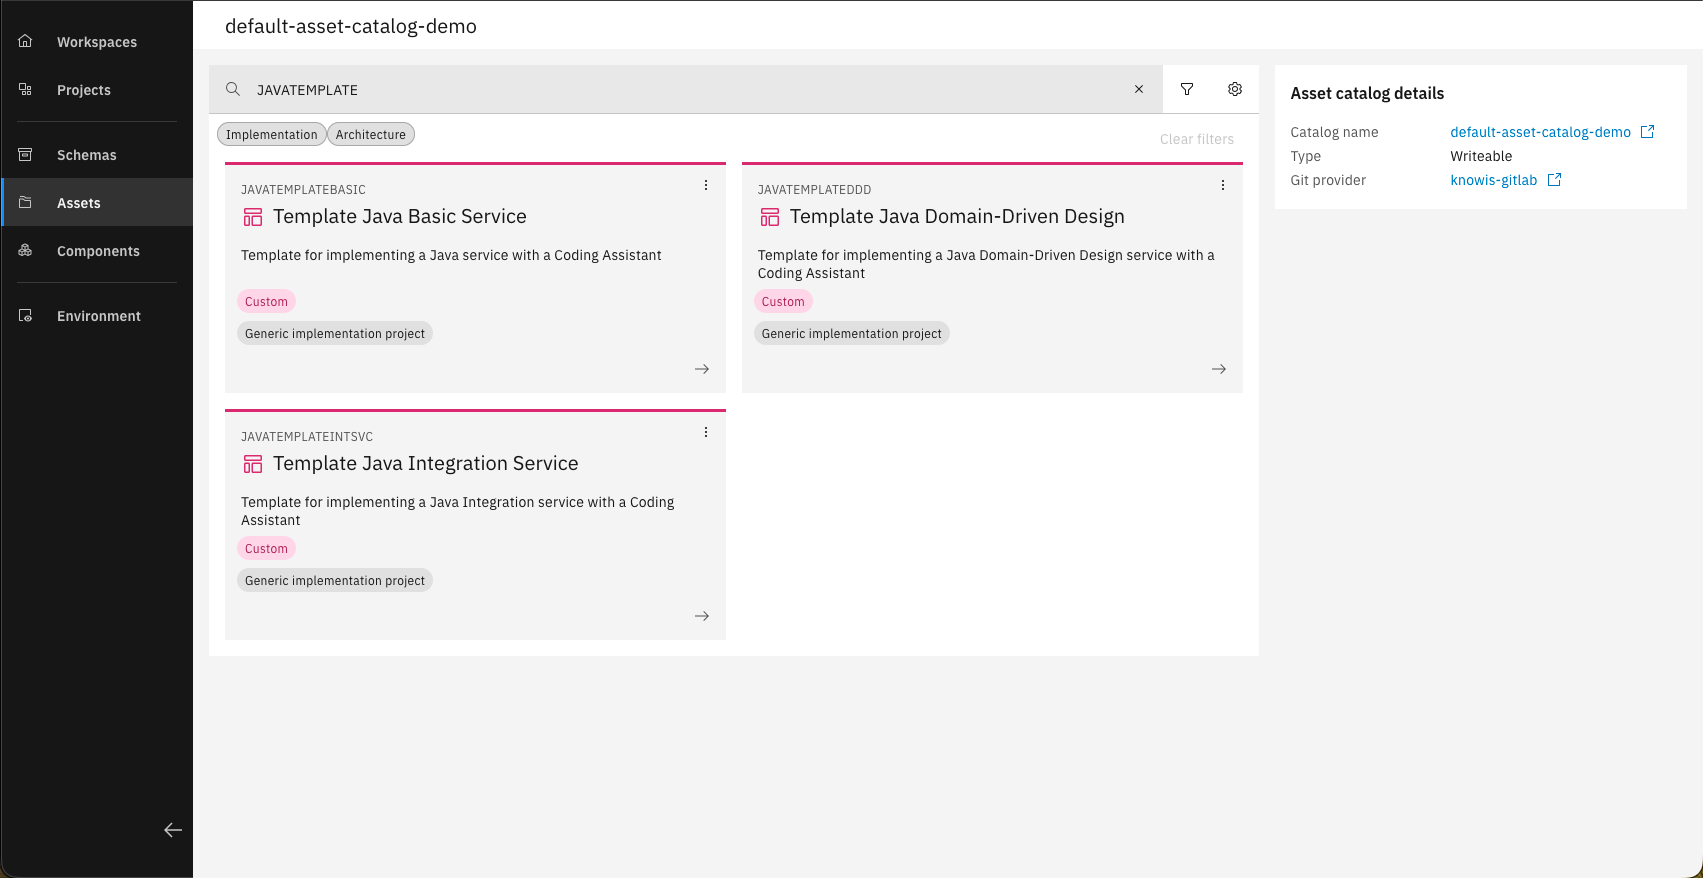
Navigate to "Assets" and search for the templates in the asset catalog.
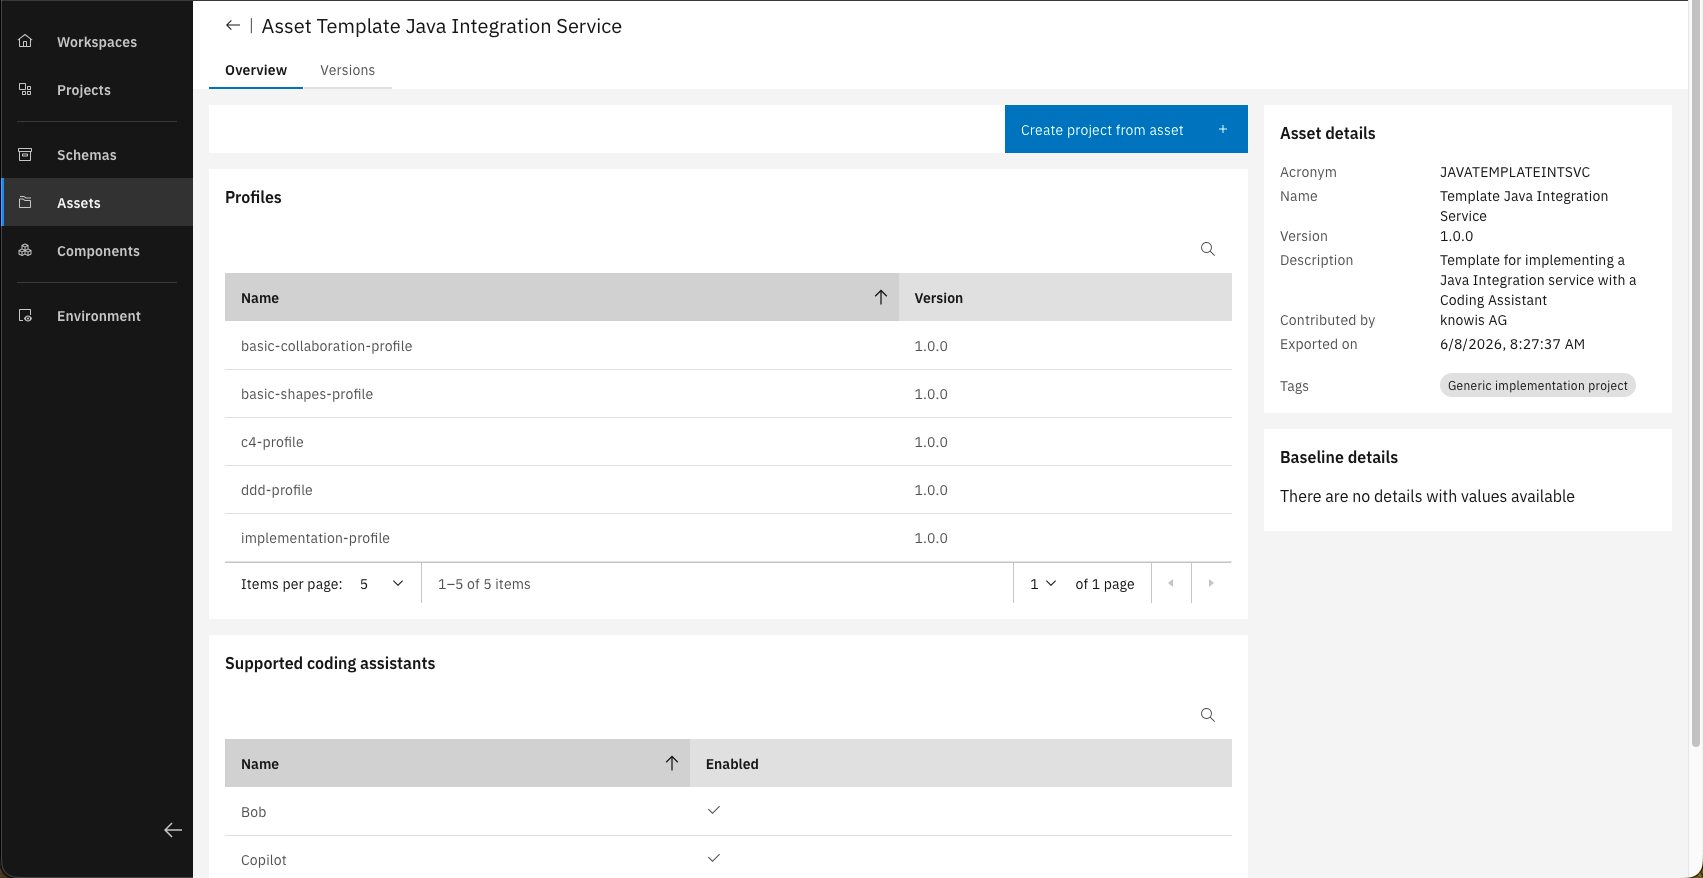
Select the "JAVATEMPLATEINTSVC" asset and click on "Create project from asset".
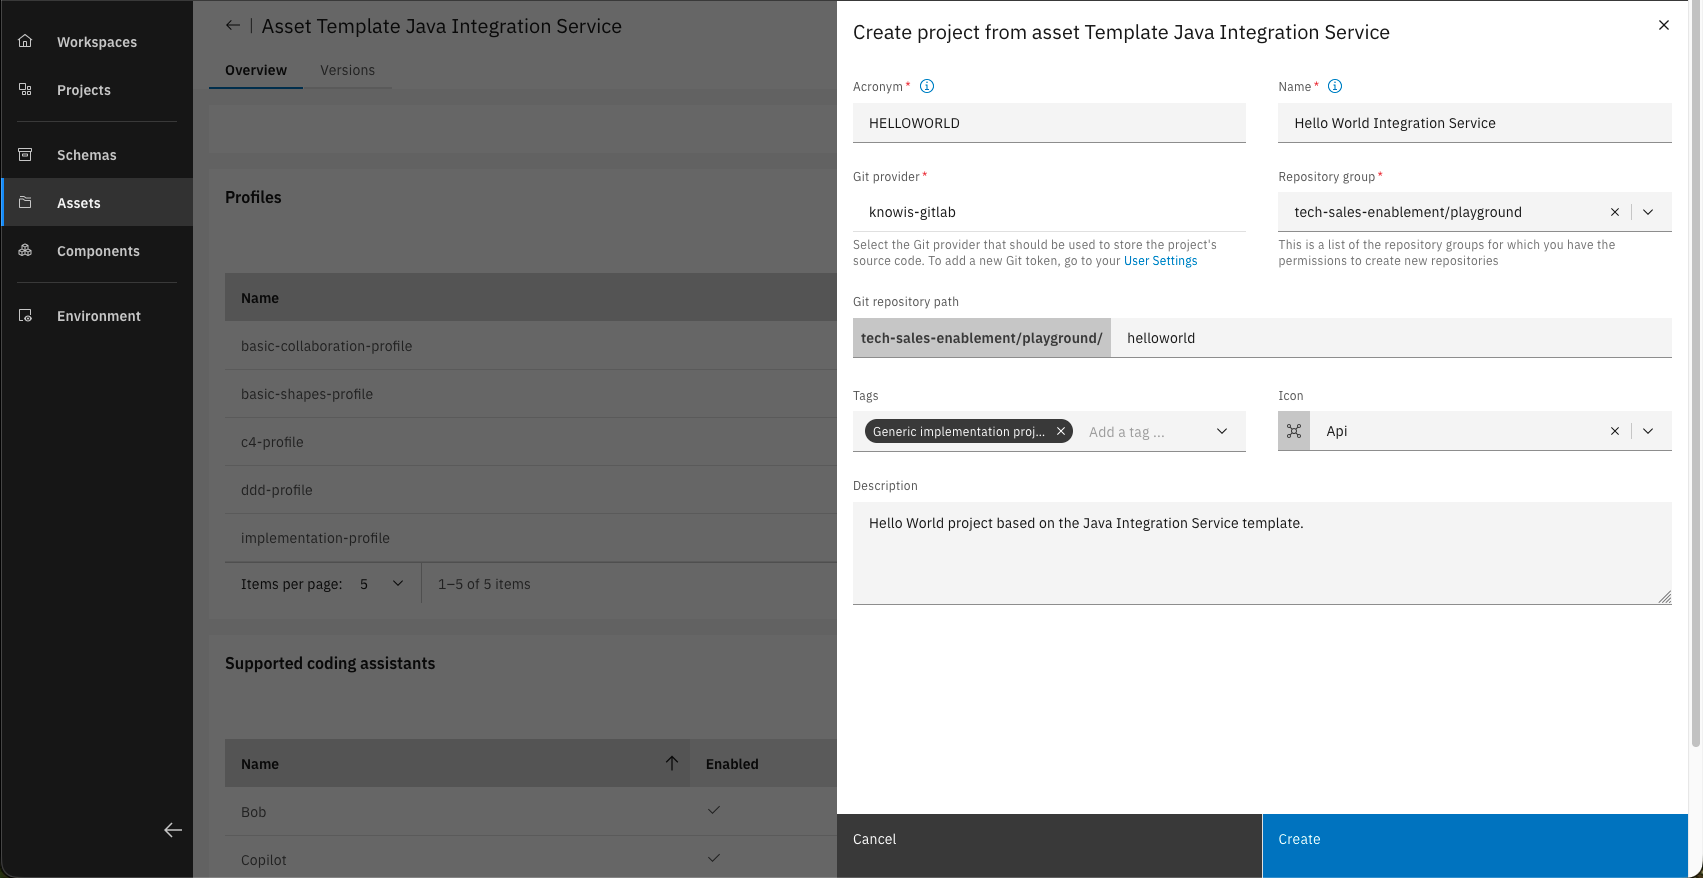
Fill in the project information.
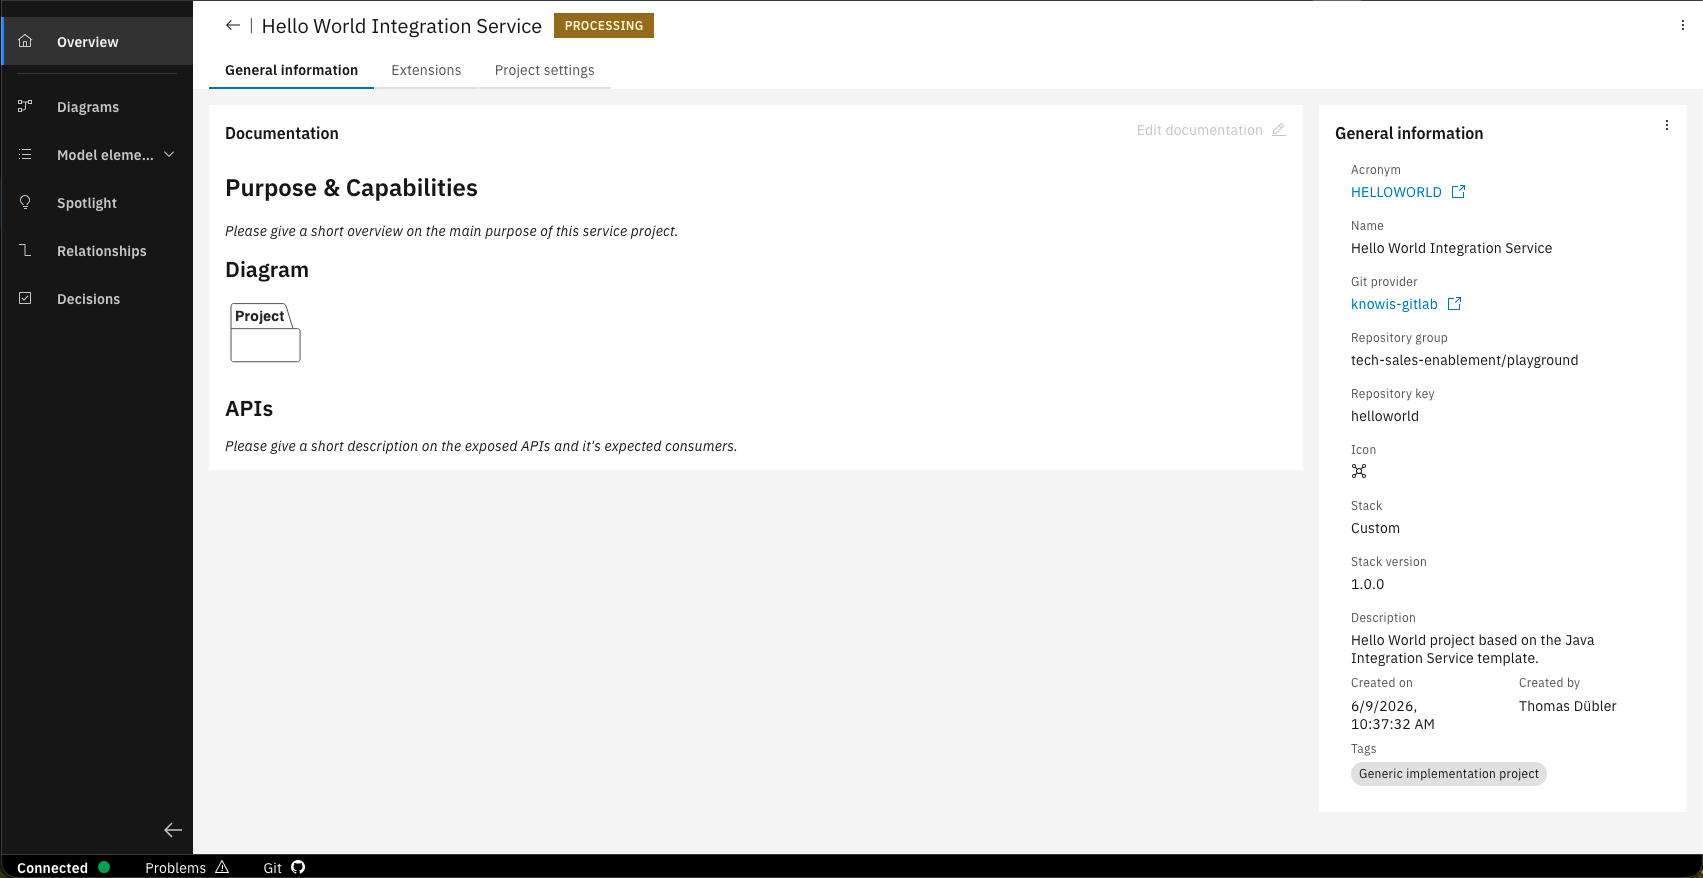
Your project is now created.
Step 2: Design your service
Create a "Hello World API" and one "SayHello" method, that returns a hello world message.
If the main branch of your project is protected, you need to first create a new branch before making changes.

Open the project that you created and navigate to the "Implementaion Design" section inside the "Model elements".
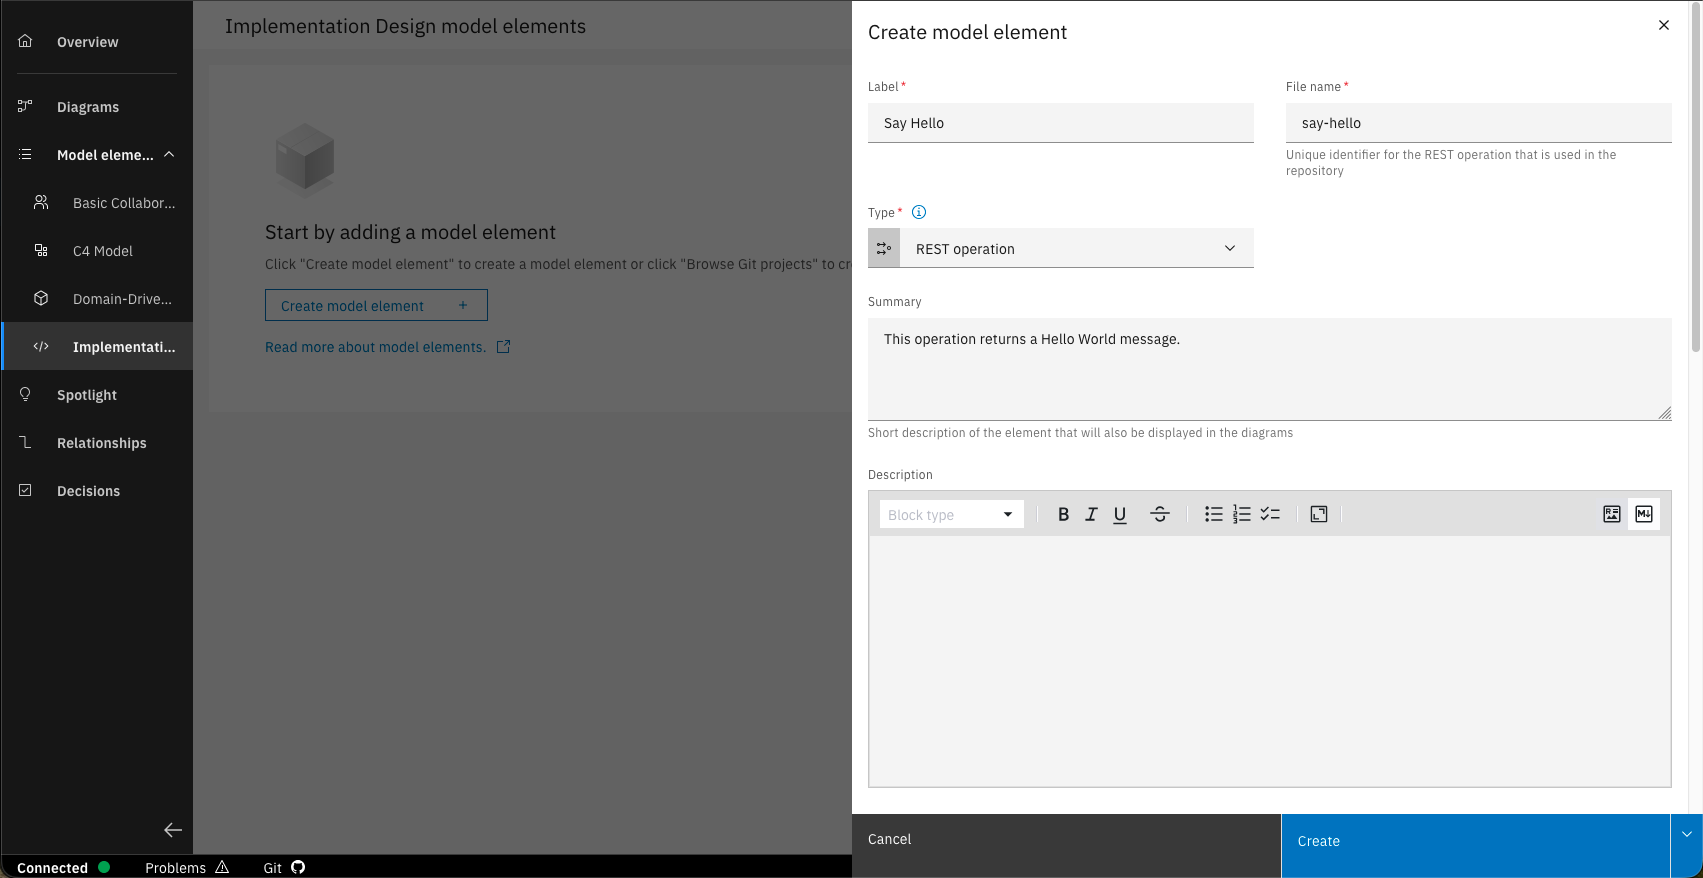
Create a new REST operation model element with the name "Say Hello" and the following information.
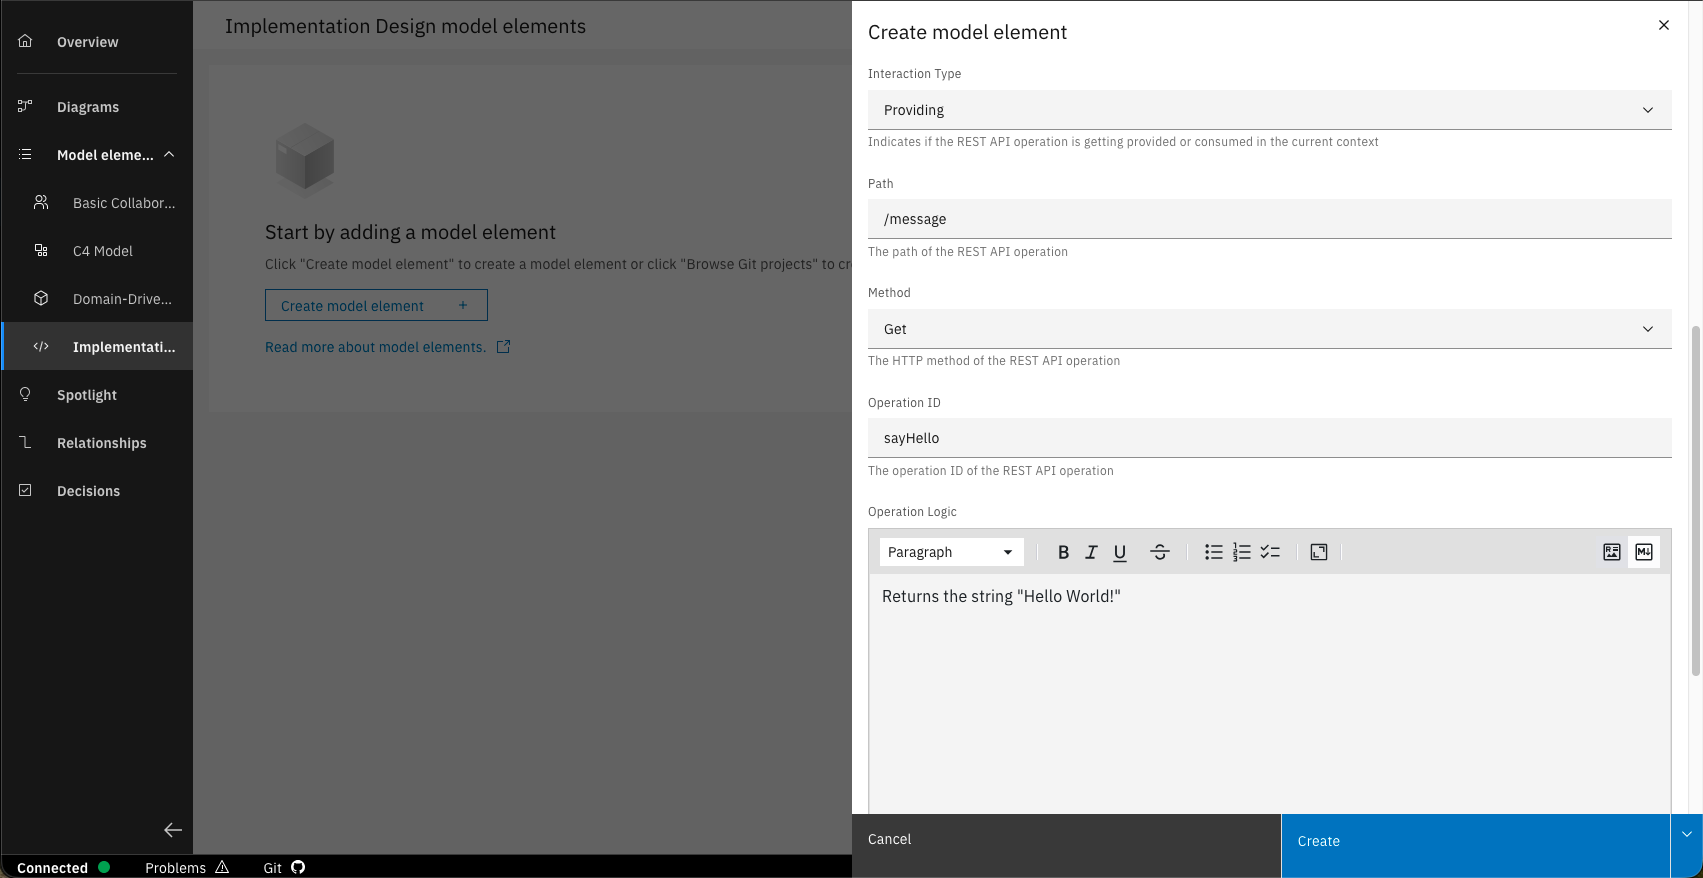
Fill in the following information to further describe the operation.
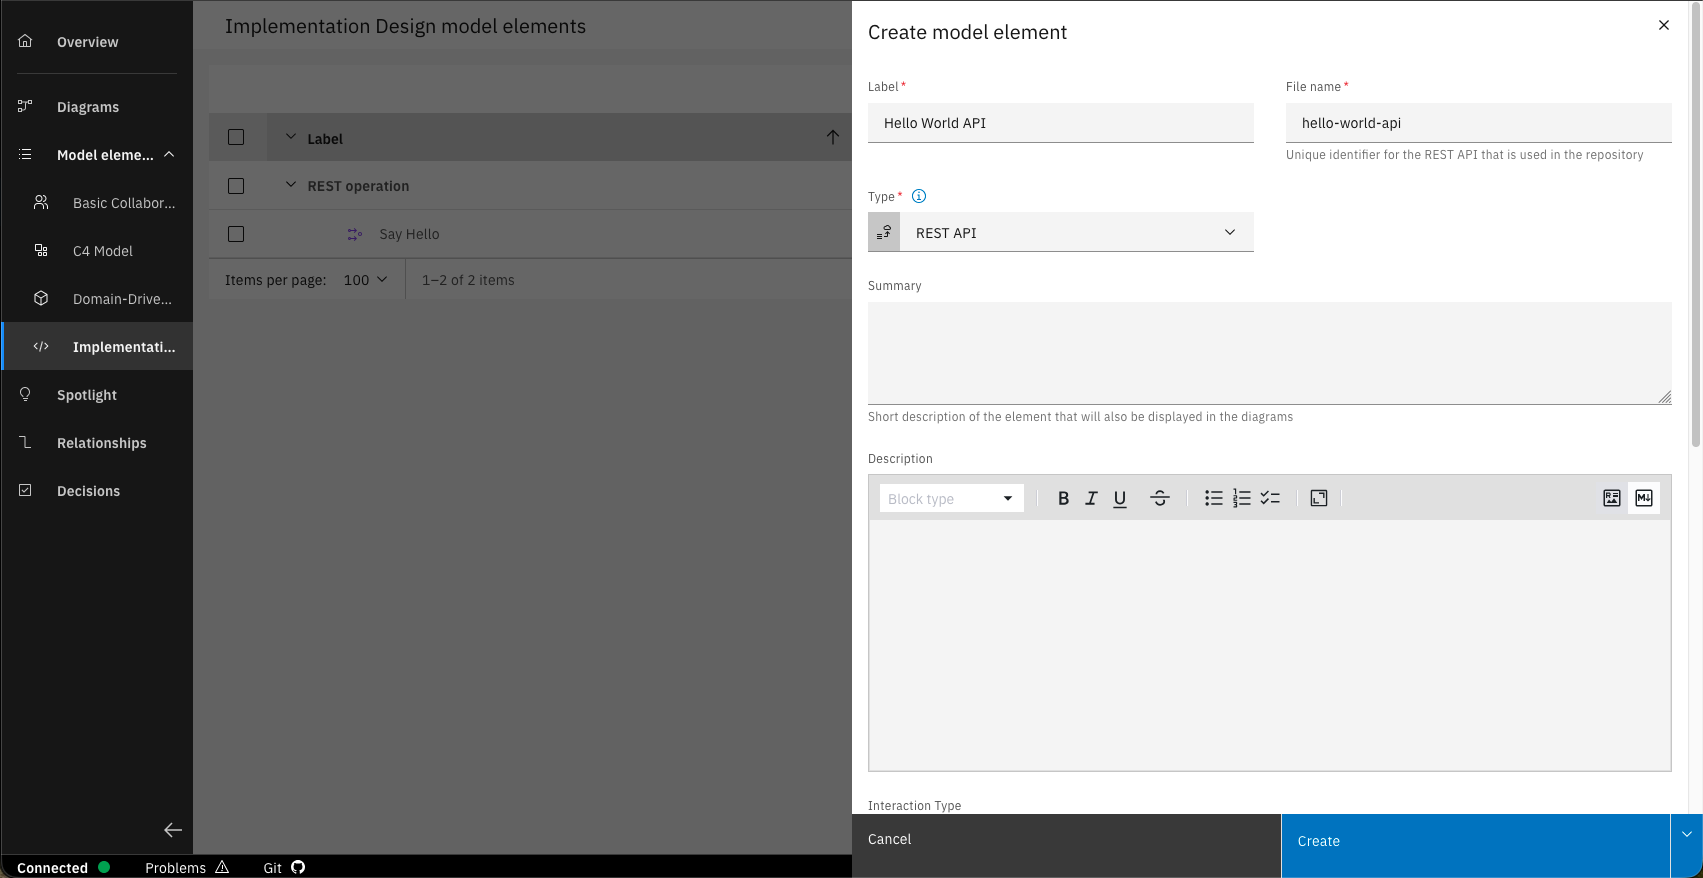
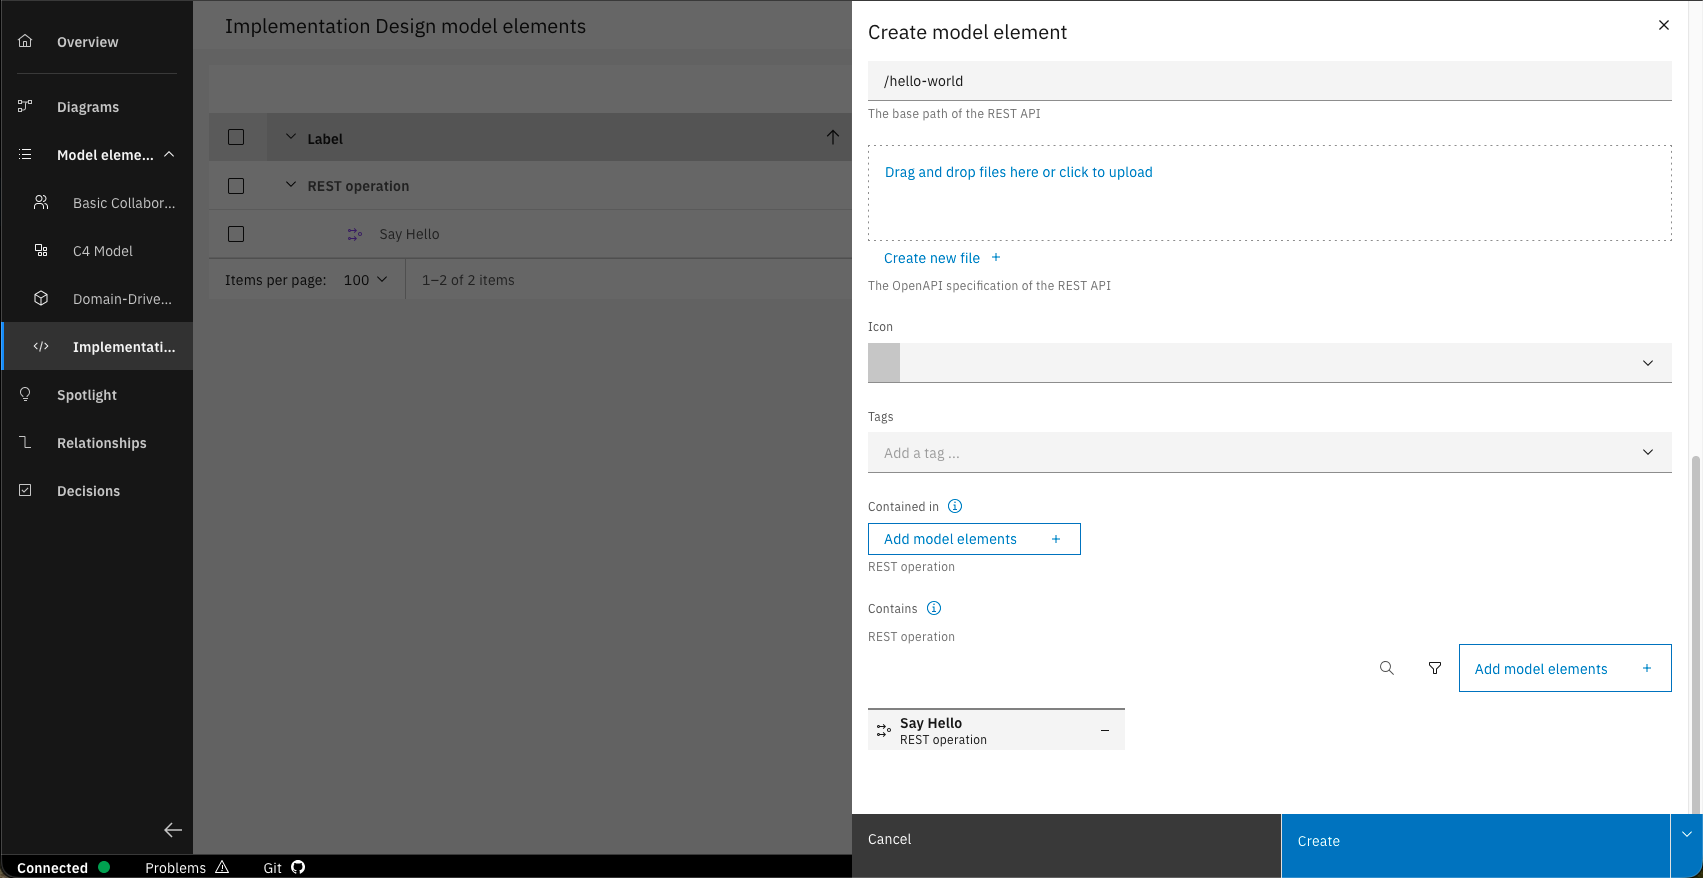
Create a new REST API model element with the name "Hello World API" and the following information.
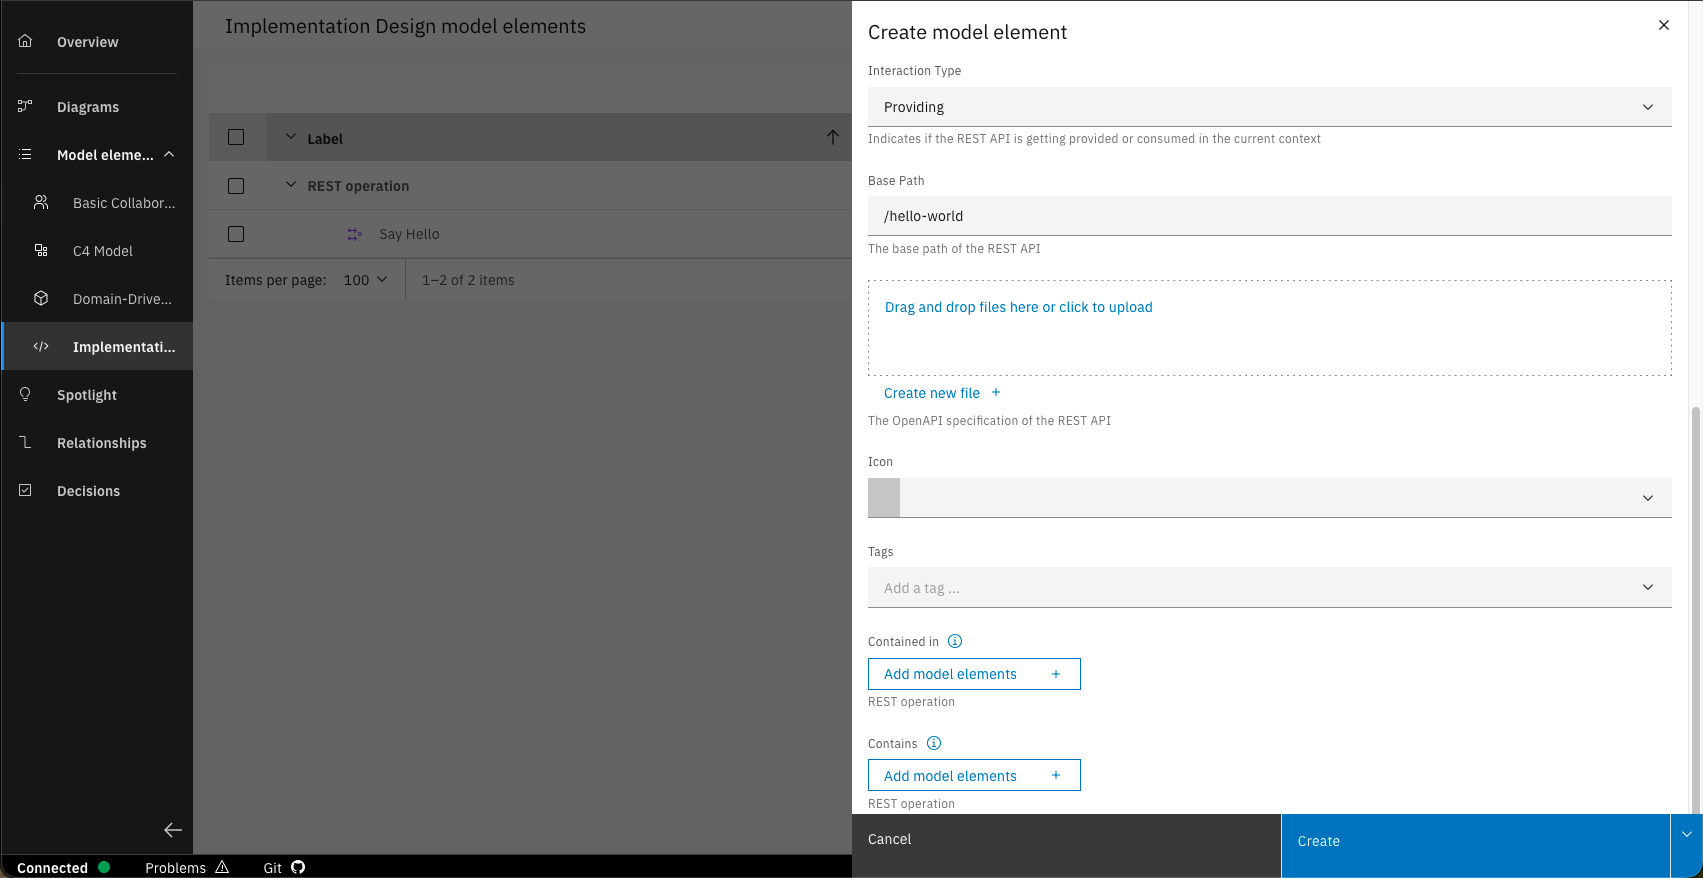
Add the interaction type and the base path and click on "Add model elements" under the "Contains" field to add the REST operation.
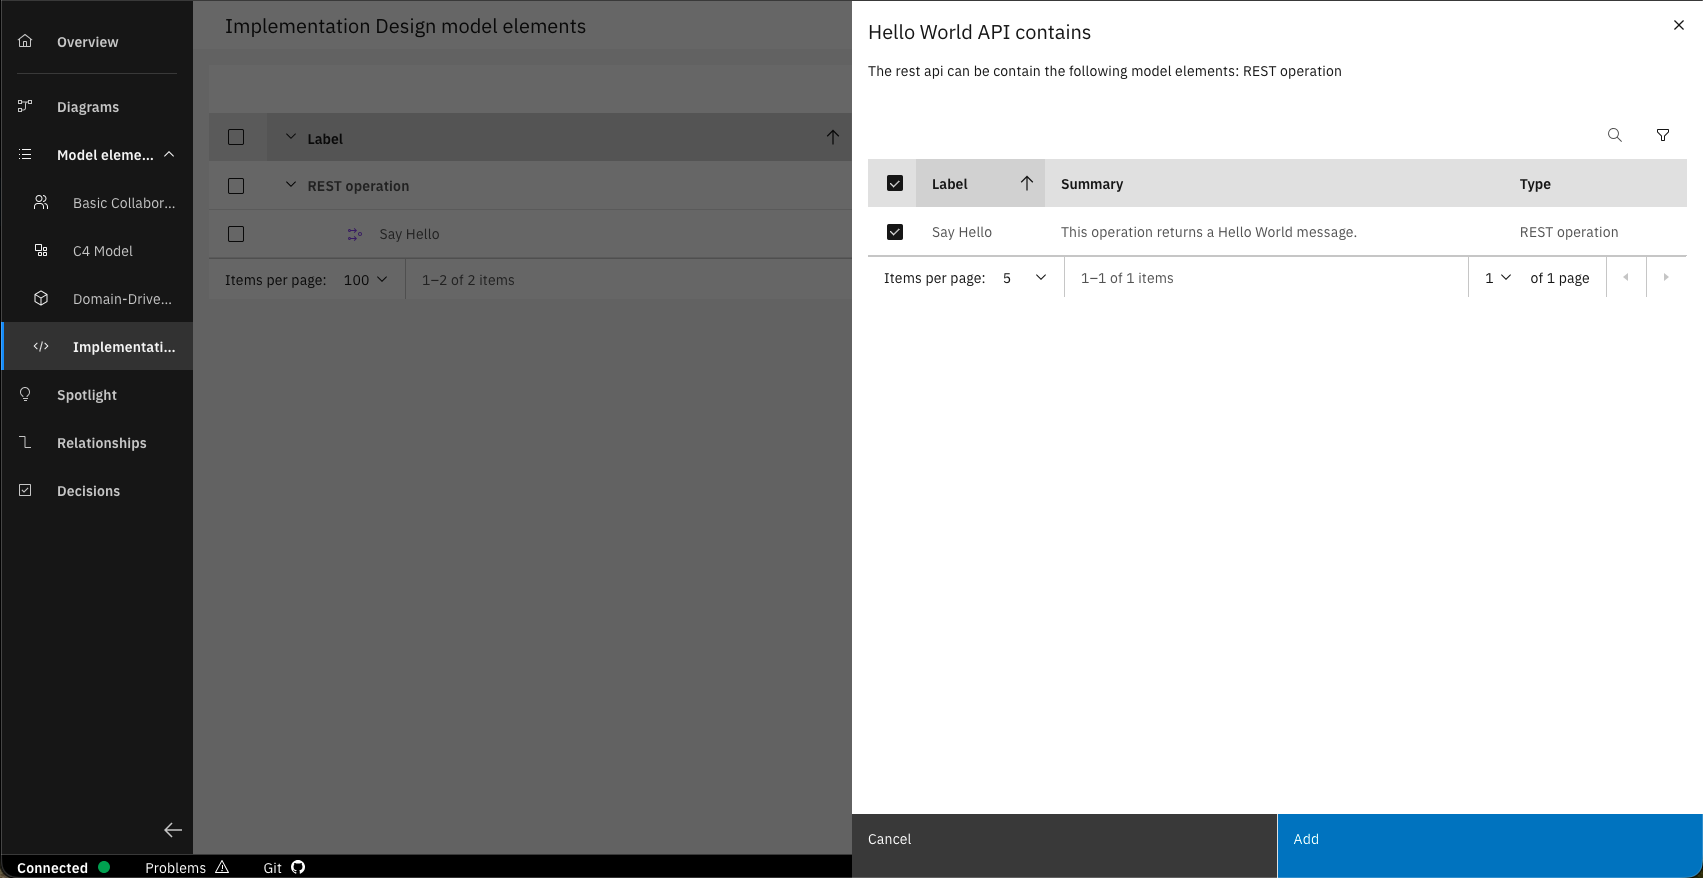
Add the newly created REST operation and click on "Create".
The REST operation is now added to the REST API.
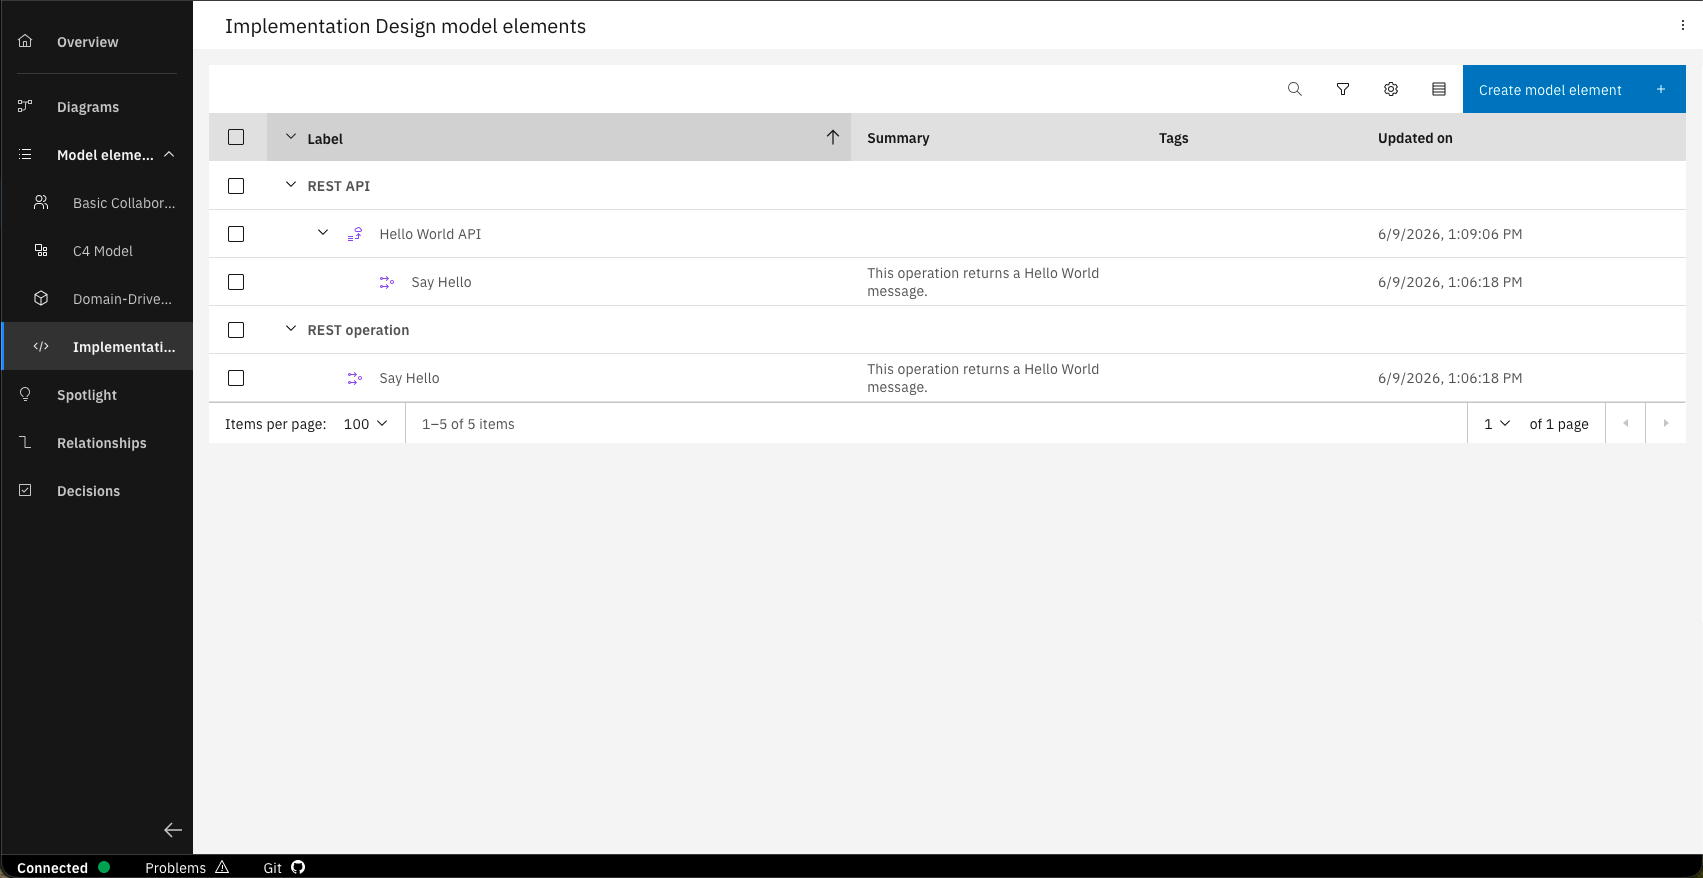
After clicking on "Create", you can now see that the operation is assigned to the API.
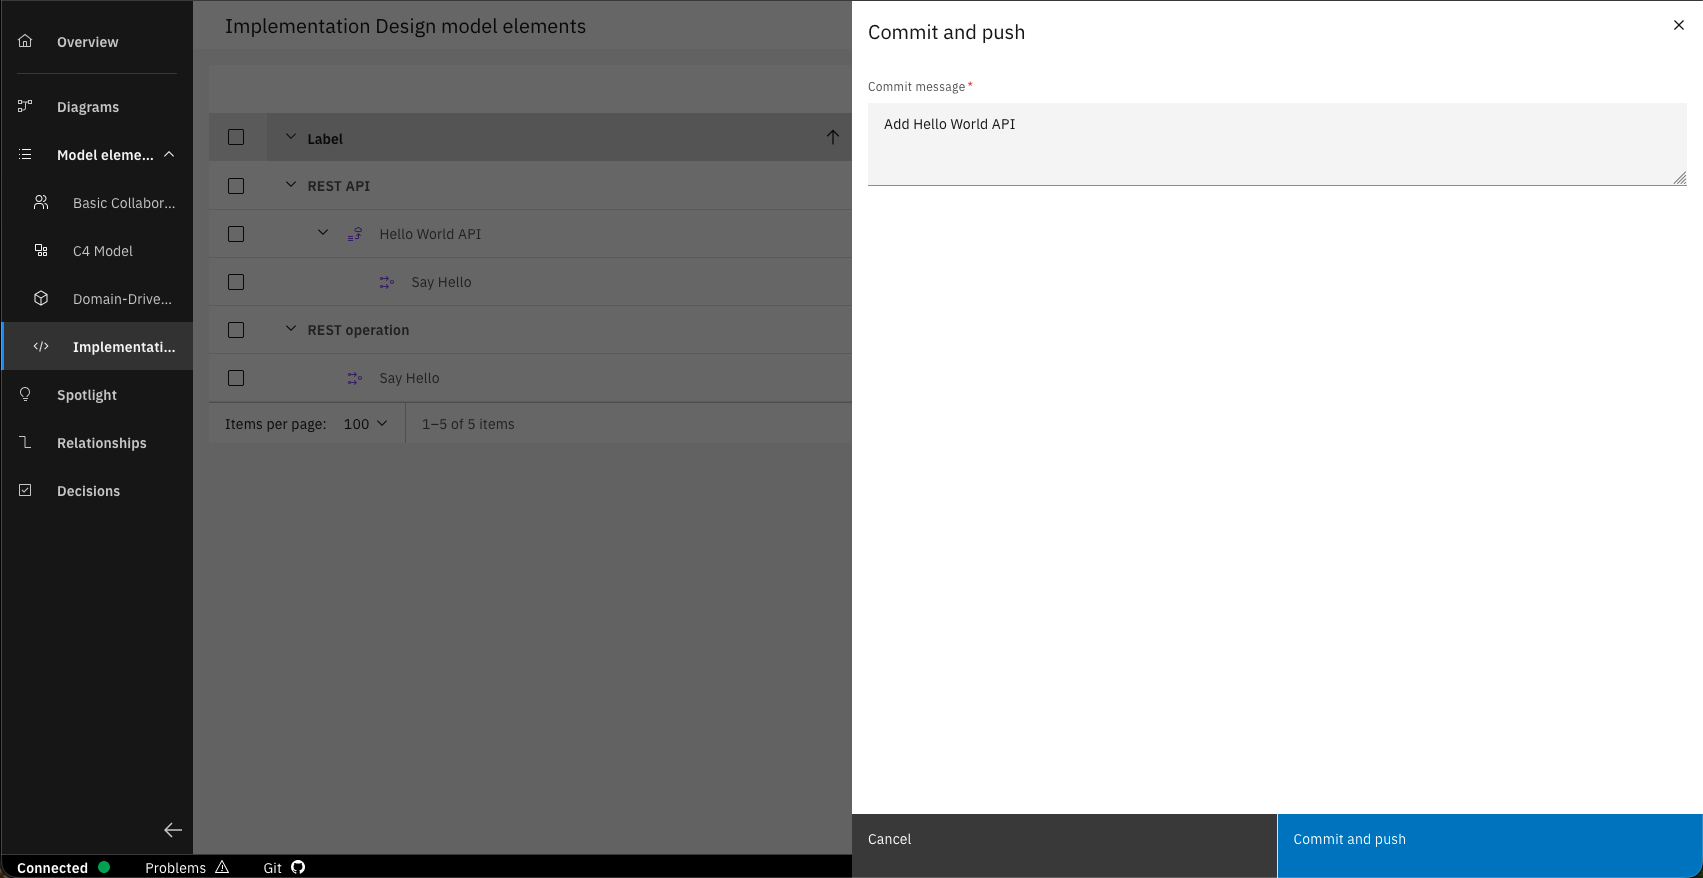
Commit and push the changes to GitLab.
Step 3: Generate code with AI
You can now make use of the integrated project baseline and use the skills provided to generate the code.
- Open the project in your IDE and have your coding assistant (GitHub Copilot, Cursor, etc.) ready.
- Trigger the code generation by executing the following prompt:
k5-generate-rest-api
As we have only designed a REST API, we are not using the k5-generate prompt. This prompt would include generating the REST API as well as eventing, but because we didn't design events we will just use the k5-generate-rest-api prompt.
- The assistant will automatically:
- Read your design files from
/src-design - Generate the REST API based on the design
- Set up Swagger UI
- Update application configuration files
- Validate the build with Maven
- Read your design files from
Optional: Generate additional components separately:
k5-generate-unit-tests  # Generate comprehensive test suite
k5-generate-readme      # Generate detailed documentation
Always review the AI-generated code carefully before proceeding. The generated code may contain errors or require adjustments. Make sure to test and validate the implementation before deploying.
Step 4: Check CI/CD variables
All deployment variables are pre-configured in your GitLab group. To view them, navigate to Settings -> CI/CD -> Variables in your GitLab group.
Step 5: Commit and push your changes
- Review the generated code and make any necessary adjustments
- Commit your changes:
git add .
git commit -m "Implement Hello World API"
git push - Create a merge request for review
Step 6: Deploy to OpenShift
After pushing your changes, the GitLab CI/CD pipeline will automatically start:
- build.app stage: Compiles the application using Maven
- build.helm stage: Packages Helm charts
- build.and.push.containerimage stage: Creates and pushes Docker image
- deploy.helm stage (manual trigger): Deploys to OpenShift
Once the pipeline succeeds, deploy your service:
- Navigate to your pipeline in GitLab
- Locate the
deploy.helmstage - Click the Play button to trigger manual deployment
- Monitor the deployment logs for any issues
- Verify deployment in OpenShift, by checking the pods in your deployment namespace
Step 8: Test the API
If the deployment is completed, you can test the api by using the Swagger UI of the service:
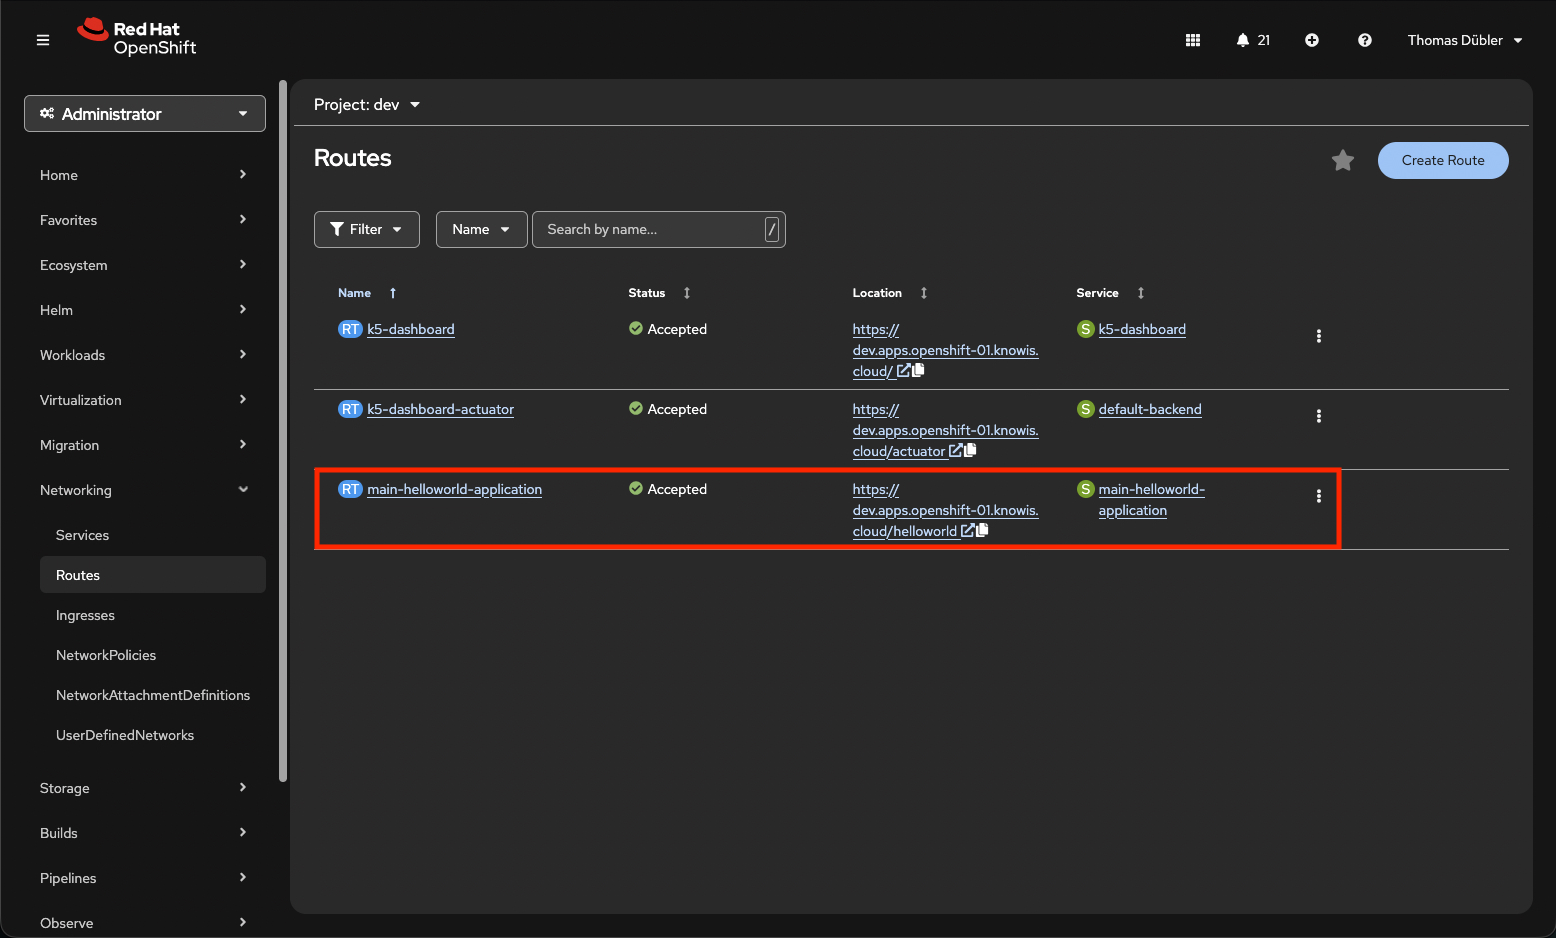
Find out the base route to your service by navigating to Networking -> Routes in OpenShift.
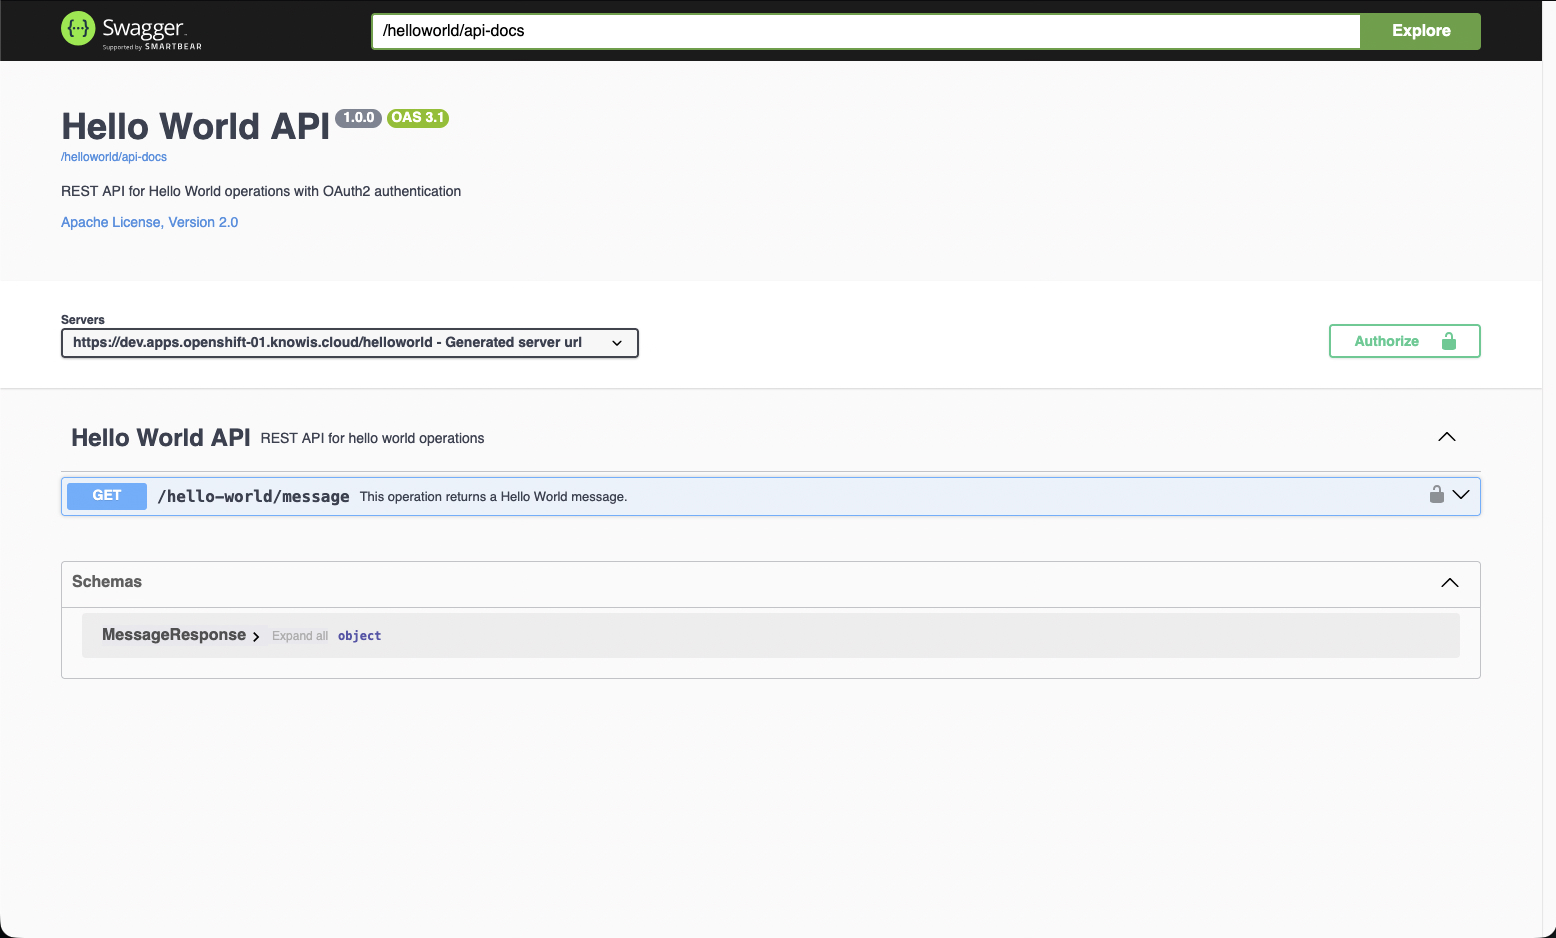
Open the Swagger UI of your service. The standard path of the Swagger UI is "/swagger-ui/index.html".
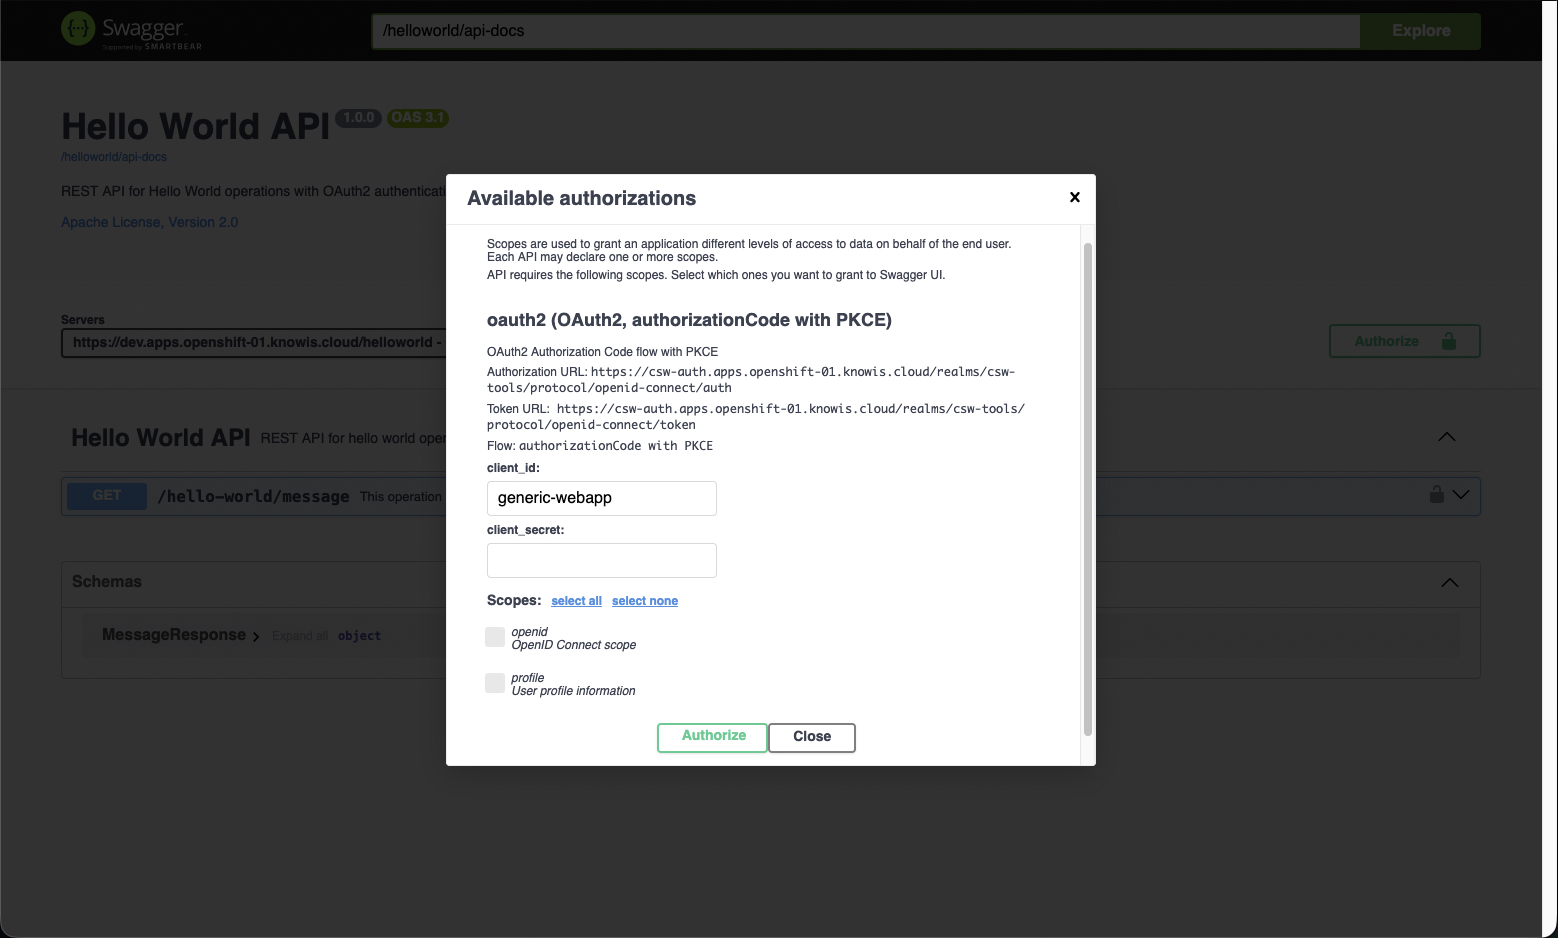
Click the "Authorize" button to authorize against Keycloak. This authorization is required to execute API requests.
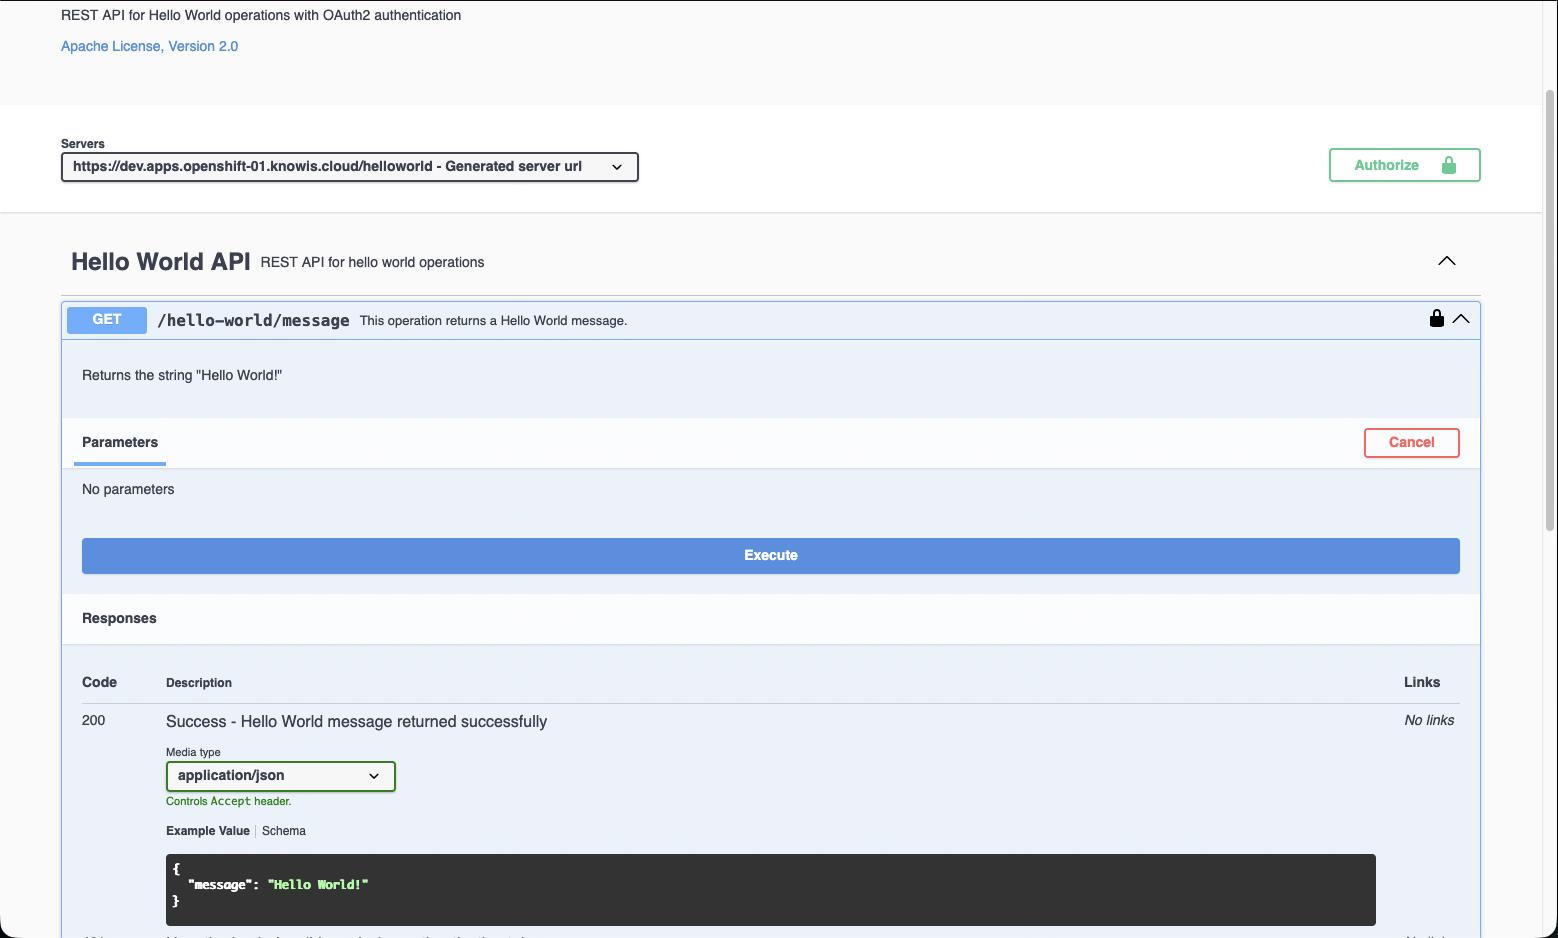
Open the operation of the Hello World API and click on "Execute" to execute the API request.
You have successfully implemented and deployed a service to OpenShift using an asset provided by the IBM DevOps Solution Workbench.