Unit 9: Design Service Integration
In this course you will learn about integrating other microservices within an integration namespace. You will also practise how to design the integration using the Solution Designer.
Outline
In a microservice architecture, the integration of other services via REST API is very common. Therefore, the Integration Namespace helps you keep track of these dependencies. You are able to add a Rest API as a so-called API dependency, which enables you to call operations of the referenced API from various places of your service project. Furthermore, you are able to encapsulate the operations in so-called integration services to generally modify their behavior inside your service project. An integration service can be seen as the counterpart to the domain service within the Domain Namespace.
Prerequisites
You have successfully completed the Preparation section in the Course Introduction.
- Open your workspace in the Solution Designer.
- Find your imported project and open it by clicking on it.
If you rather want to use this course as a starting point of your training, you can use a different asset where courses for designing the domain and API namespace are already completed.
In this case - depending on the chosen implementation language - use either asset "Order_Java_Design_0.3" or "Order_TypeScript_Design_0.3" to create a new project and to continue your training.
You can look up how to create a new project from the Order assets in the Preparation section in the Course Introduction.
While this course demonstrates a REST-based integration, a similar approach can also be applied to other protocols such as SOAP, where you would model the service integration here and integrate the SOAP service in your IDE.
Exercise
Estimated time: 15 minutes
Supported languages: TypeScript and Java
In this exercise you will add an API dependency to an Integration Namespace to integrate with an eMail service, which is used to send order confirmations.
Step 1: Open Integration Namespace
You will use the pre-prepared Integration Namespace to learn how to integrate other services. See the steps below.

In the sidebar select "Integrations" and click on the "email" namespace
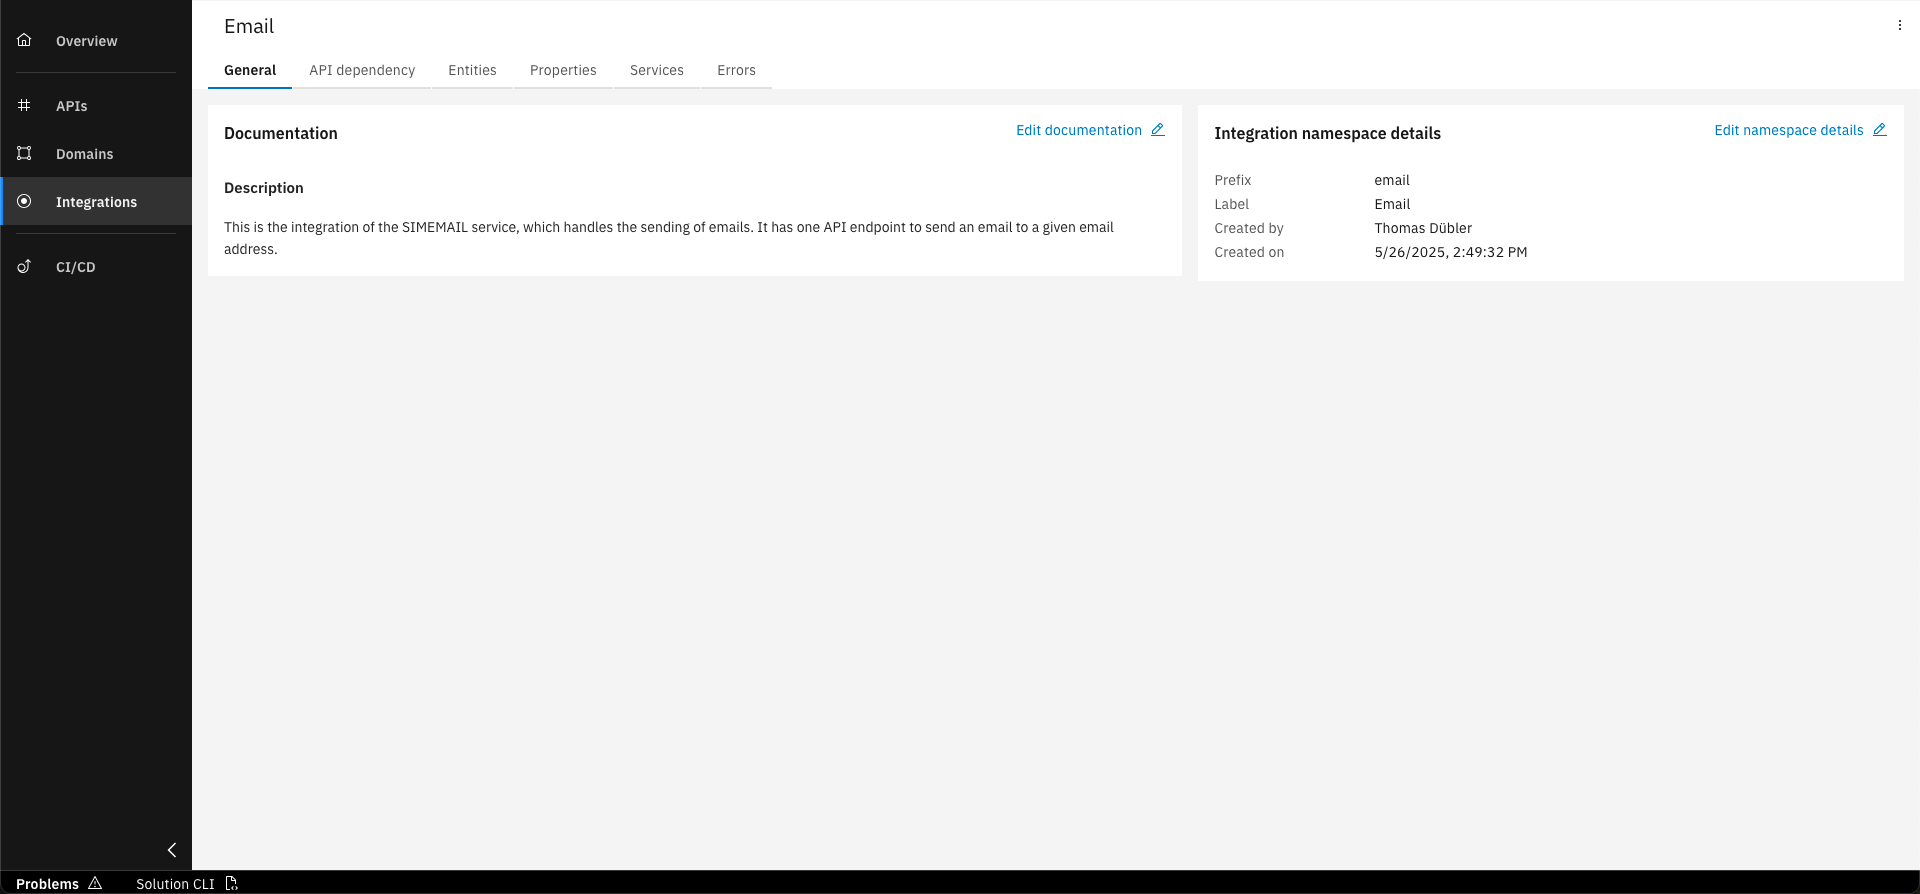
See the created Integration Namespace
Step 2: Create API dependency
To use the Email API and benefit from tool support during implementation, you will create an API Dependency within the Integration Namespace.
There are two ways to add an API dependency. You can either upload the API specification or choose an existing Workbench Project to integrate with. Using API Dependencies is not required to integrate with other services, but it makes the process easier.
For more details see Product Documentation: API Dependencies.
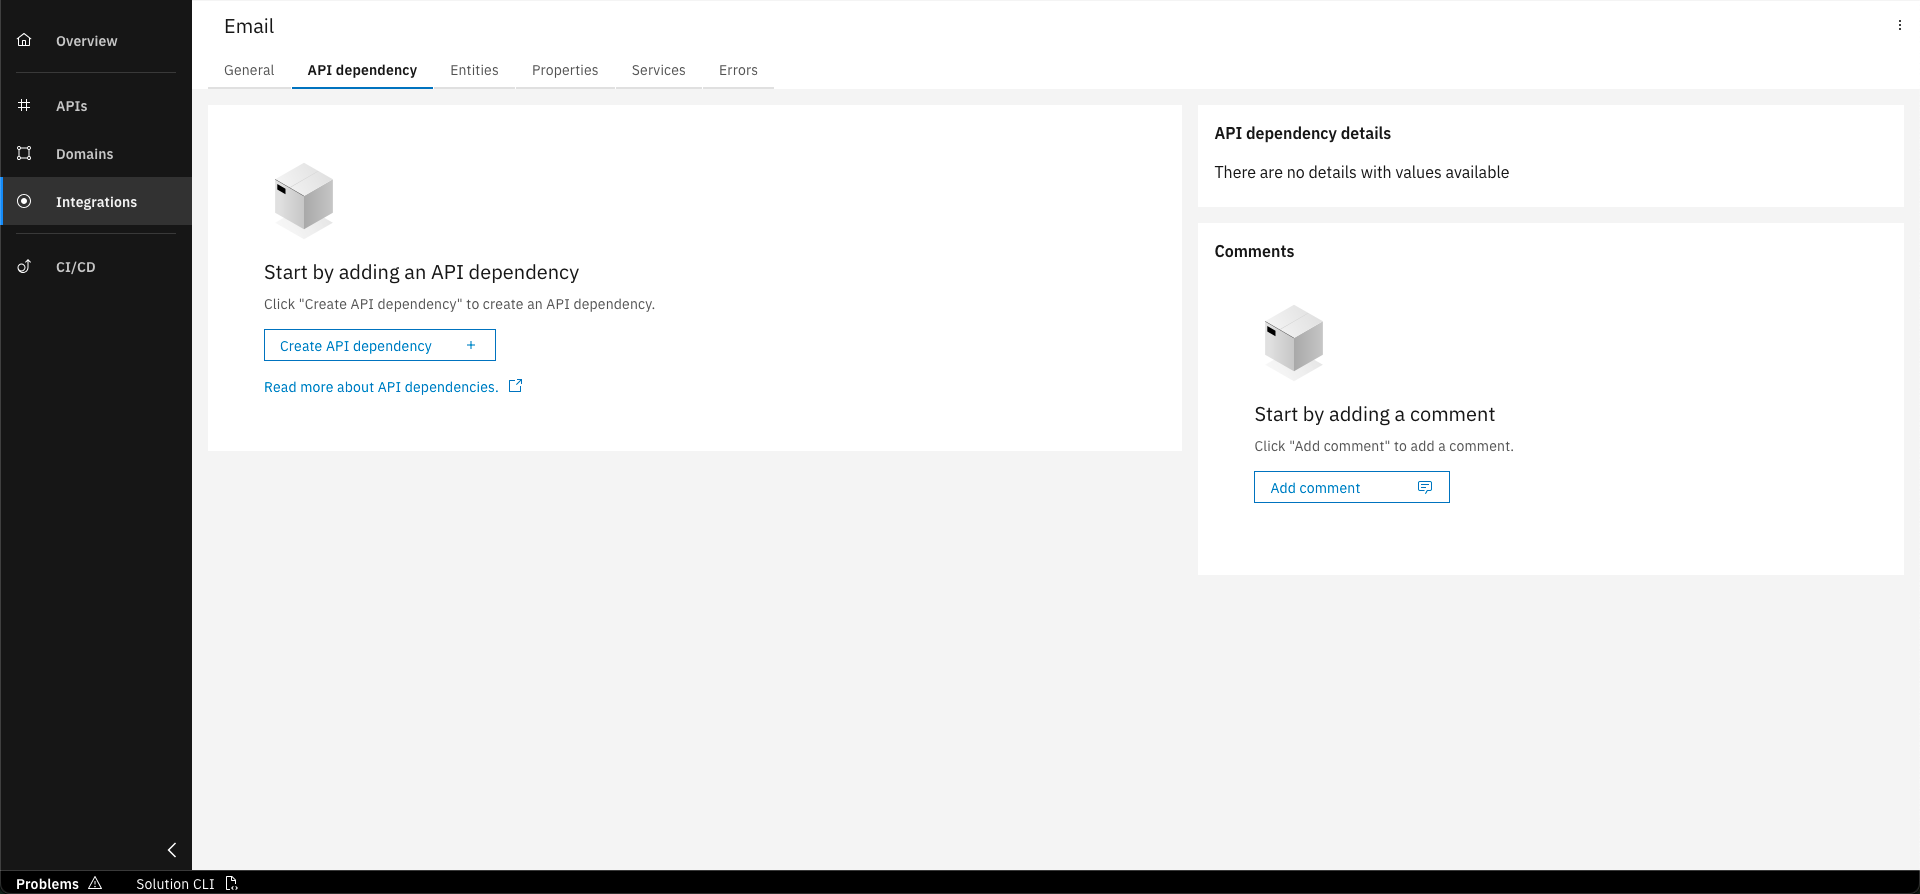
Select the "API dependency" tab and click on "Create API dependency"
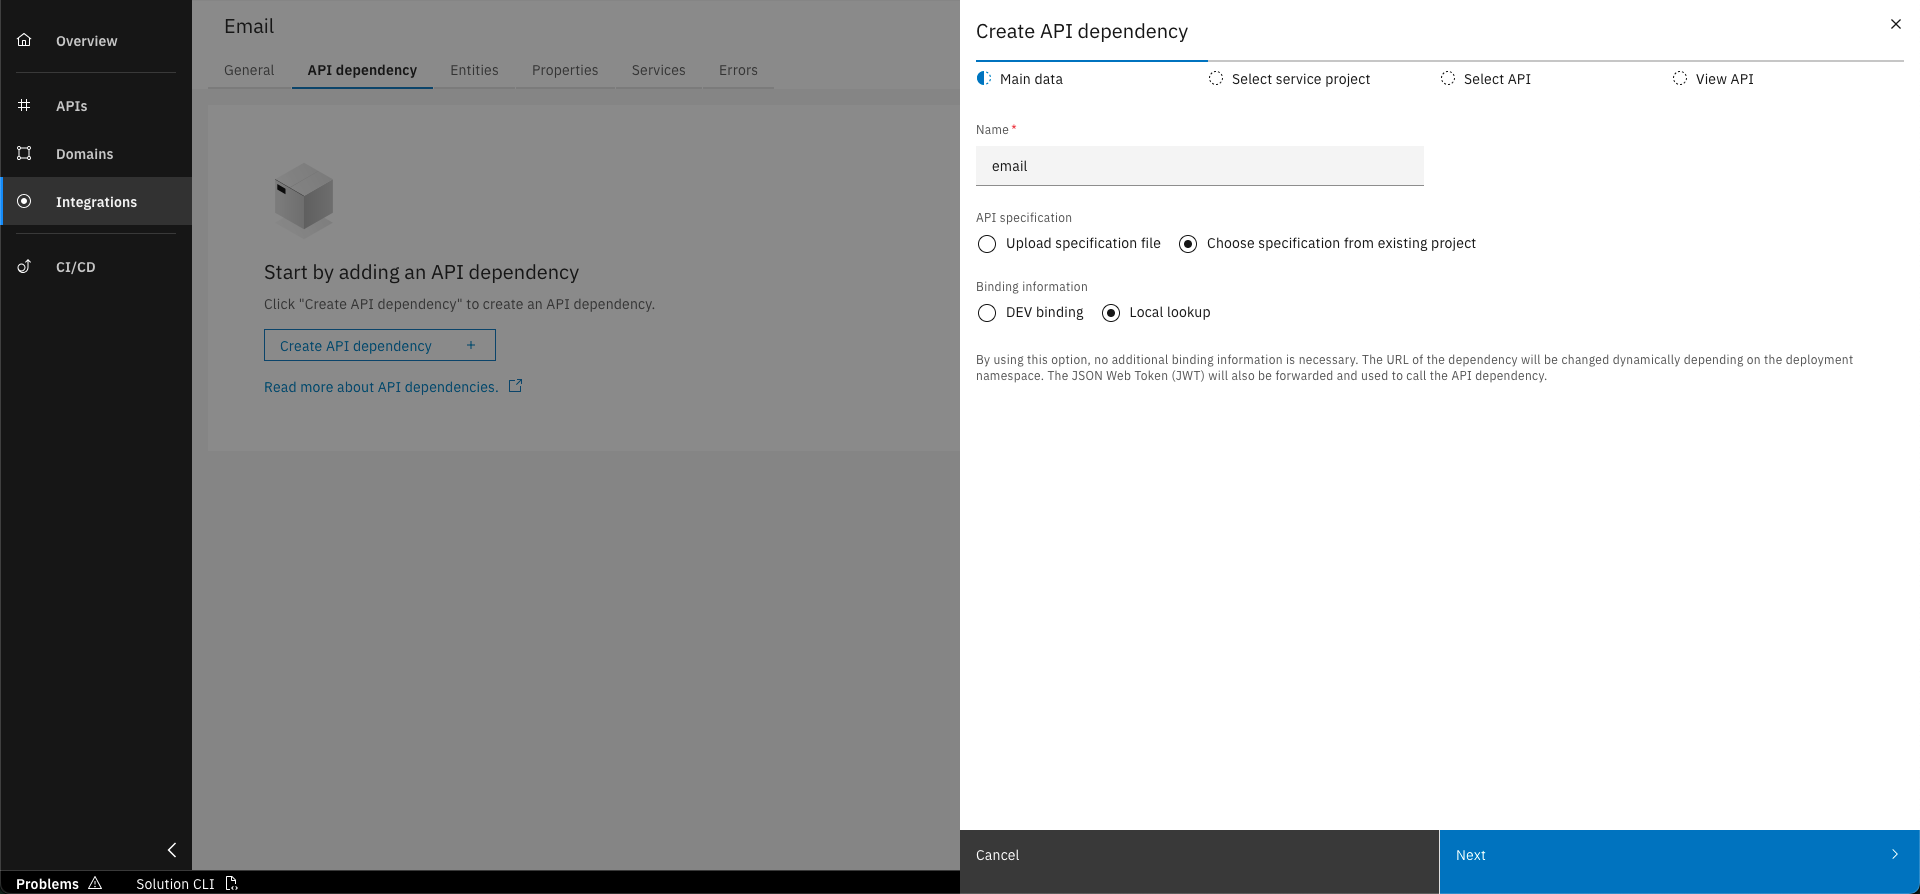
Enter the required details for the API dependency and click "Next"
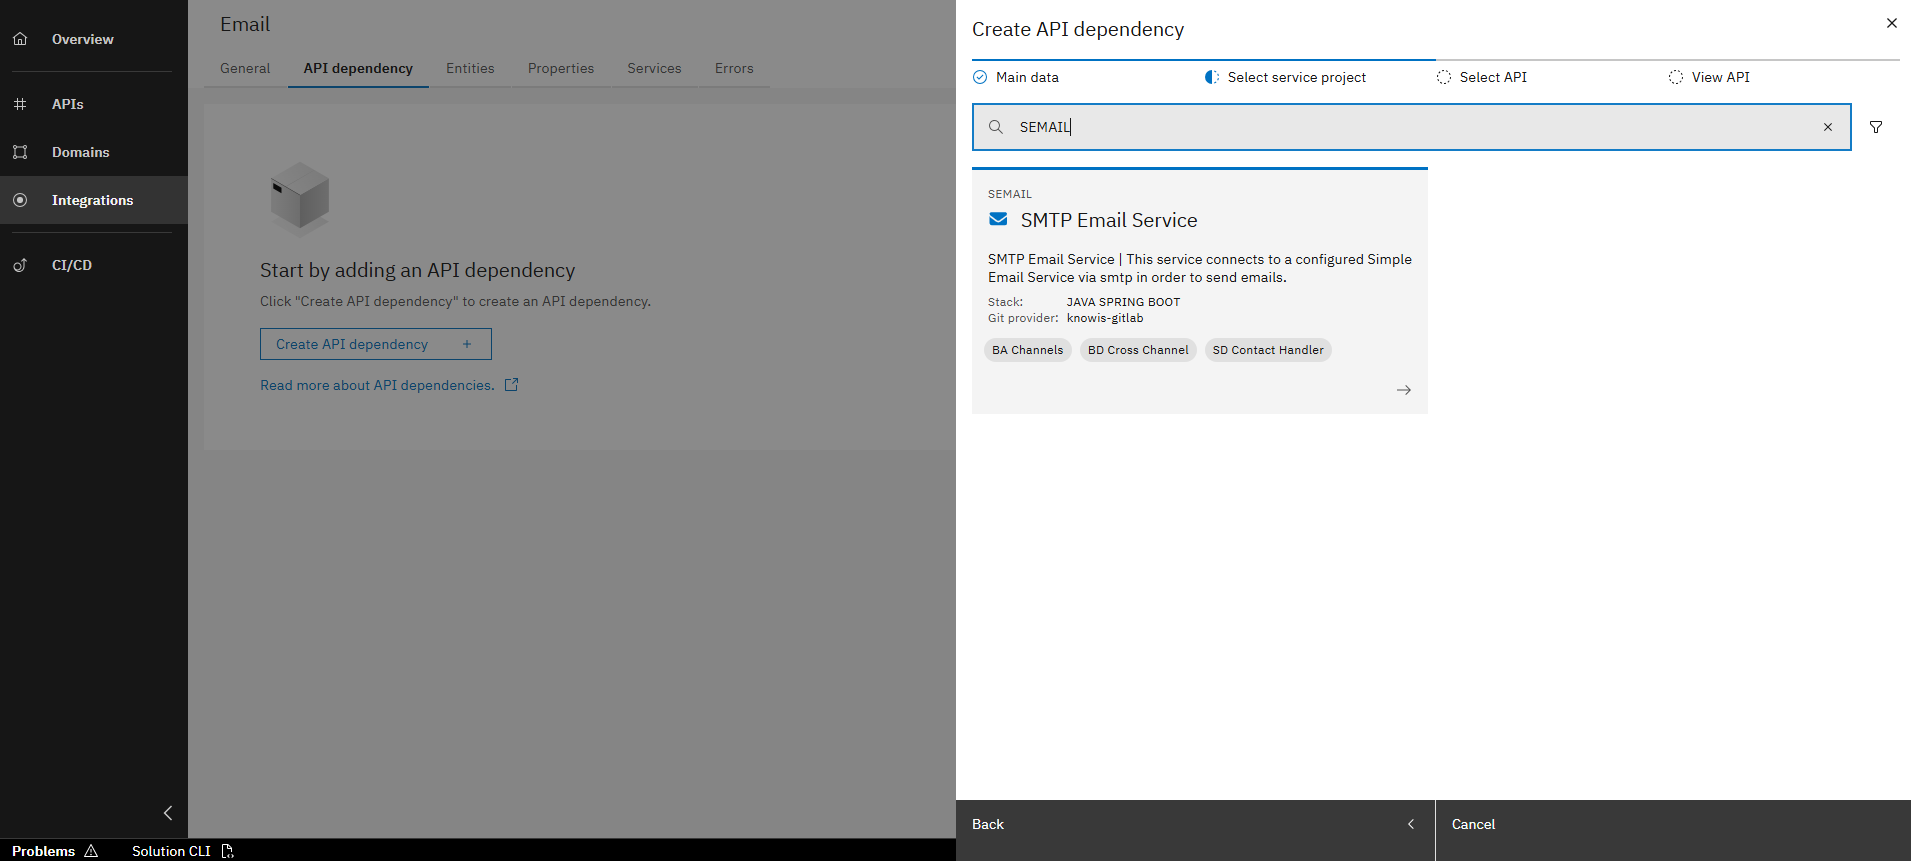
Select service project "SEMAIL"
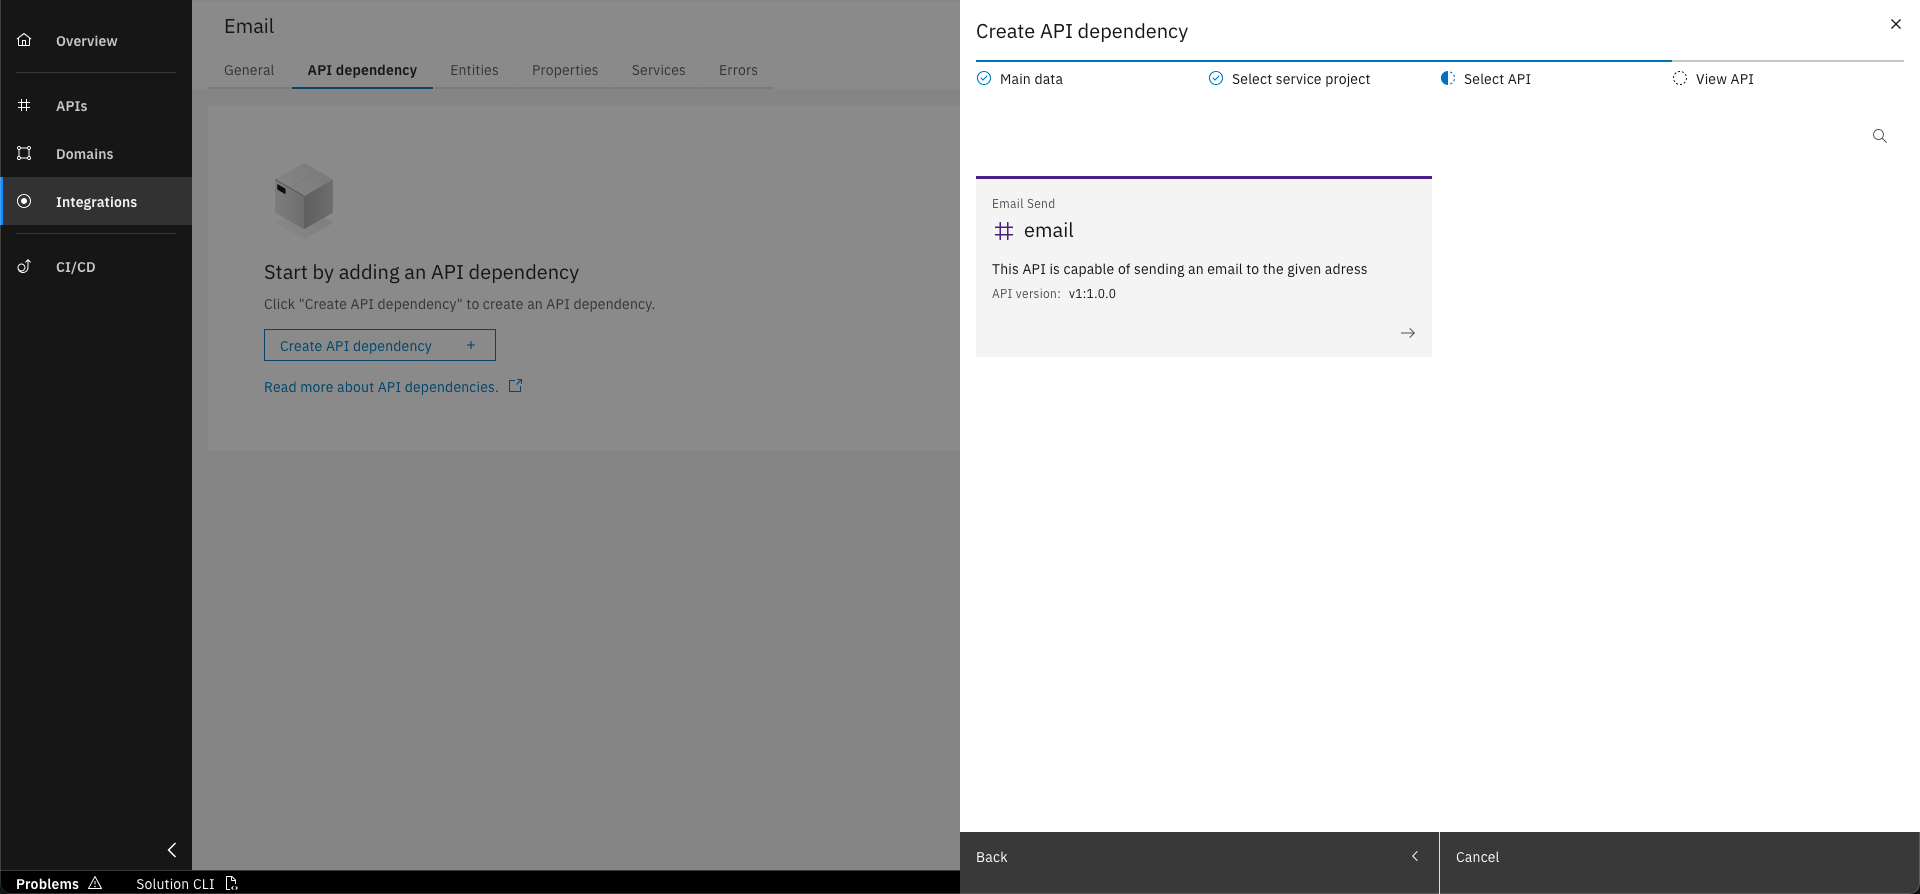
Select the email API
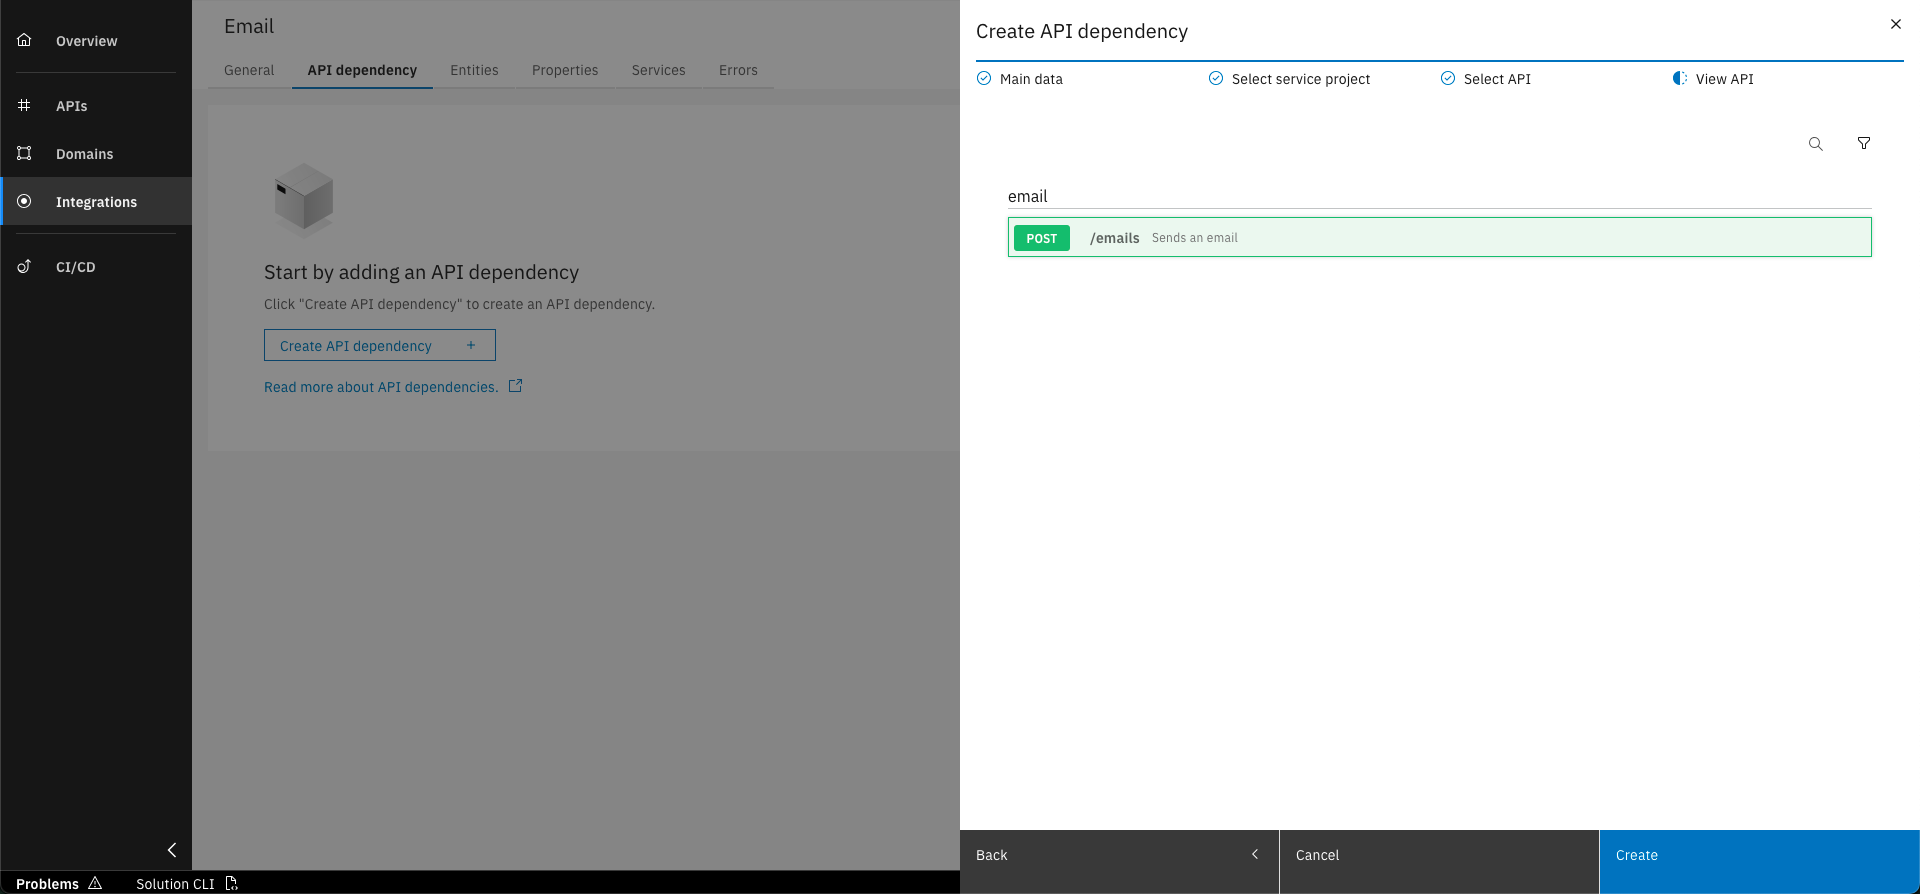
View API and click on "Create"
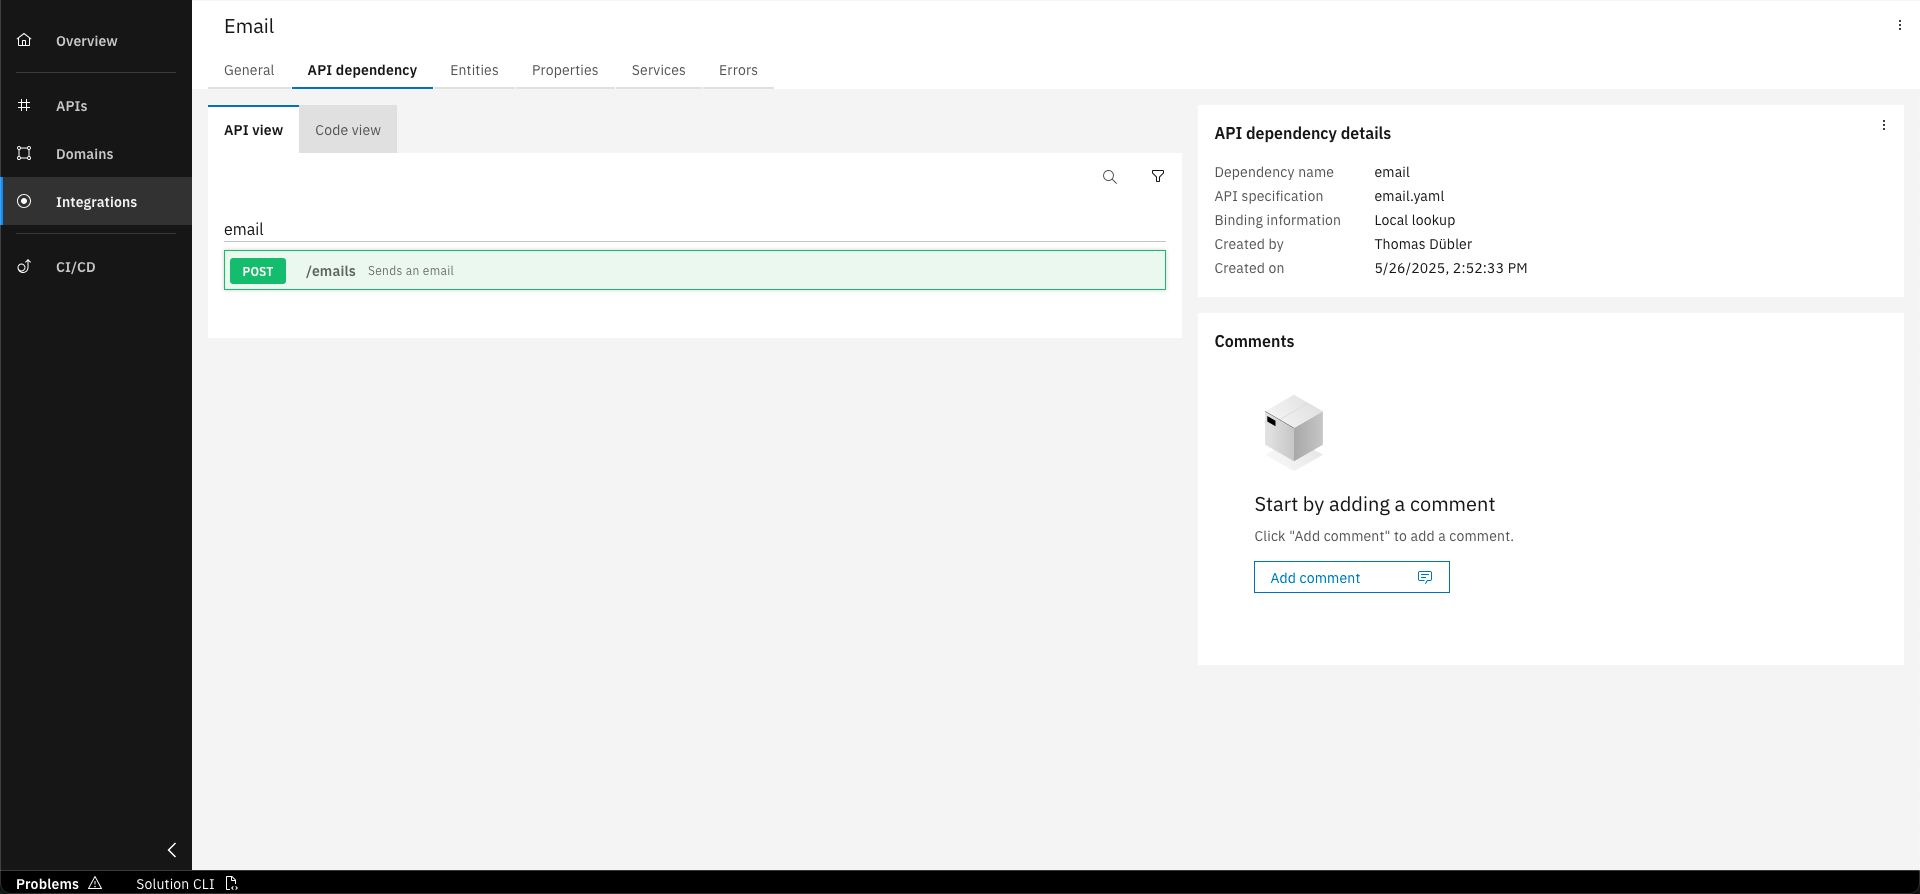
Discover the API view
Basic data to create API Dependency
Please provide the details below for creating the API dependency.
- Name: email
- Binding information: Local lookup
In addition to the API view, you can also use the code view of the API specification, providing you with full visibility into all specified details.
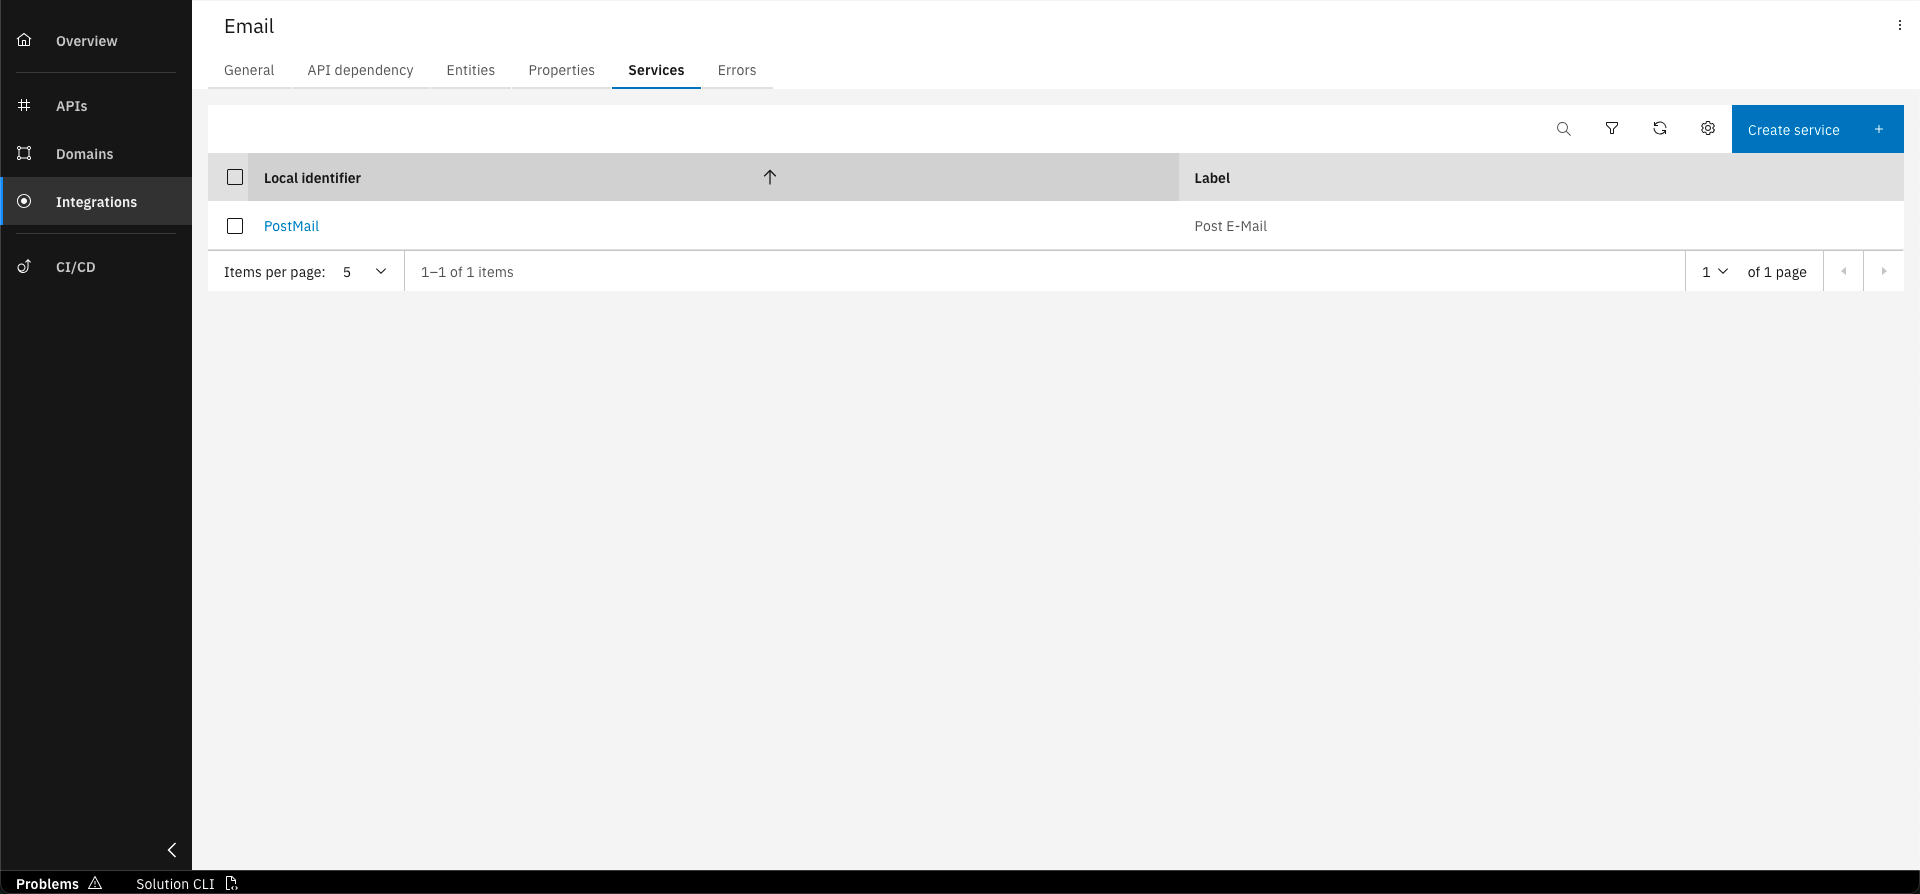
Step 3: Create Integration Service
Once you have added the API Dependency to the E-Mail Service, the next step is to create a Service within the Integration Namespace. This Integration Service is responsible for calling operations on the external API. In our case, we will create one specifically to call the postMail operation.
Calling the external API isn't limited to REST Integration Services. You can use the same syntax inside API Operations, Commands, Domain Services or Agents. However, it's generally best practice to handle these calls within Integration Services.
Select the "Services" tab and click "Create service
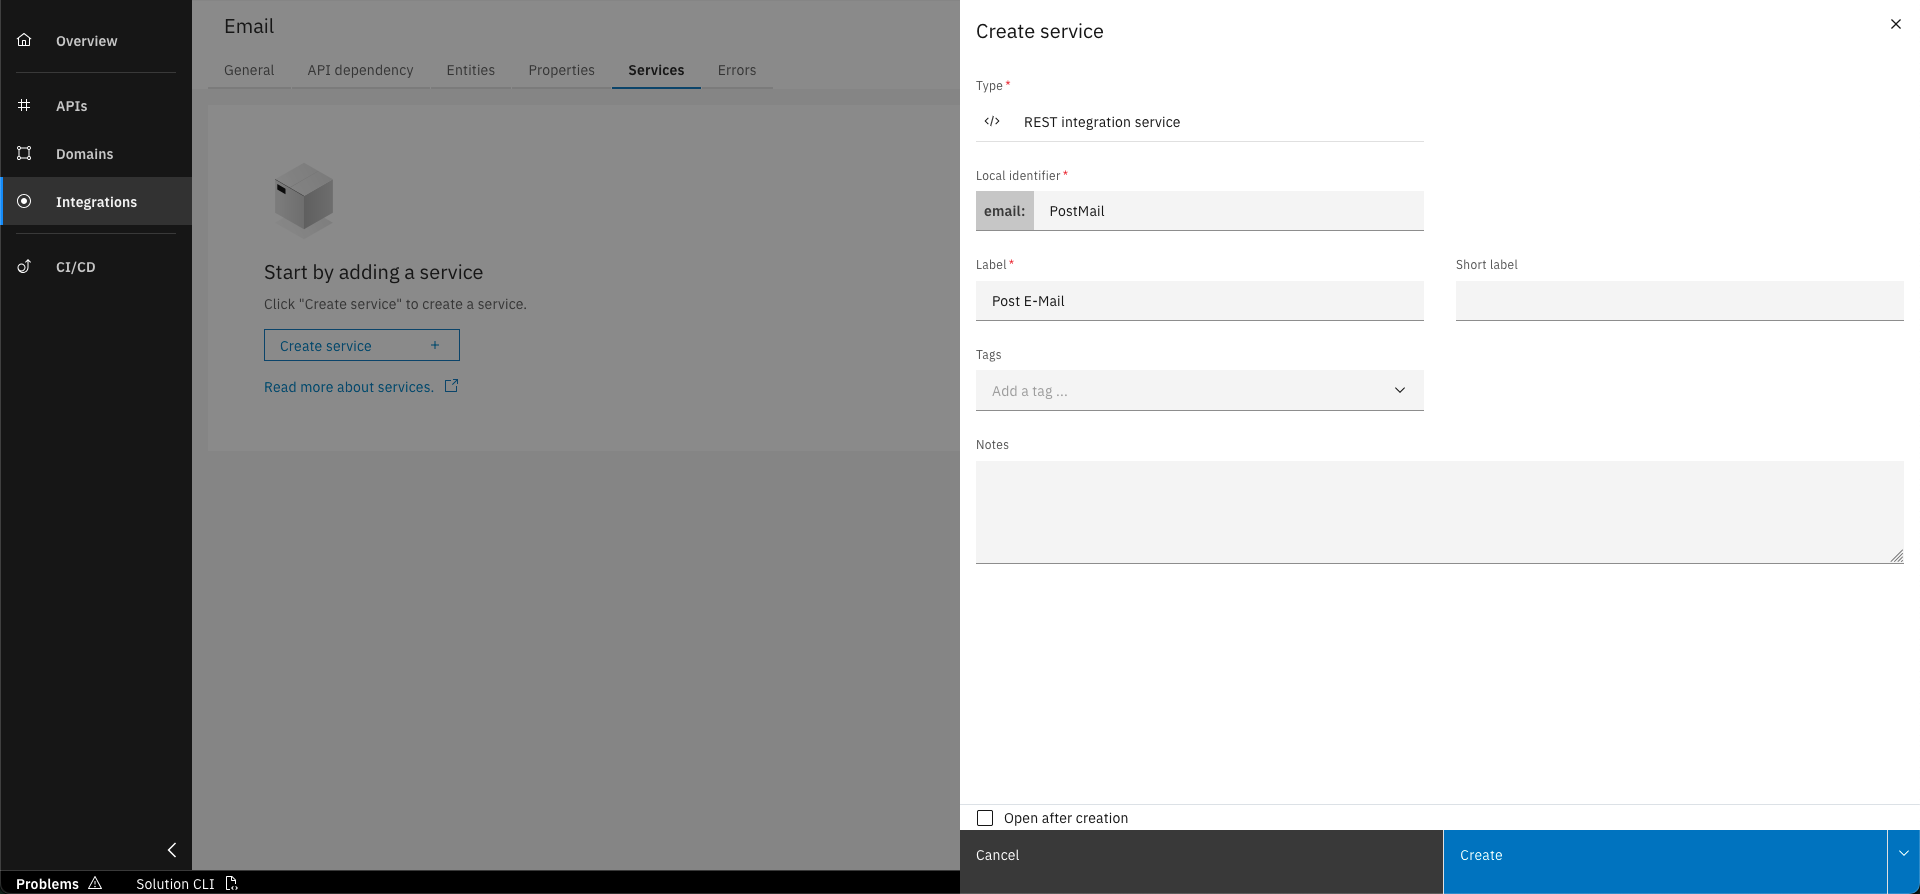
Enter the required details for the new service and click "Create"
Basic data to create Integration Service
Please provide the below details for creating the integration service.
- Prefix: PostMail
- Label: Post E-Mail
Step 4: Add Input to Integration Service
To send an email, the necessary data must be provided as input to your new Integration Service - see the steps below.
Go to the "Services" tab and click on the service you just created
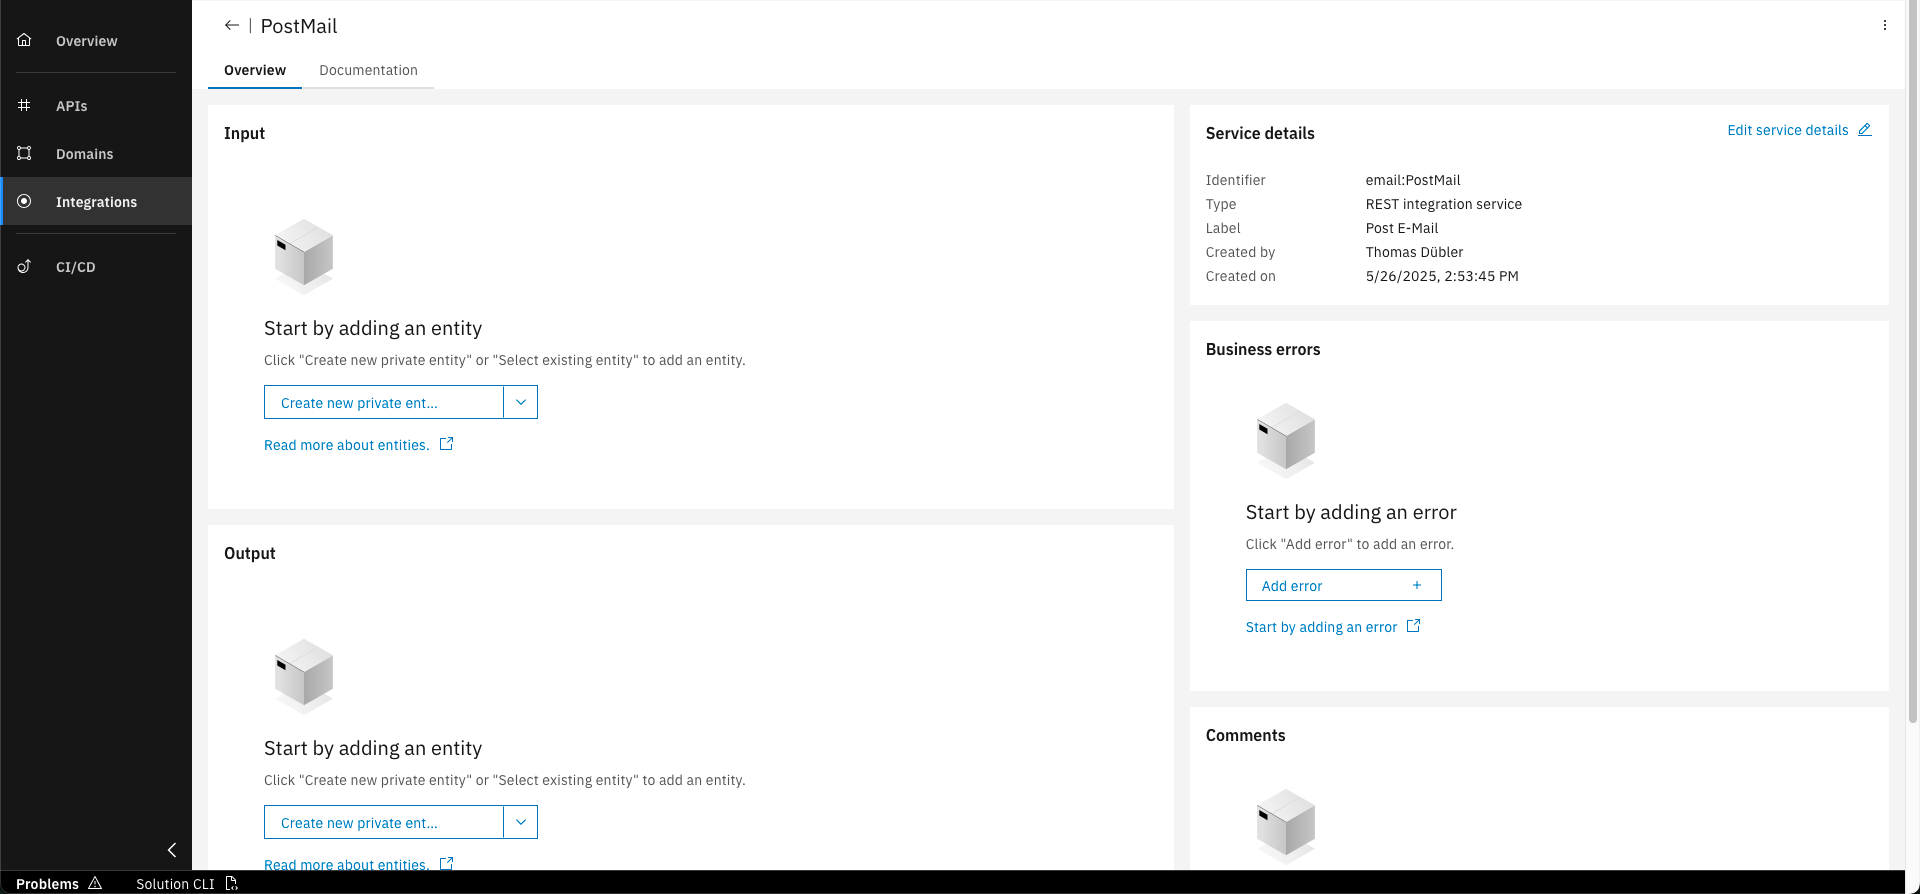
Click on "Create new private entity" in Input section
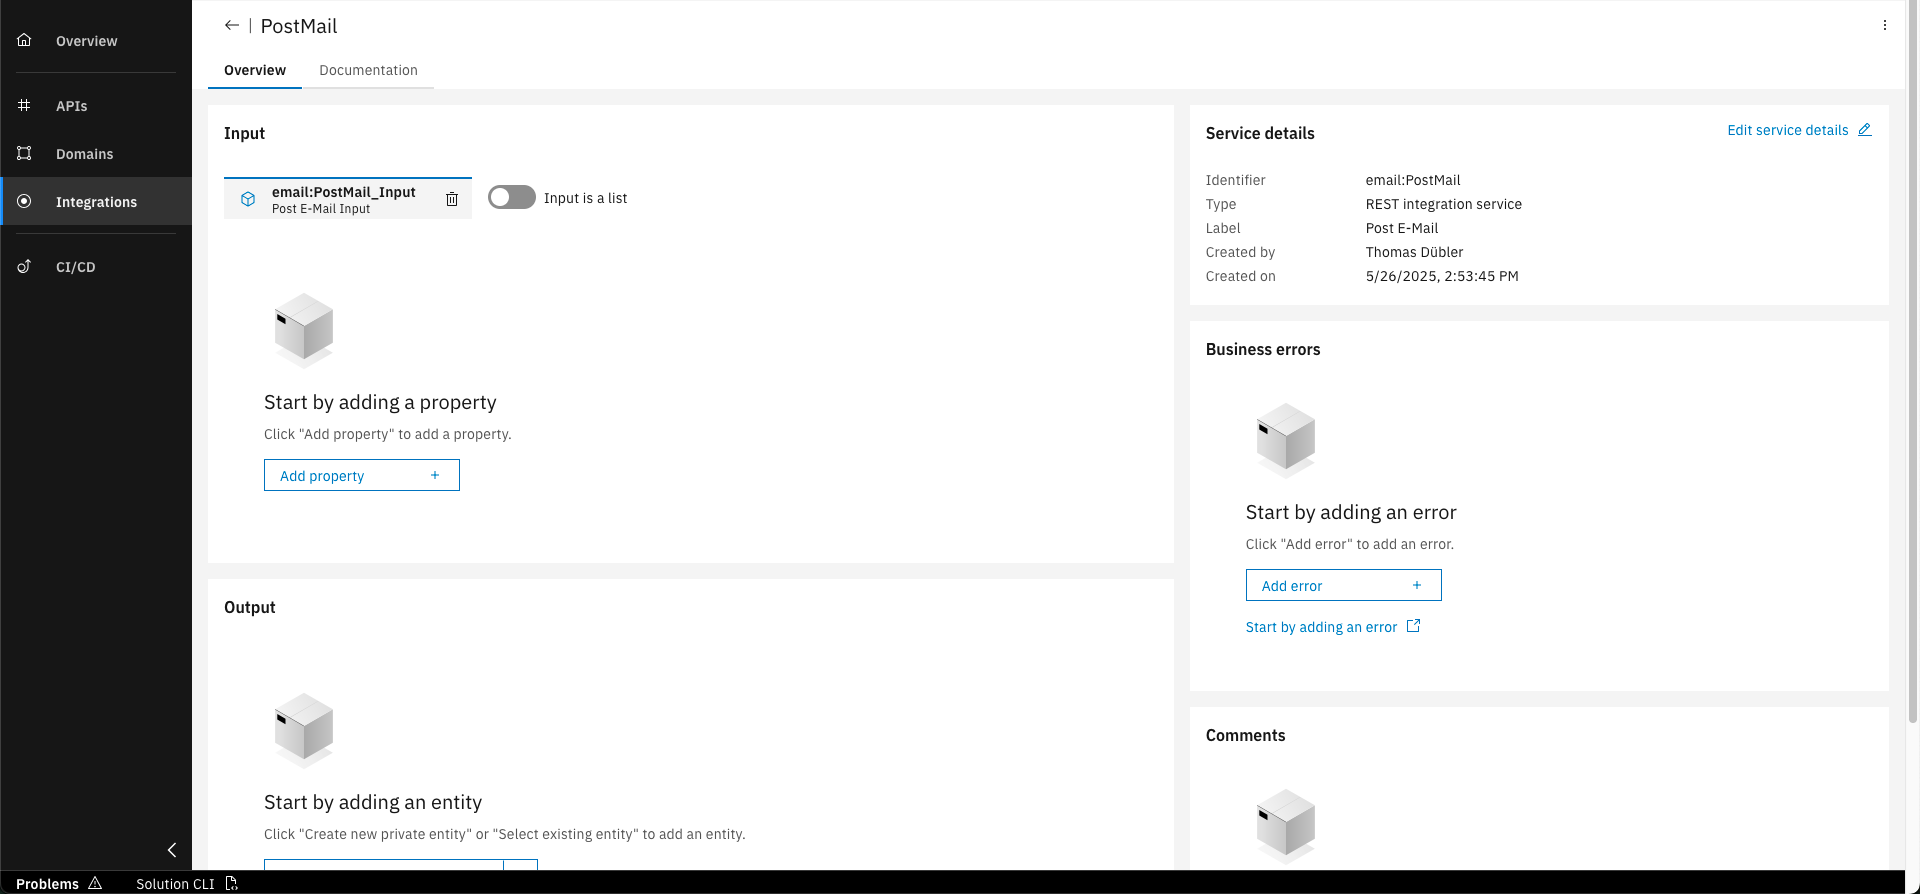
Click on "Add property"
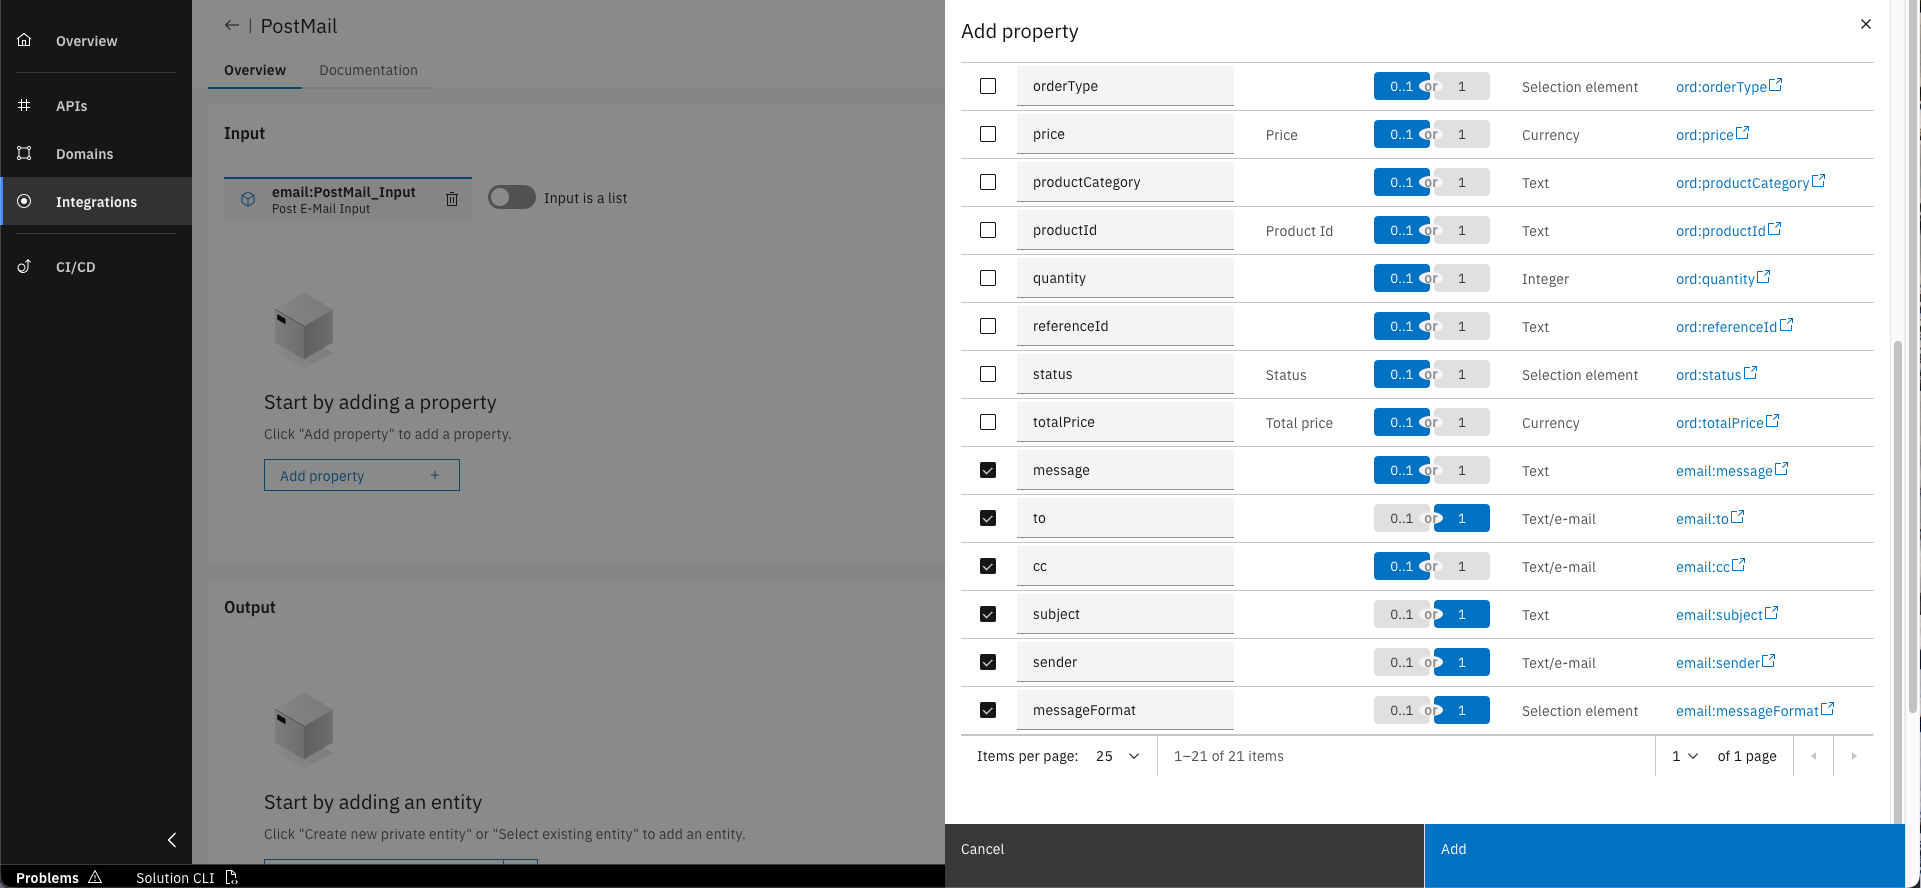
Select "Associate existing property" and choose all properties with the "email" prefix. Mark "to", "subject", "sender" and "messageFormat" as required (1) and click on "Add"
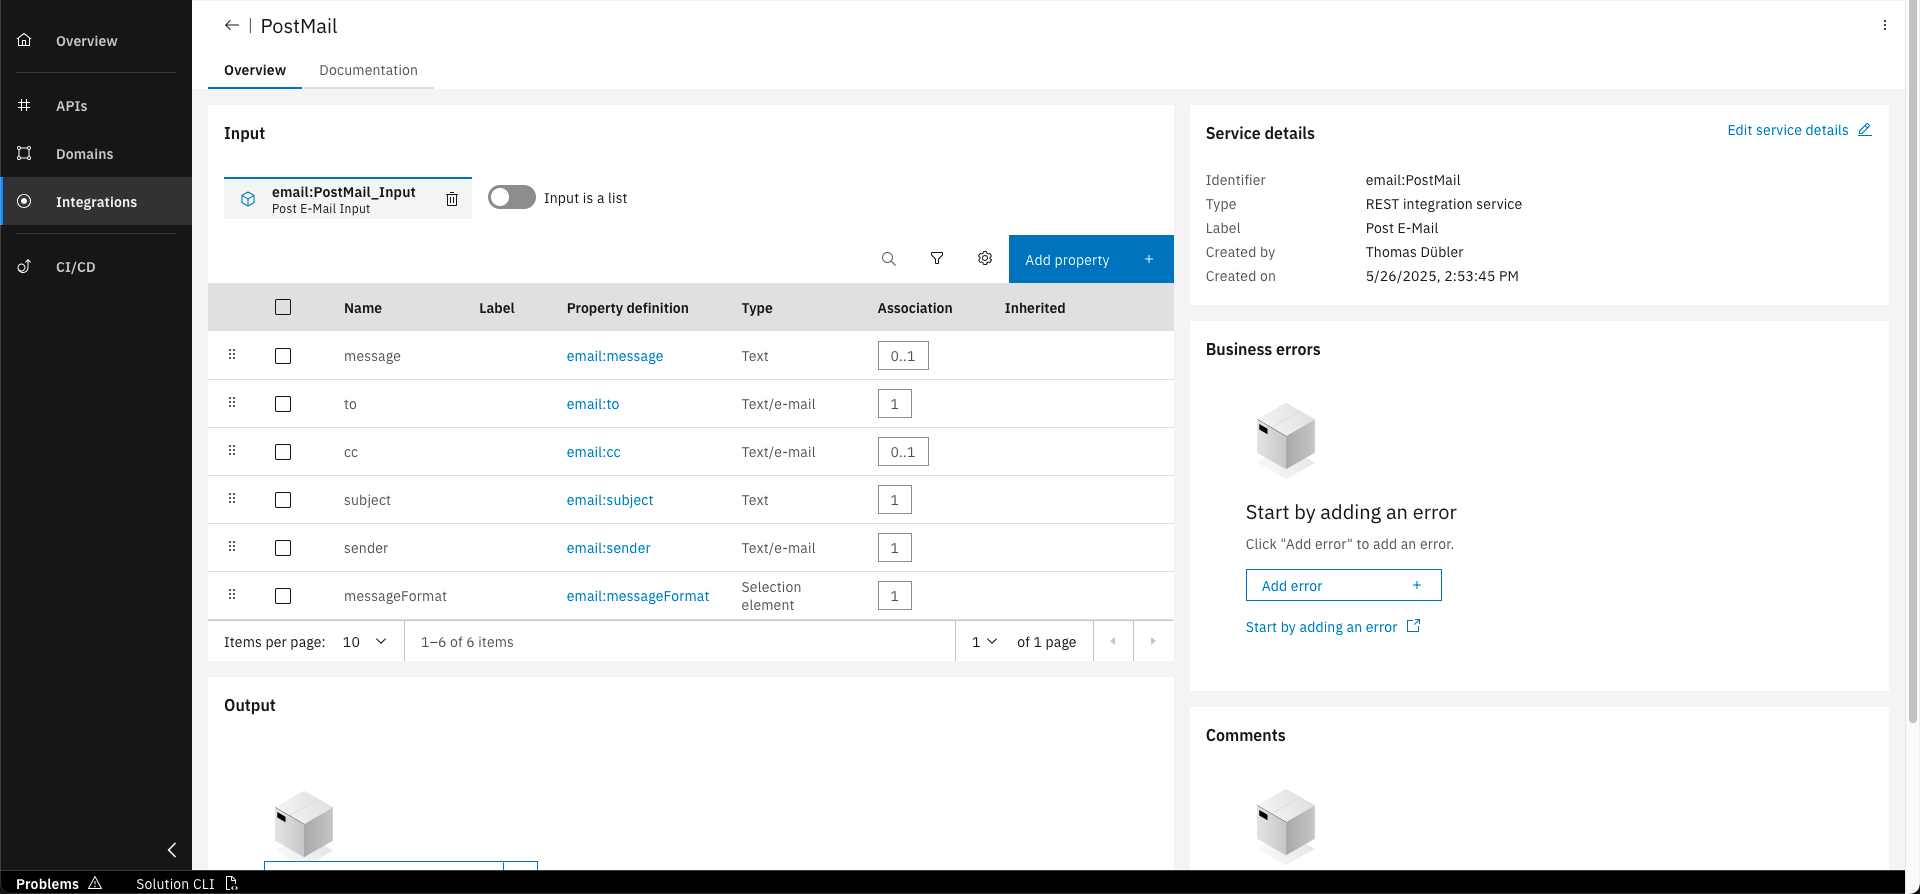
Discover the designed integration service
Properties to add
Please add the following properties to the input entity.
- to
- cc
- subject
- message
- sender
- messageFormat
You may have noticed that the Integration Namespace exposes fewer properties than the postMail operation’s request body. This is because not all properties are needed when sending order confirmations.
Just like with other design artifacts, such as Entities, Commands, Domain Services, and API Operations, documentation can and should be written for Integration Services to explain their logic and keep the team aligned.
Step 5: Commit and Push changes
For the final step, commit and push your changes by clicking the appropriate icon, and provide a clear commit message.

Click the "Commit and push" icon in the headerbar.
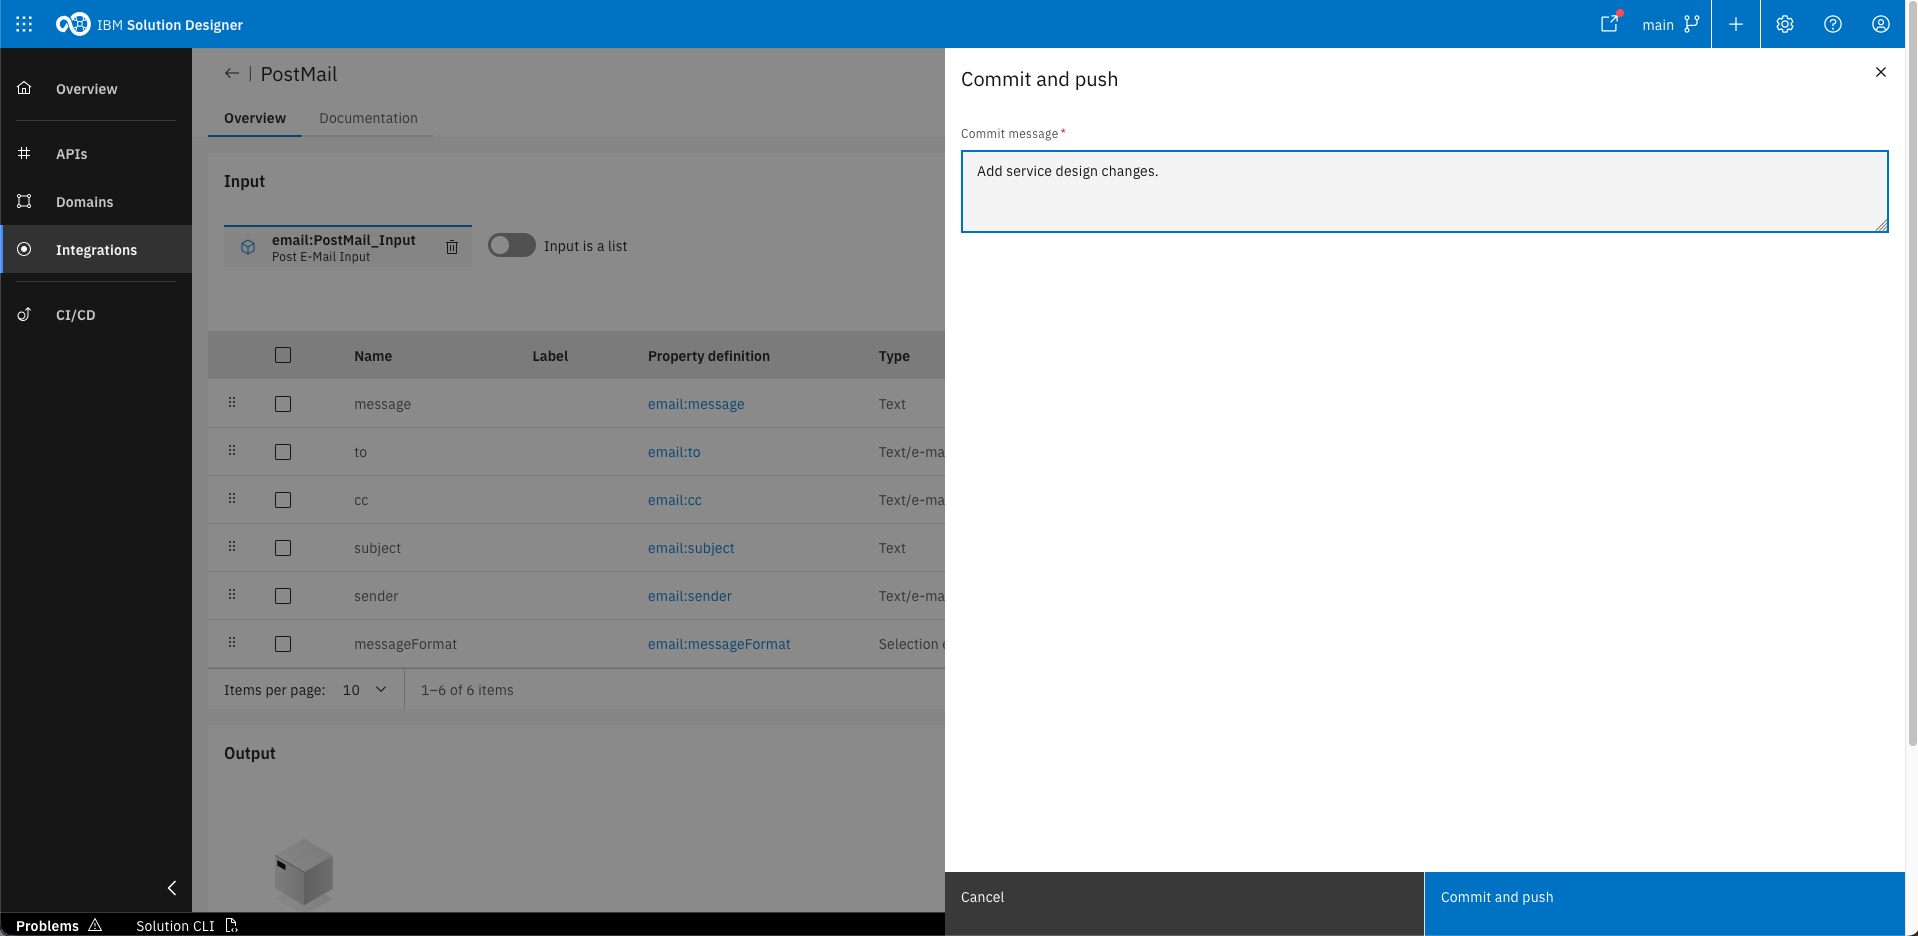
Provide your commit message and click "Commit and push" to push your changes to the Git repository
With committing the design changes, the entire design will be stored in the projects Git repository as YAML-Files. Later in the training, you will discover that the same happens with the source code.
You’ve successfully designed the integration with the Email API. Now you are able to add dependencies to other microservices through integration namespaces!
As this also concludes the design phase of your training, you are now ready to continue with the implementation phase.
What's next?
The next courses will cover the implementation of your Domain Service, including the Integration Service.
Related Links
Please find more information about Integration Namespaces: