From Prompt to Design-Aware AI
In this hands-on trial, you will implement the same requirement twice — first with your coding assistant alone, then with structured design context from Workbench. Same prompt. Different result.
Before you start
Estimated time: 15-20 minutes
What you need: Your own IDE and coding assistant, access to our trial environment.
About your trial environment
Your trial environment includes everything you need to get started: a dedicated, isolated tenant in the IBM DevOps Solution Workbench, and a GitLab instance with repositories for all your projects - including our reference application Roboflow ready for you to explore.
You bring your own IDE and coding assistant — whatever you normally use. In our screenshots throughout these trials we use Visual Studio Code with GitHub Copilot.
Solution Designer
The Solution Designer is your main workspace in Workbench. This is where architecture is modelled,
design decisions are captured, and structured context is created for your coding assistant.
Your trial comes with a dedicated, isolated tenant. Log in using the credentials from your trial onboarding email.
GitLab
Every project in the Solution Designer is backed by a Git repository in your trial's dedicated GitLab group. Throughout the trial, you usually access GitLab repositories
through the Solution Designer since URLs are specific to your tenant.
To find the Repository URL for any project:
- Open the project in the Solution Designer
- On the Overview page that opens, you'll find "General Information" on the right hand side.
- The link under "Acronym" takes you directly to the GitLab repository for that project.
- Log into GitLab using the "Keycloak" button.
Cloning a project to work in your own IDE requires a Personal Access Token (PAT). To create one:
- Log into your Trial GitLab (using the Keycloak button)
- Click your profile icon in the upper right corner and select Preferences
- Go to Access → Personal Access Tokens
- Create a token with
read_repository,write_repositoryandapiscope
Cloning a project
To clone a project, you can either use the "Code" button in the GitLab UI and copy the "Clone with HTTPS" URL or you can copy the URL directly from the Solution Designer project page. To do this:
- Open the project in the Solution Designer
- Expand the footer bar that says "Git"
- Copy the URL
In both cases, use a terminal and run git clone <URL> -b <optional-branch-name> and use your username and the created PAT as the password when prompted.
Cloning via SSH is disabled in the trial environment for security reasons.
RoboFlow
Your trial environment comes preloaded with RoboFlow — a fictional B2B webshop for robotics parts that serves as the reference
application across all trial experiences. Its services are already designed and documented in the Solution Designer, ready for you to explore and build on.
Step 1 — Orient yourself
You are working the Payment Service of RoboFlow — a fictional B2B webshop for robotics parts that serves as the reference application across all trial experiences. If you are new to the scenario or want a quick overview of the system and its services, expand the section below.
About the RoboFlow reference application
The RoboFlow reference application
The trials in this section are built around RoboFlow — a fictional B2B webshop for robotics parts that serves as the reference application across all trial experiences. If you want to find out about RoboFlow's ambitions and requirements, you can head to the RoboFlow overview page for a quick introduction.
RoboFlow's system is composed of multiple microservices, each designed and documented in the Workbench. The starting point is an architecture project — a high-level view of the system that shows which services exist, how they relate, and what responsibilities they carry. RoboFlow's architecture is modelled using C4 notation, one of the modelling languages IBM DevOps Solution Workbench supports out of the box.
The diagram below is the Container Diagram (Level 2) of the RoboFlow system in the RoboFlow architecture project — one level below the overall system context (L1), showing the individual services and their relationships. You can also open it directly in the Workbench.
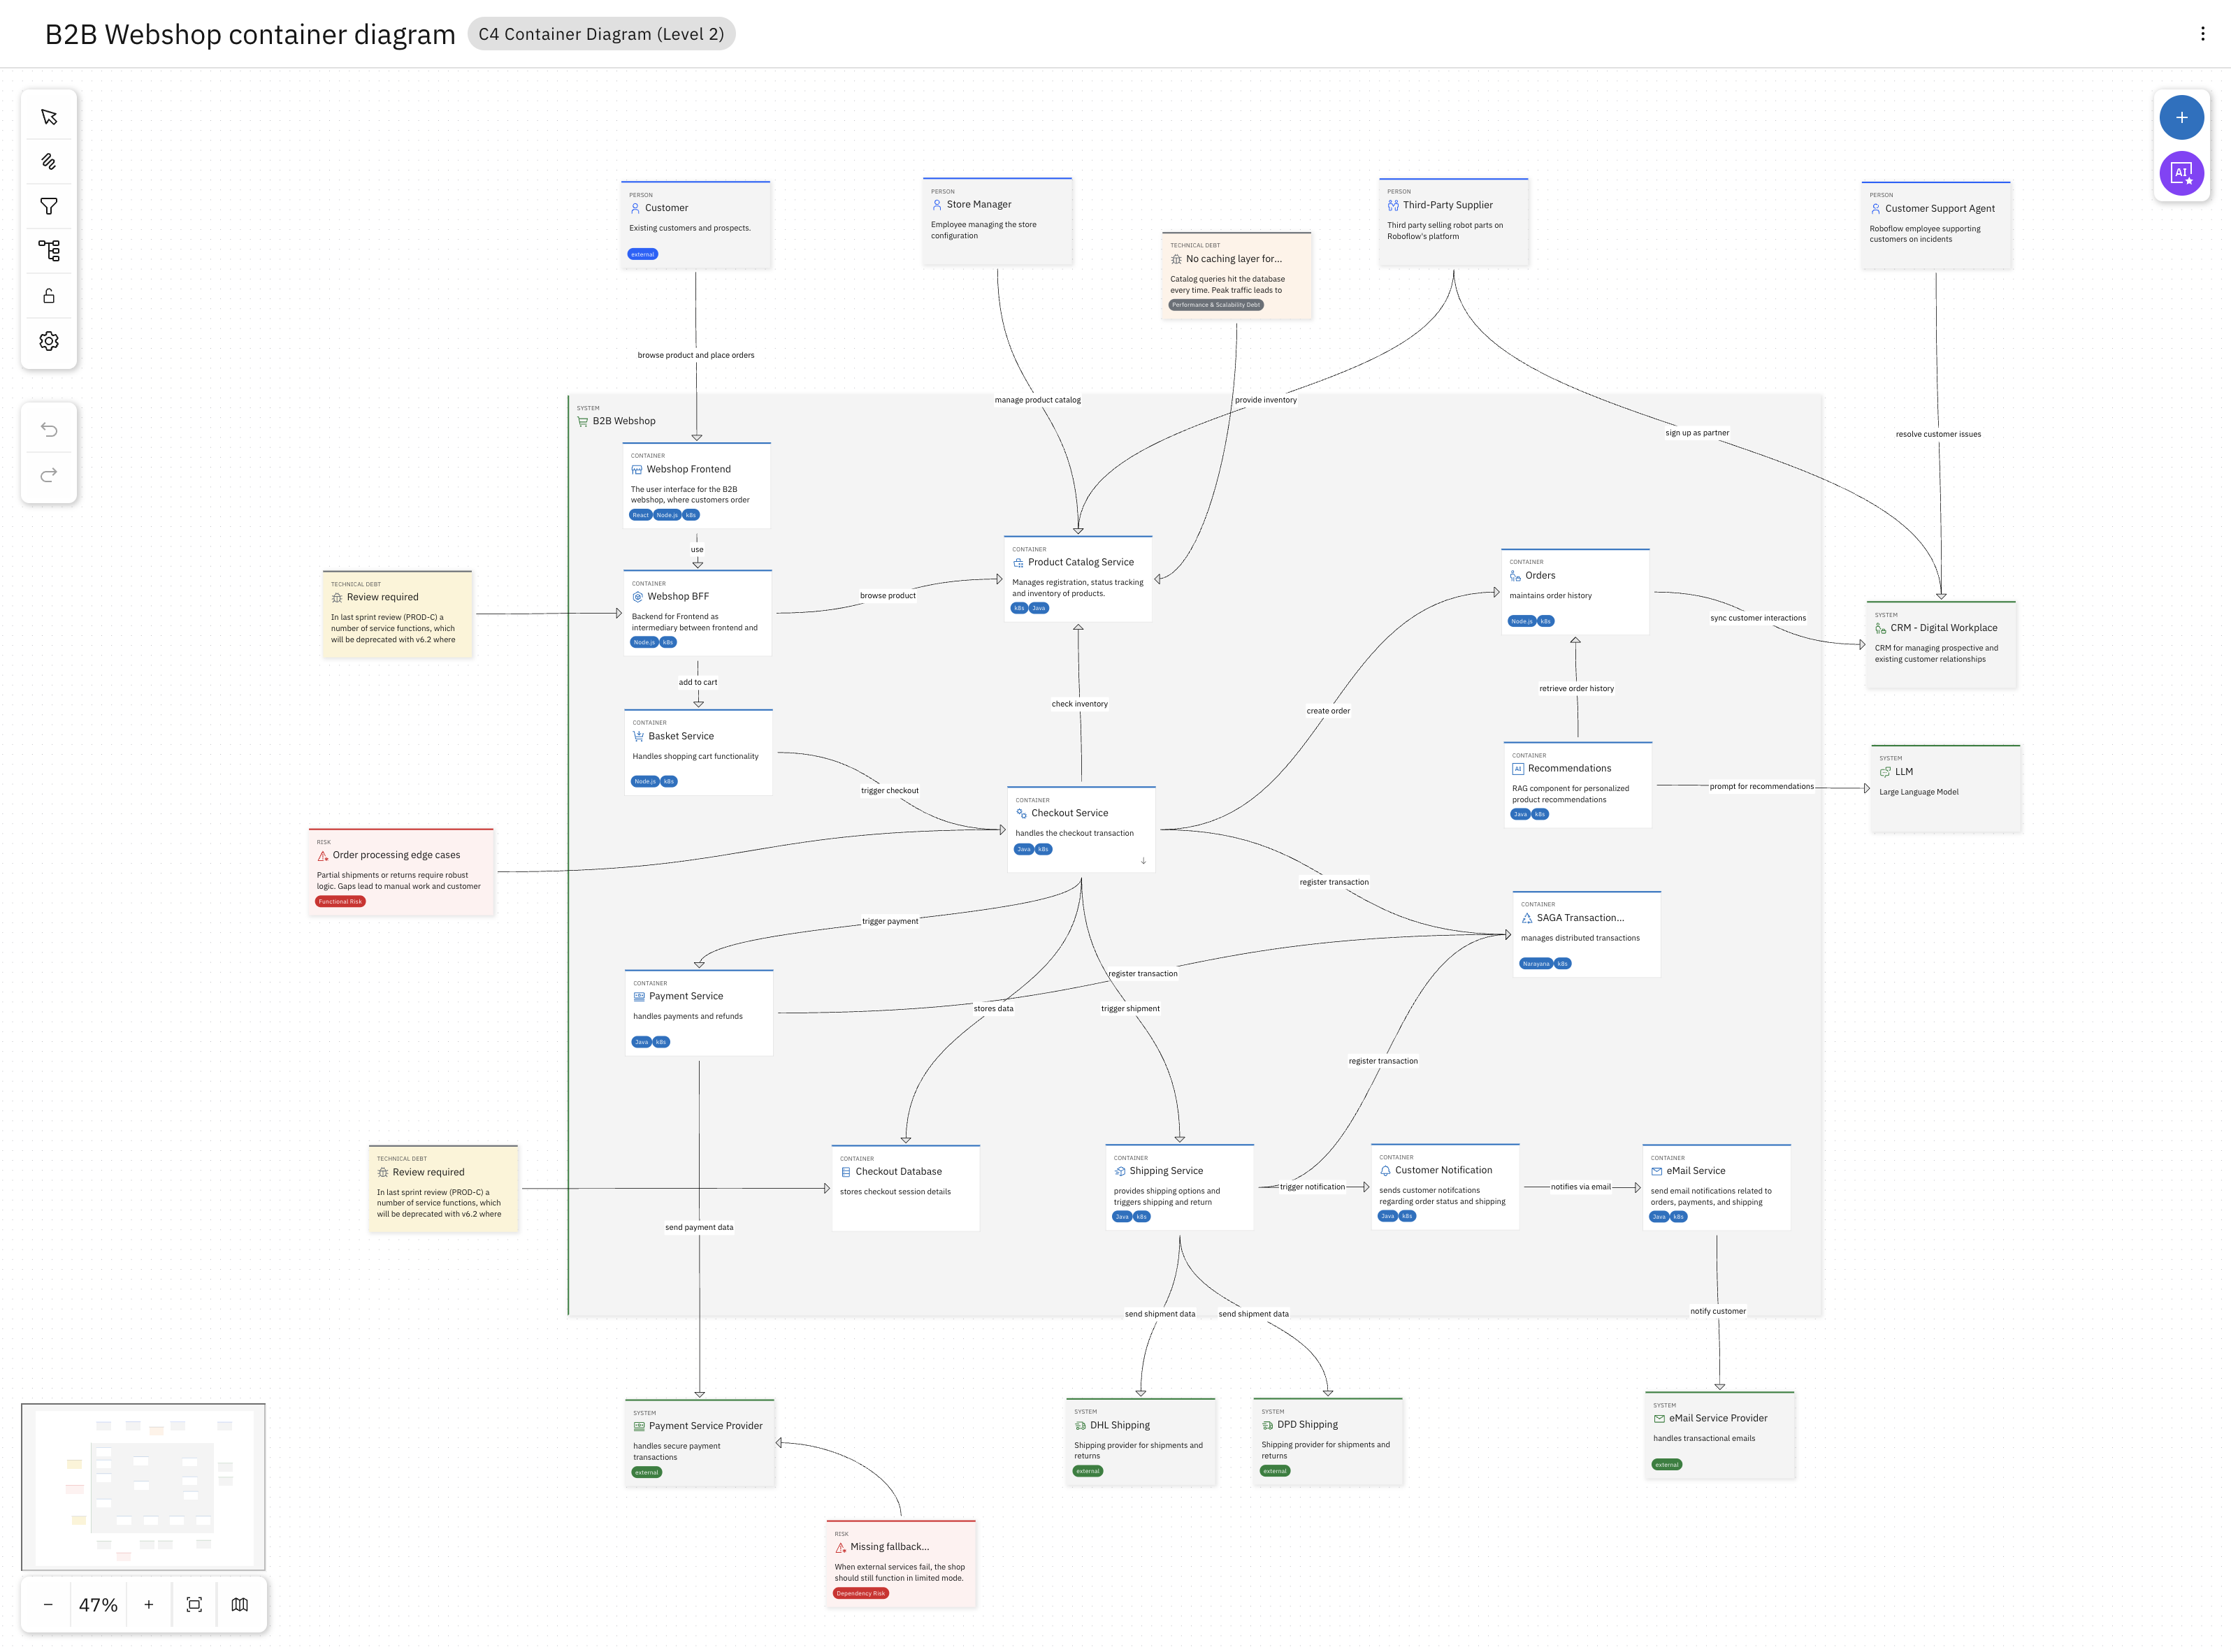
The system includes a WebShop Frontend, a Basket Service, a Checkout Service, a Payment Service, and others. Three services are central to the trials:
- Checkout Service — orchestrates the checkout flow, applies discounts, and initiates payment
- Payment Service — handles all payment processing and integrates with external payment providers
- Gift Card Service — manages gift card balances, validates voucher codes, and tracks redemptions
Each service usually has its own service project in the Workbench — a separate, more detailed specification that defines the service's boundaries, domain model, interfaces, and the architectural decisions that apply to it. This is where the real design work happens.
Explore a service
As an example, let's look at the Checkout Service.
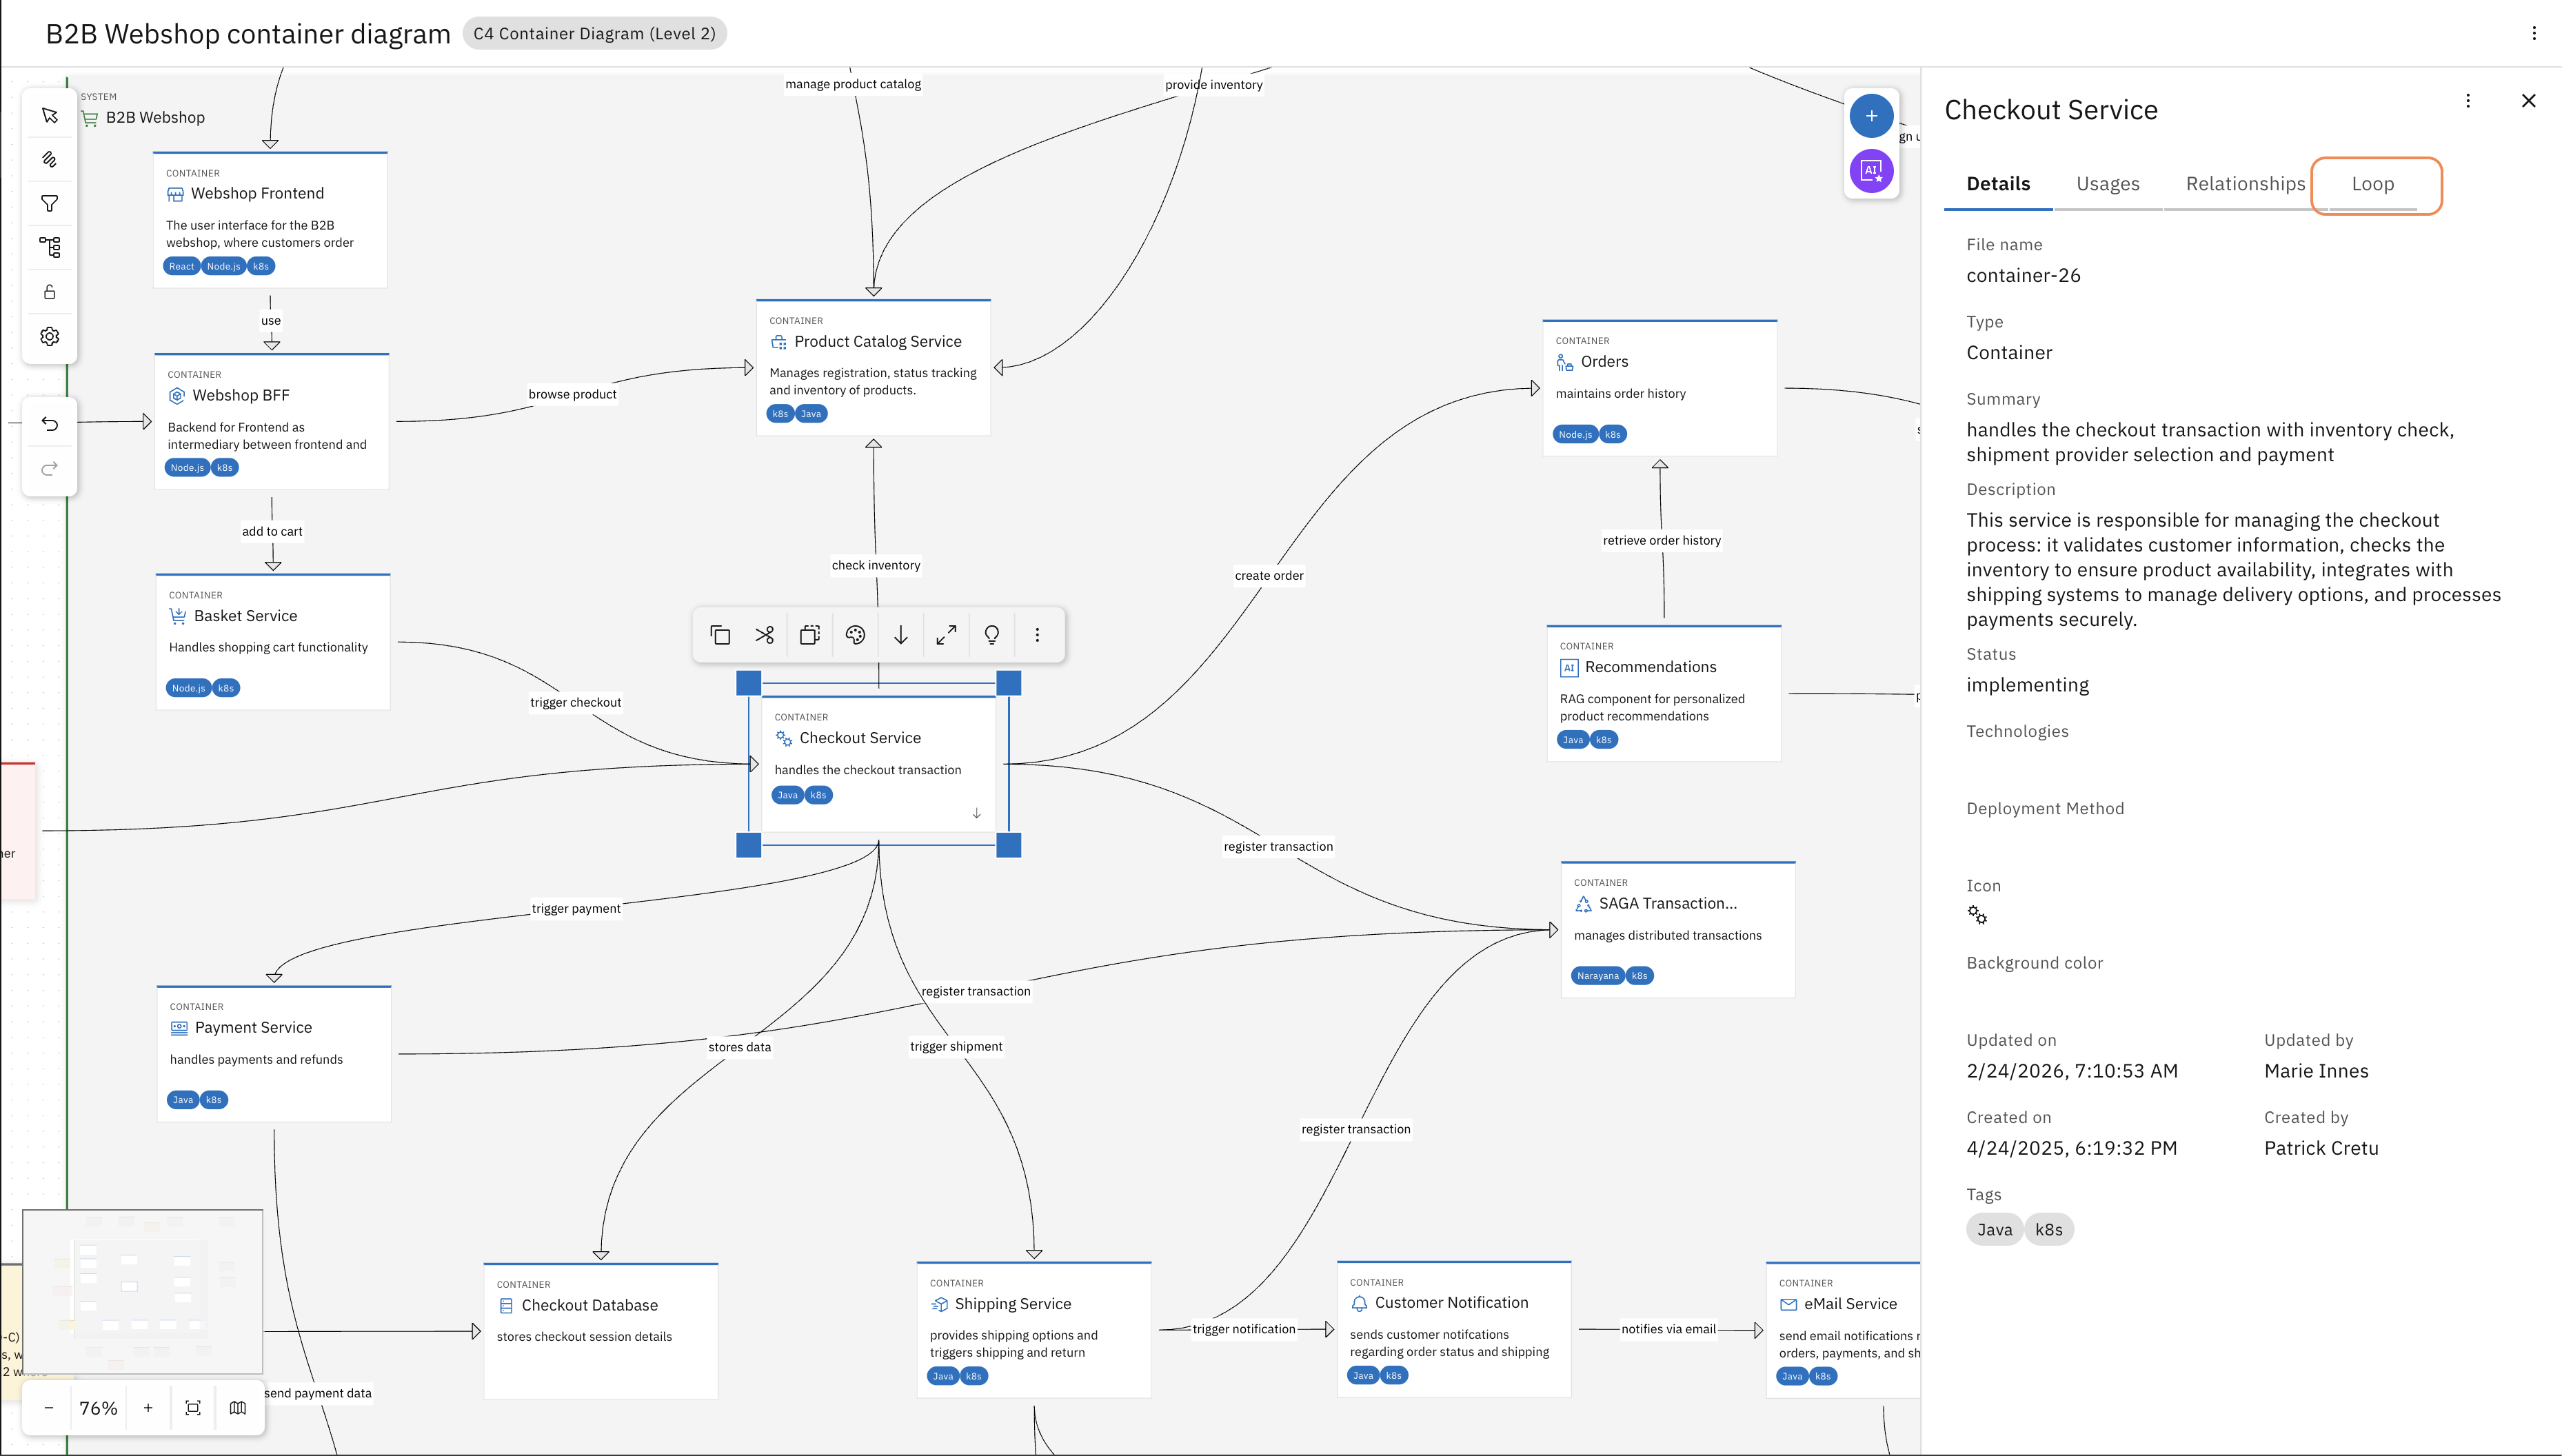
Select the Checkout Service on the L2 diagram and in the sidebar on the right (you might need to expand it) navigate to the Loop tab.
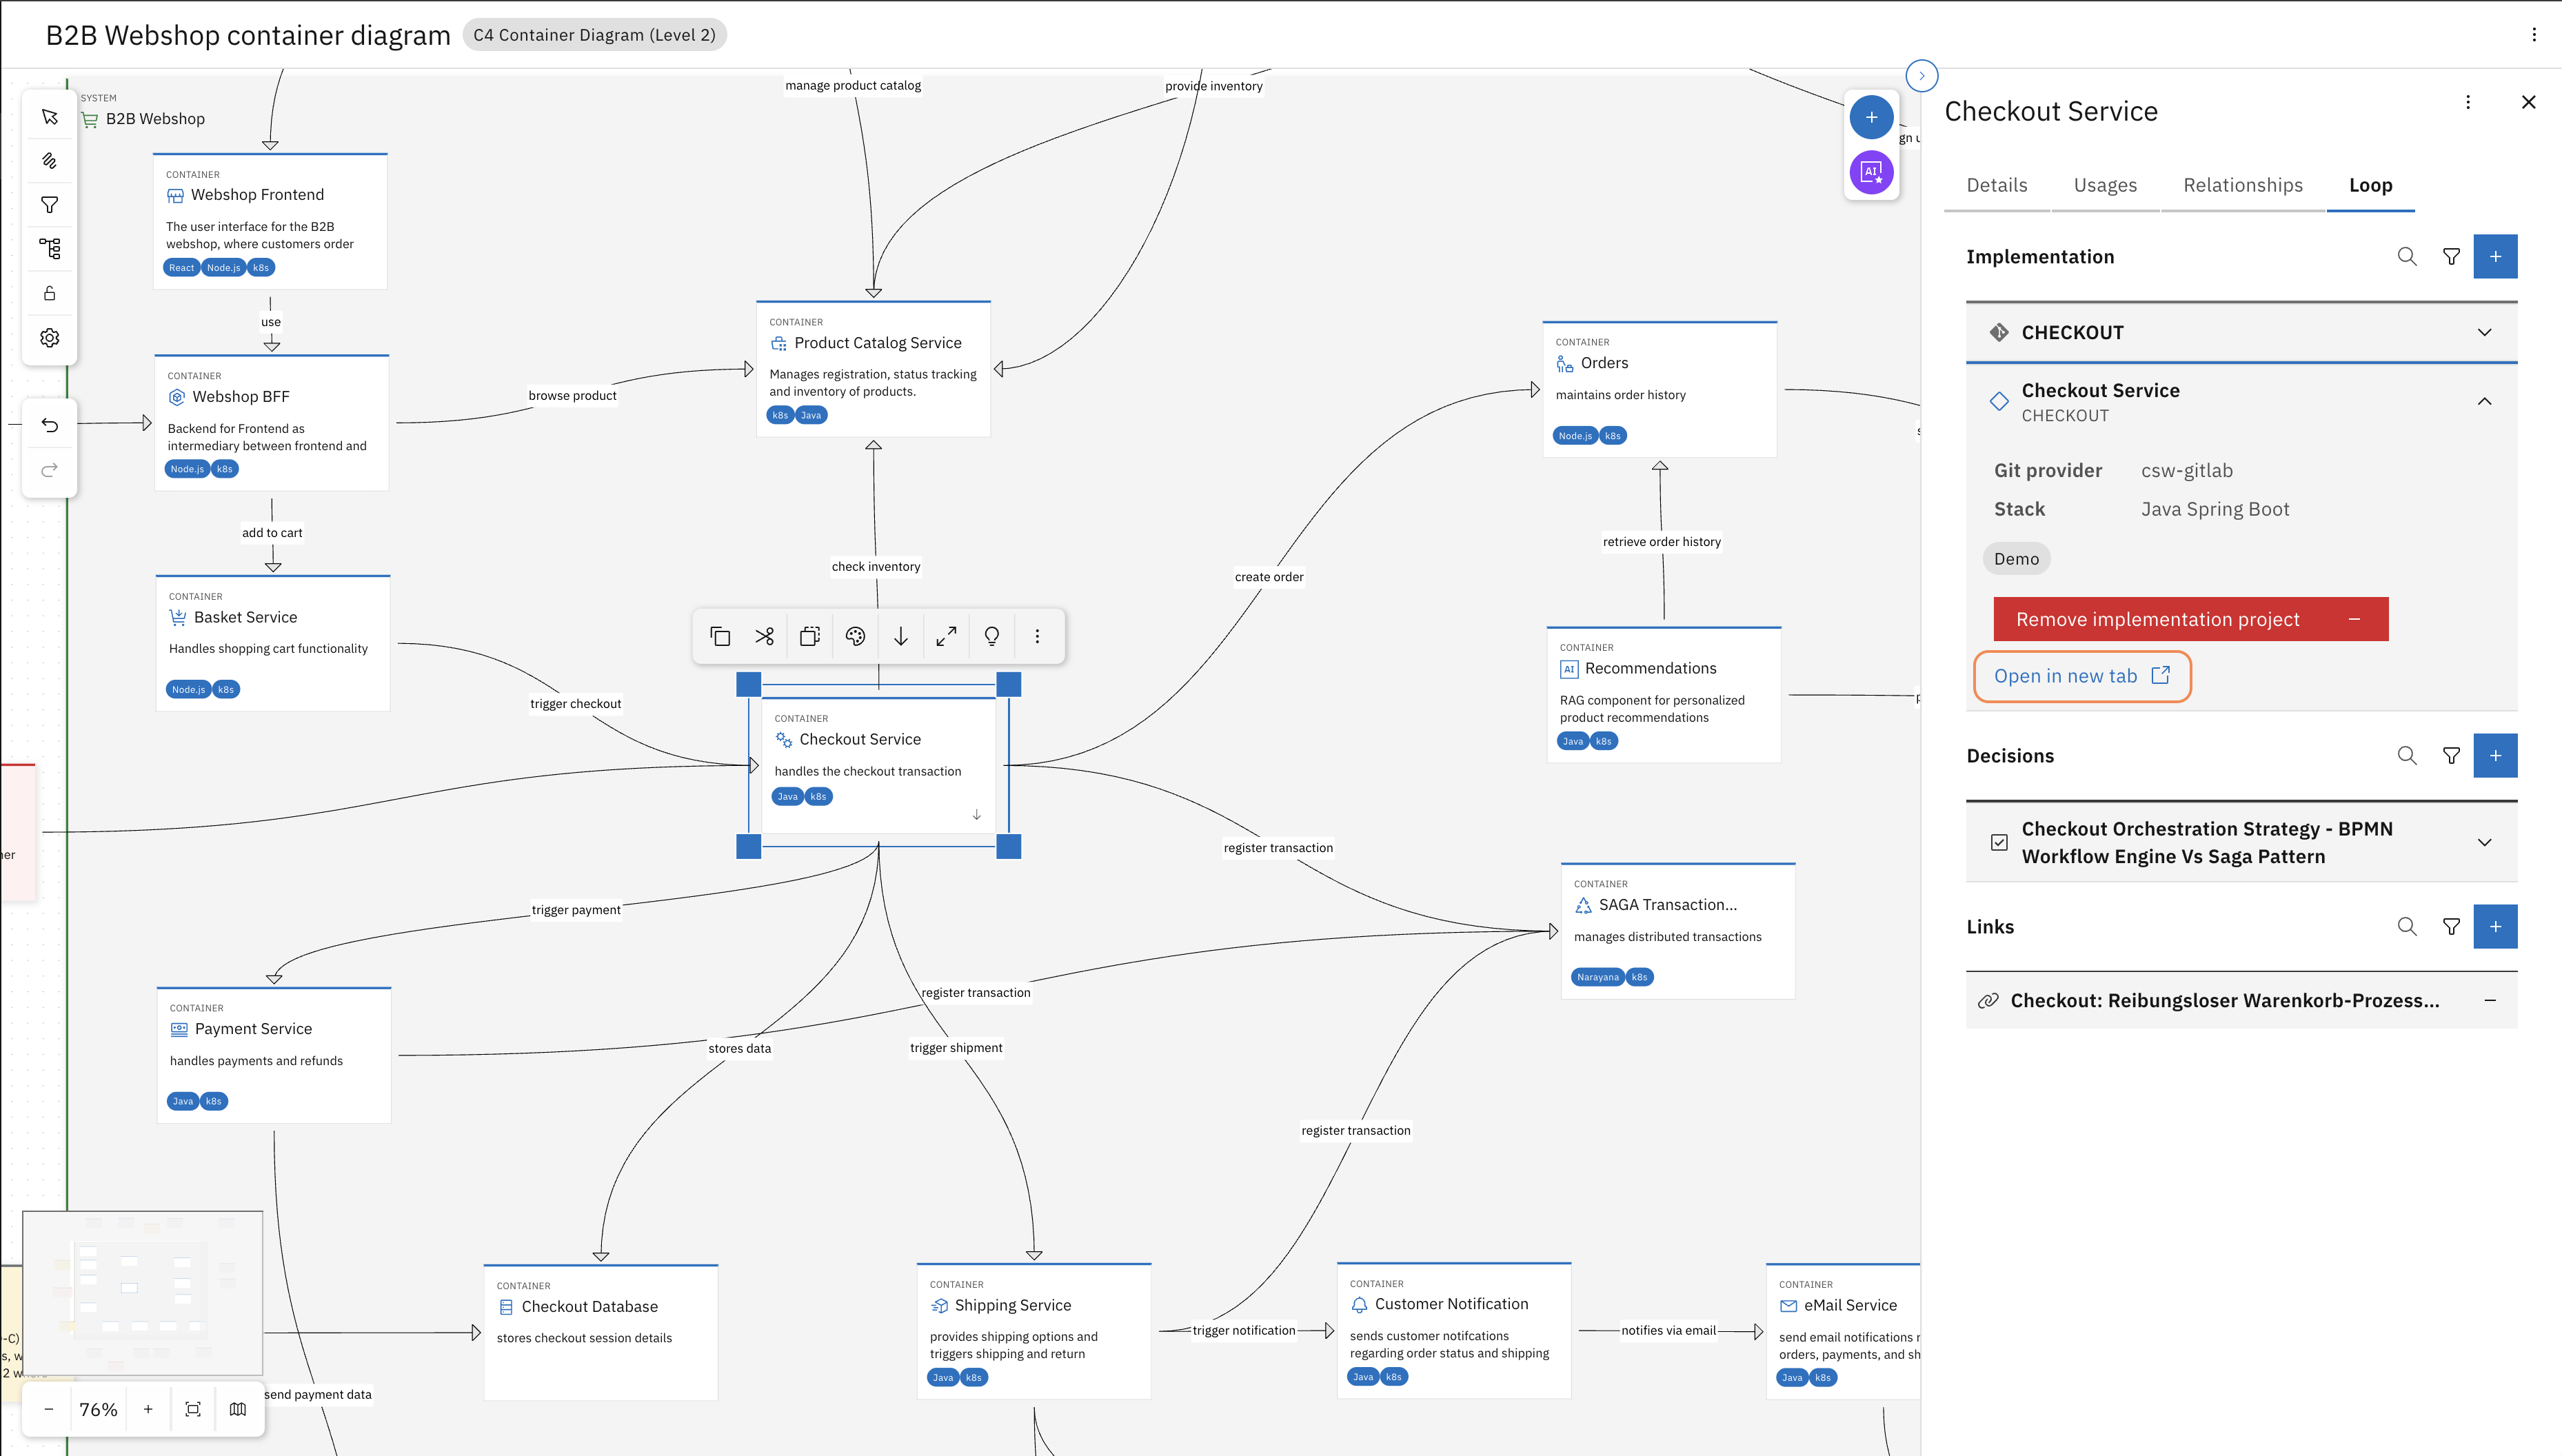
Find the Workbench project and "Open in new tab". This will open the service project where the design details of the Checkout Service are modelled and documented.
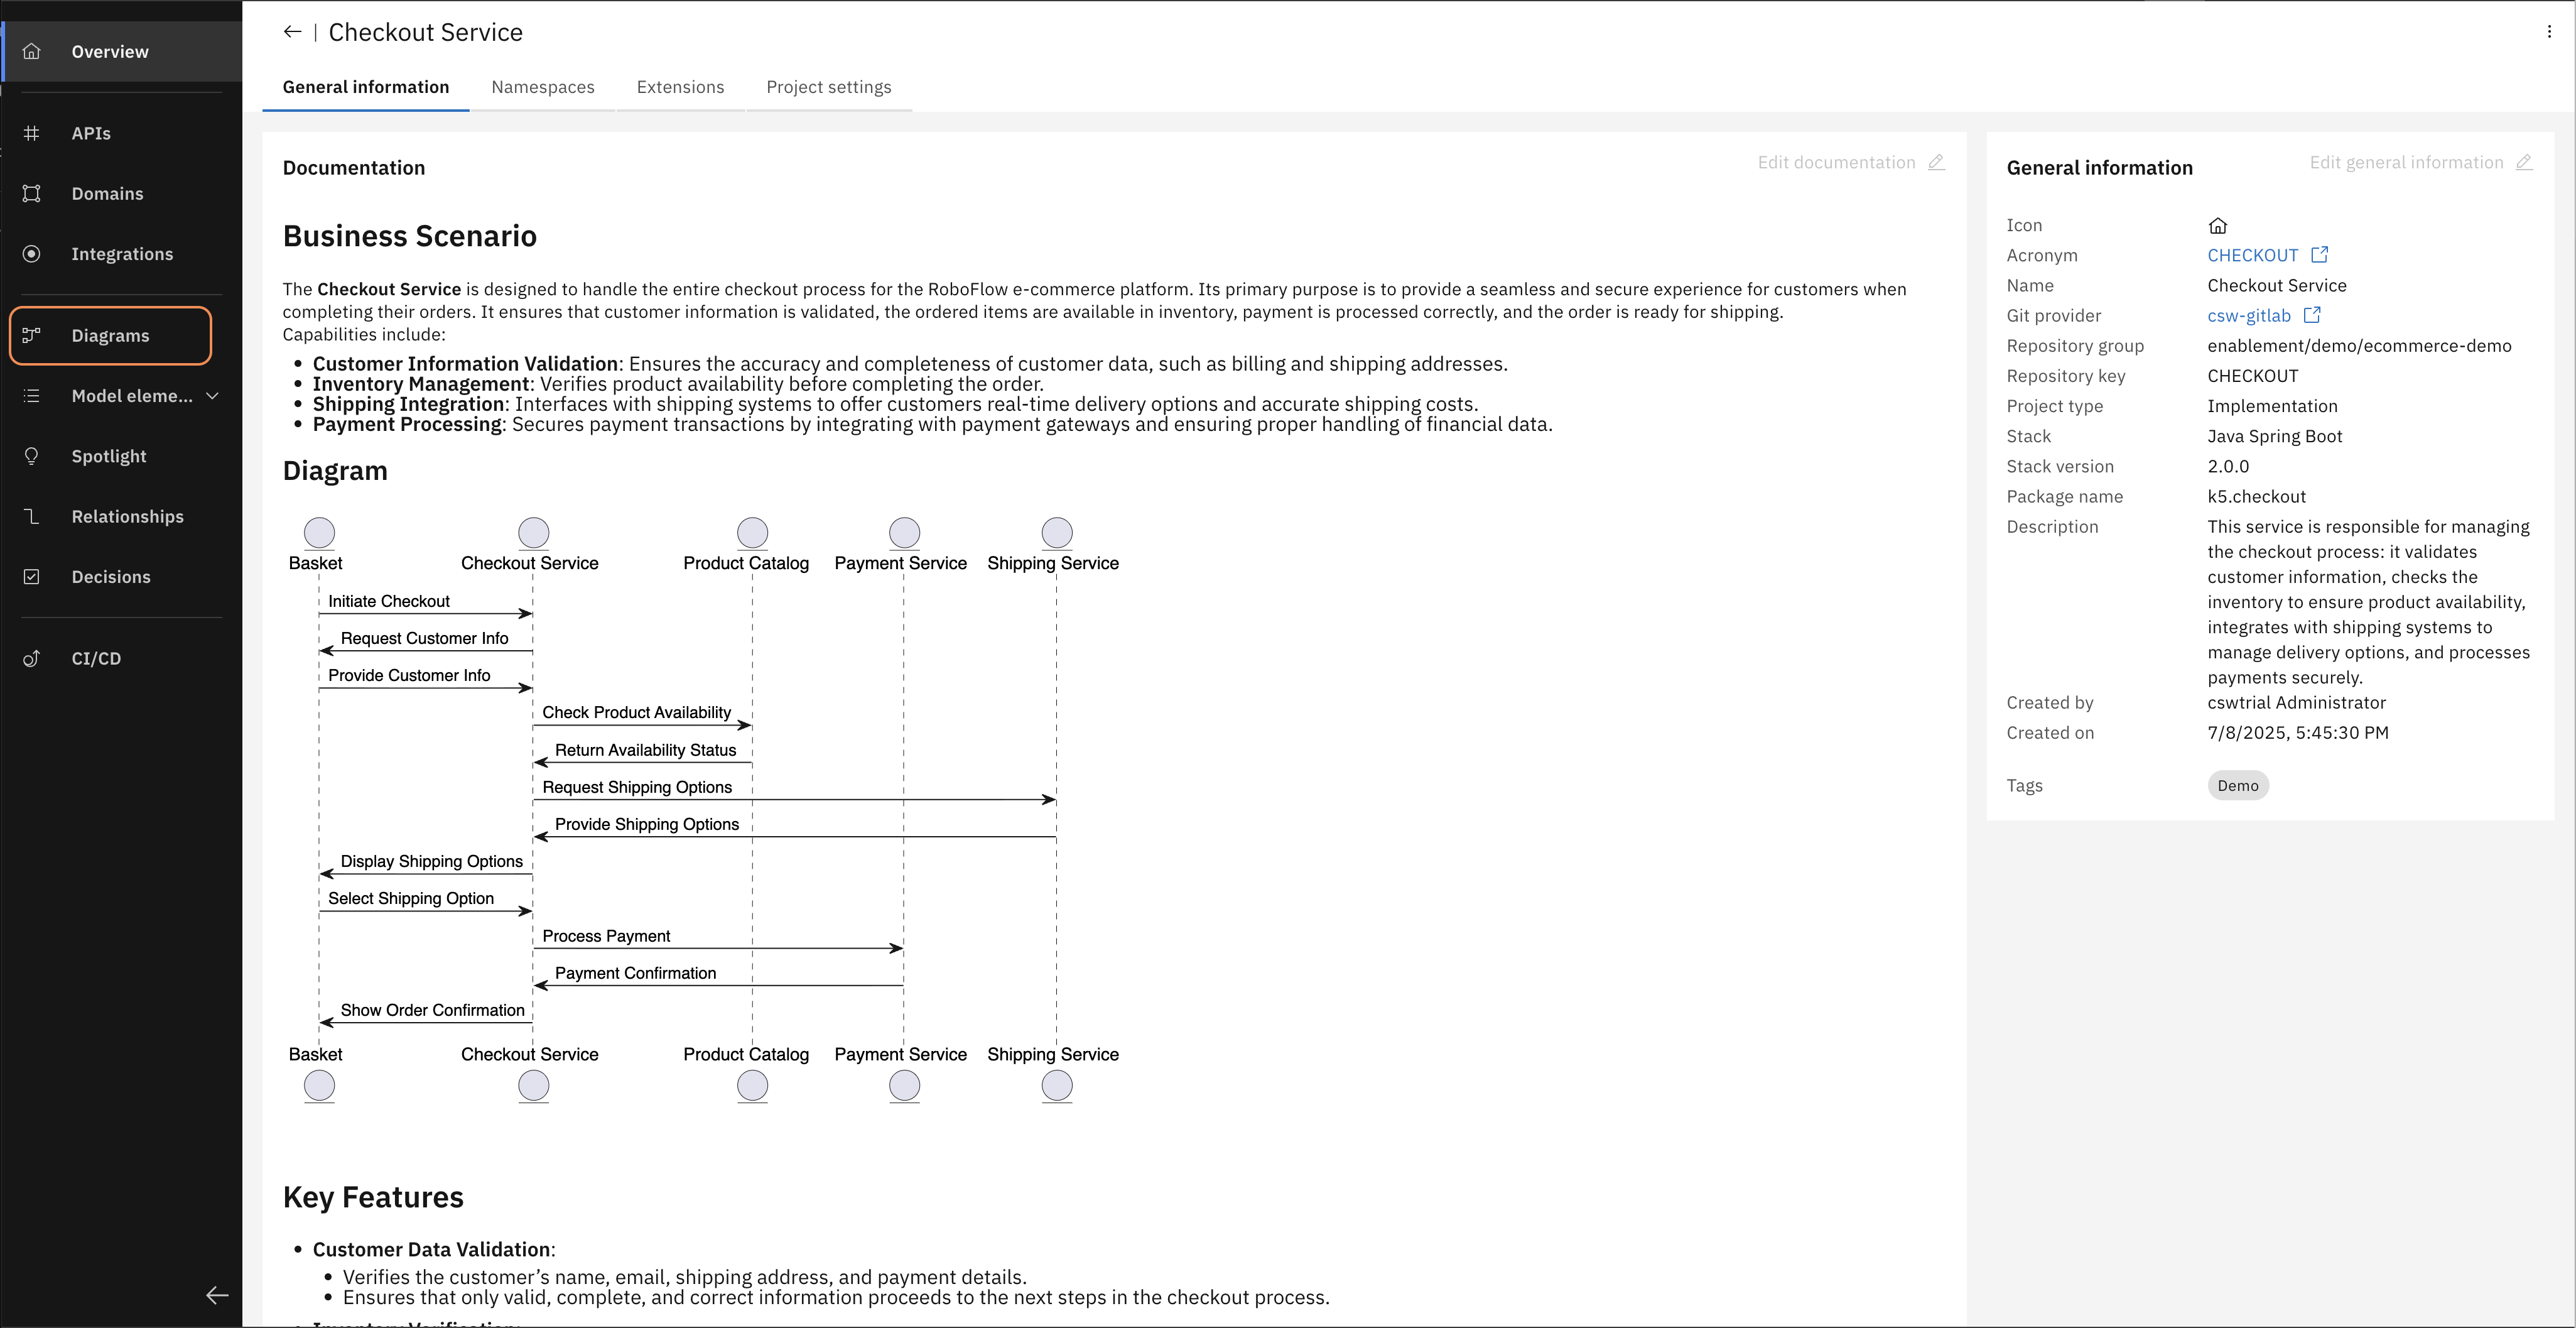
In the left navigation bar, open Diagrams and then open the "Checkout Service component diagram".
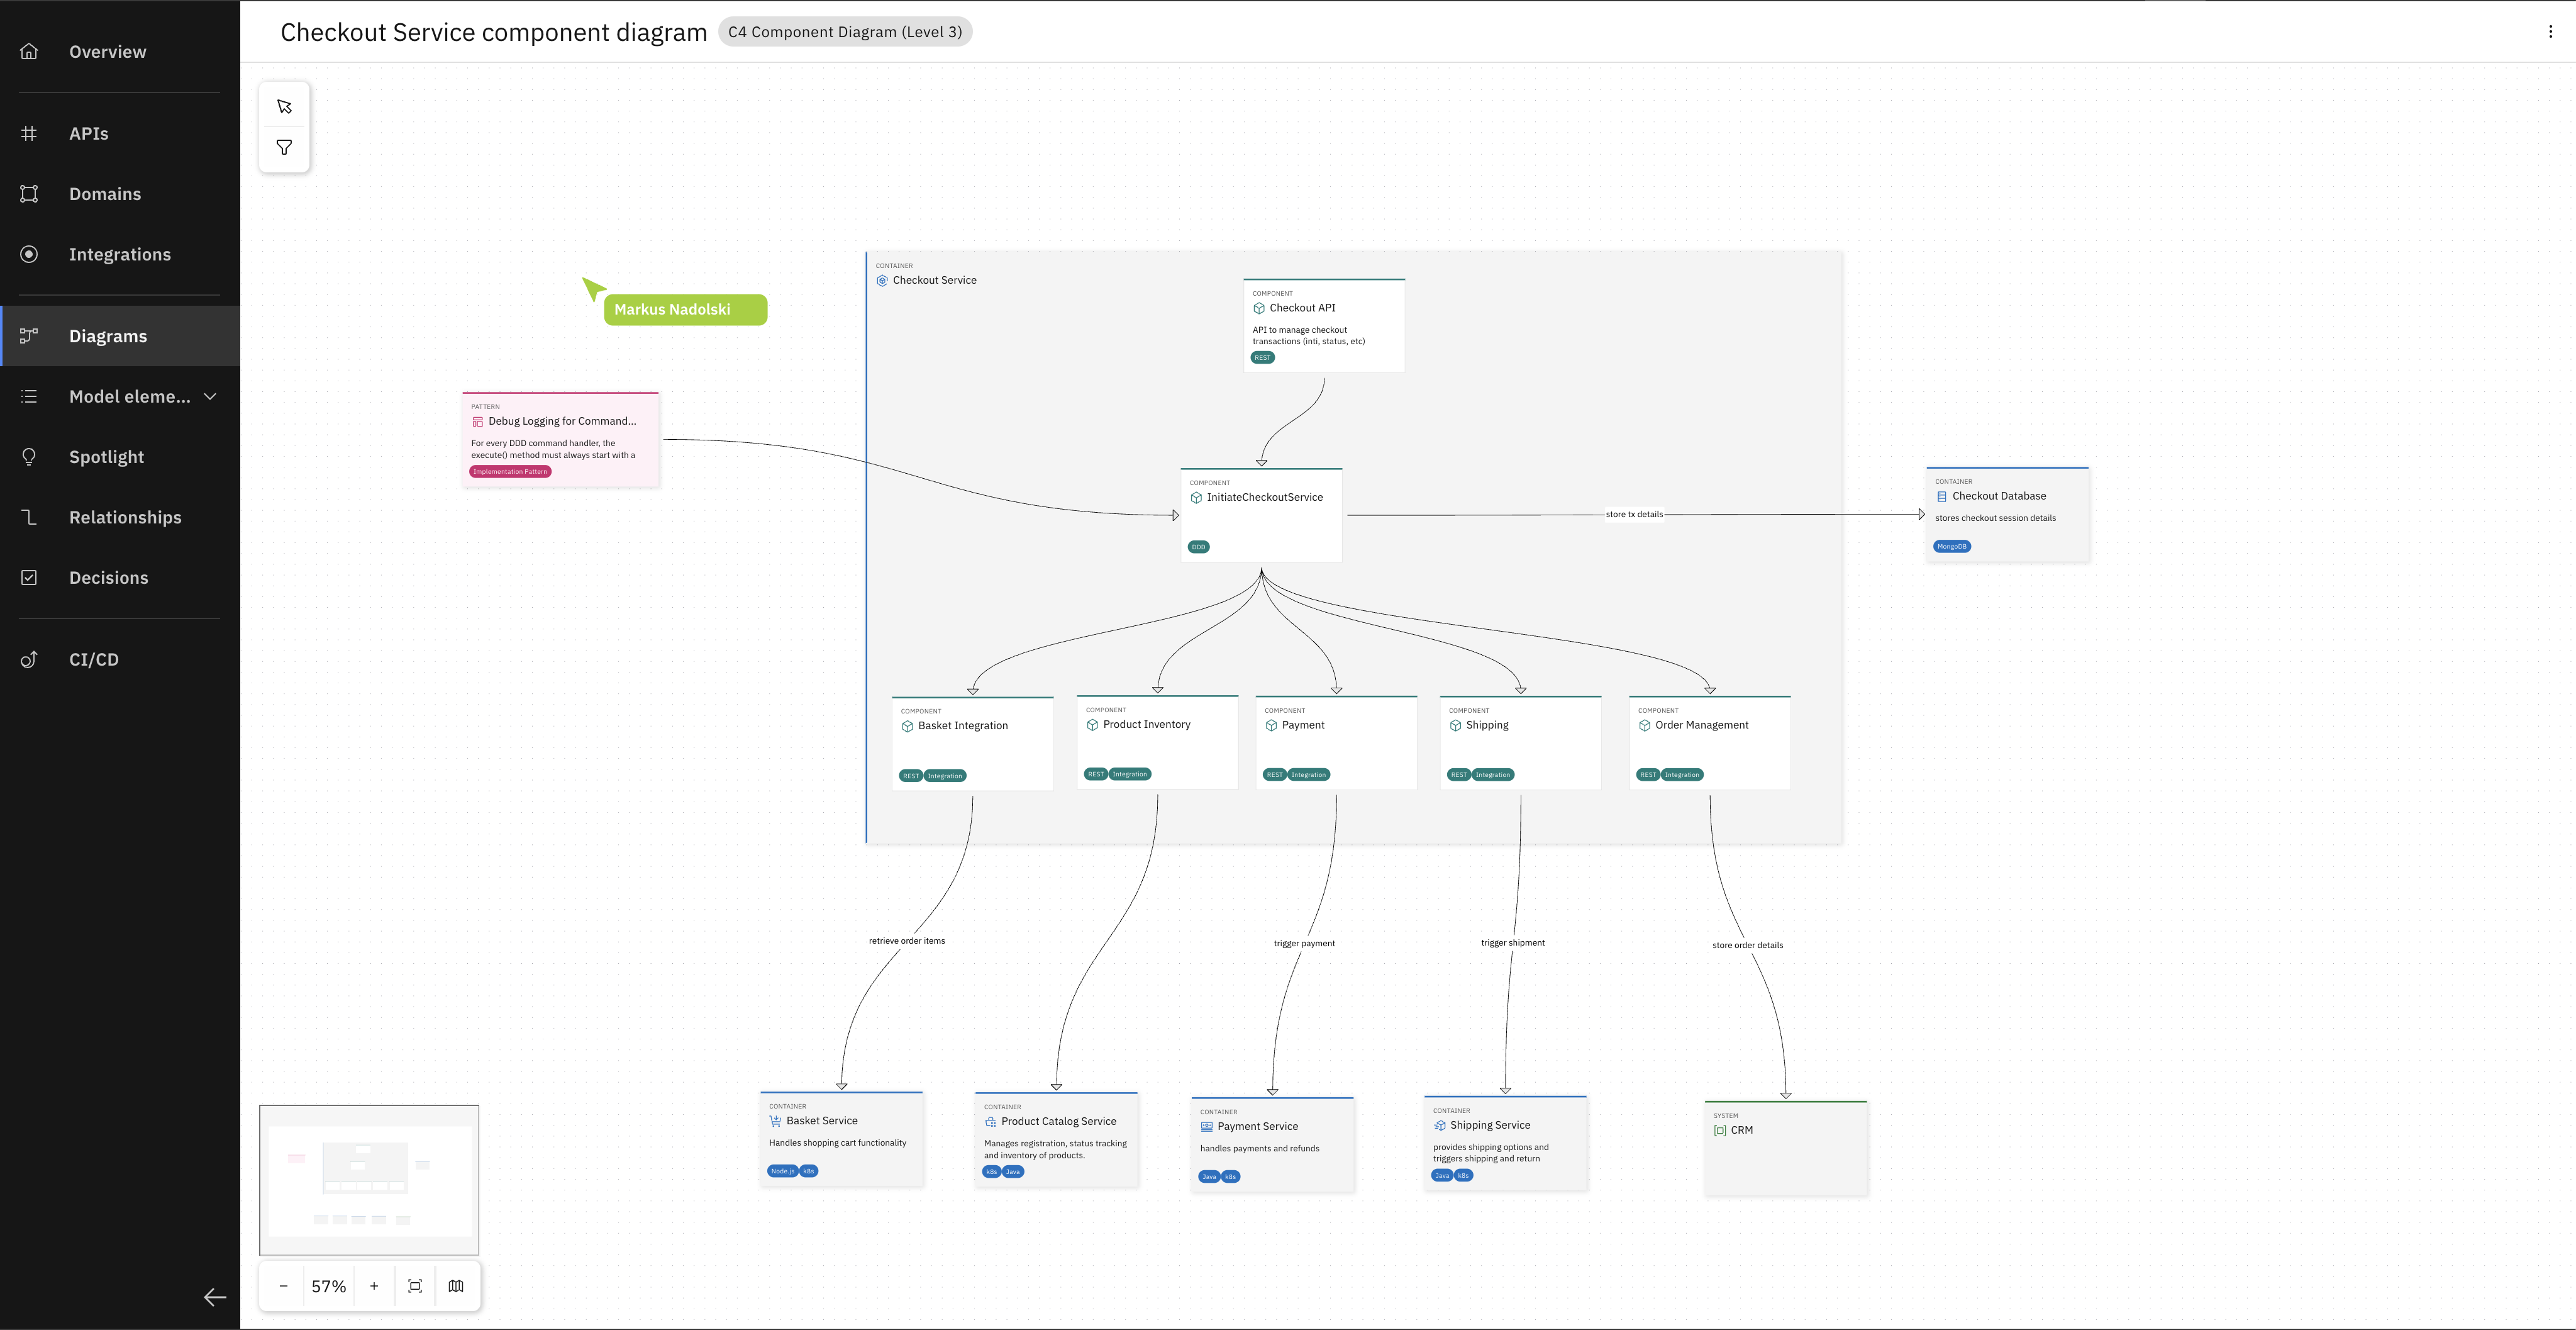
You can now explore the Component Diagram (Level 3 in the C4 model) of the Checkout Service.
In the RoboFlow system, the Payment Service handles all payment processing and talks to external payment providers.
Step 2 — Clone the Payment Service
We will start with the Payment Service as it exists in the codebase today. To give you the correct entry point for your trial environment, open the Payment Service in the Workbench.
Here you will find a link to the Gitlab repository where the service lives. We will have a closer look at the Solution Designer
later, but for now, just use the link in the "Git" footer to clone the no-src-design branch of the Payment Service to your local machine and open it in your IDE.
Here's how:
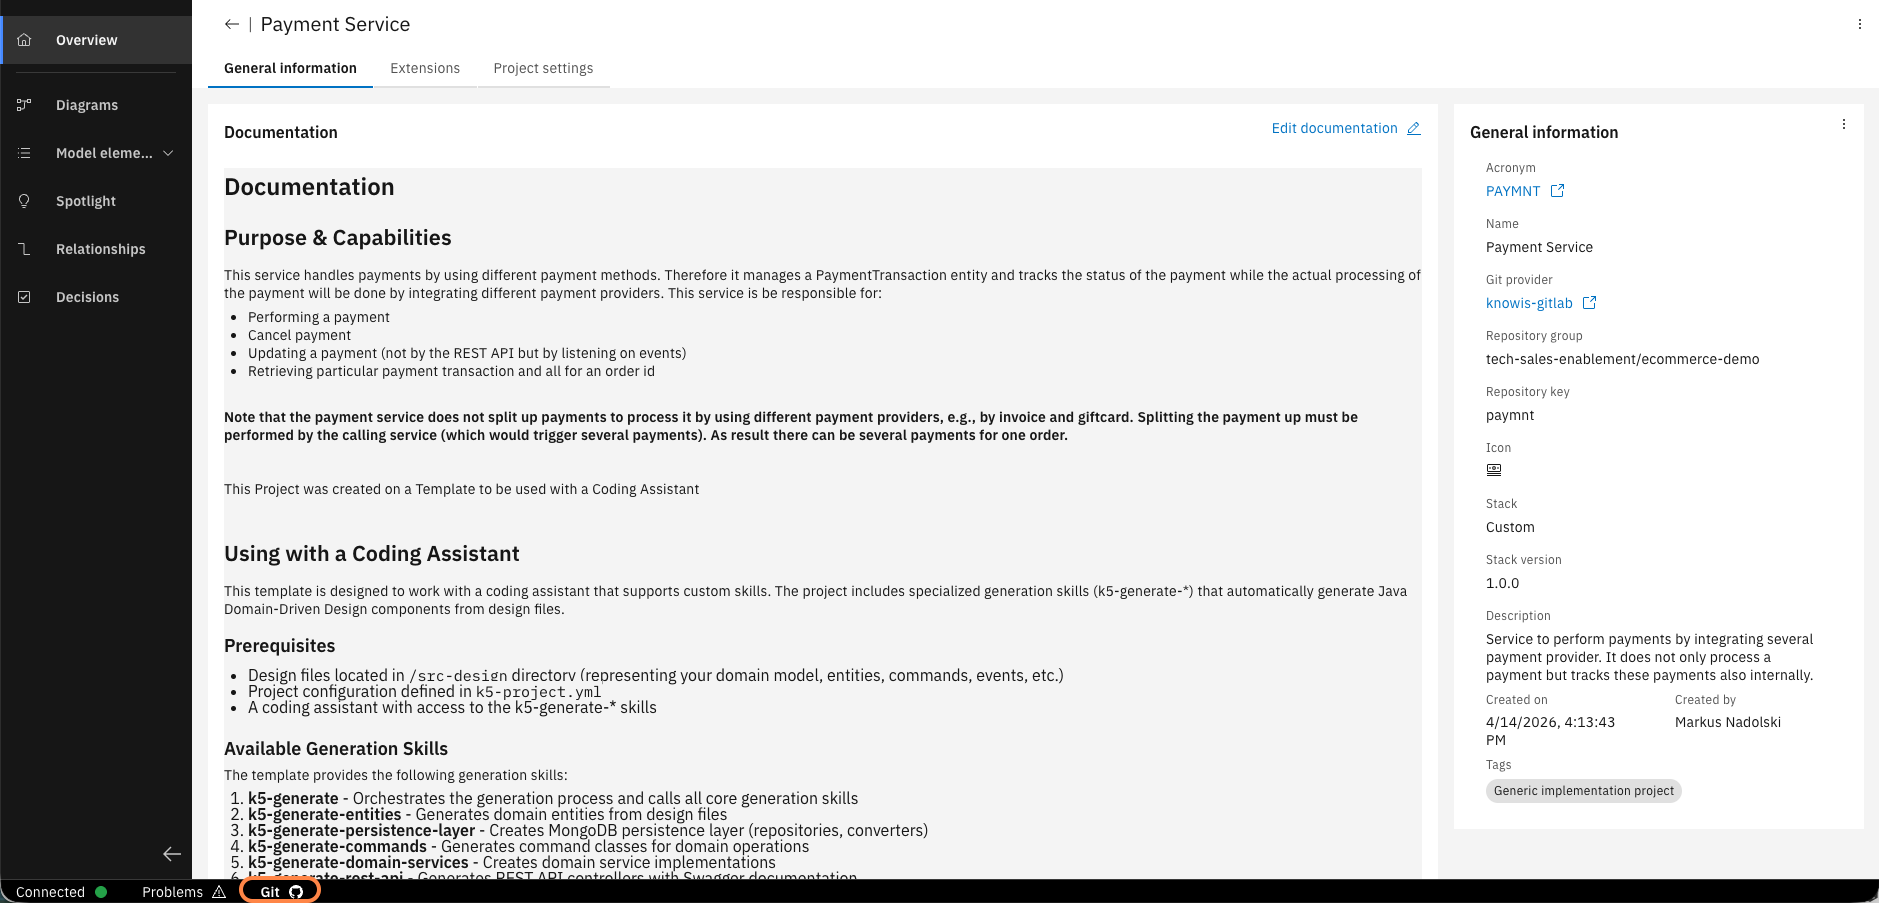
Open the Payment Service in the Solution Designer and retrieve the link of the Git repository of your trial instance in the "Git" footer.
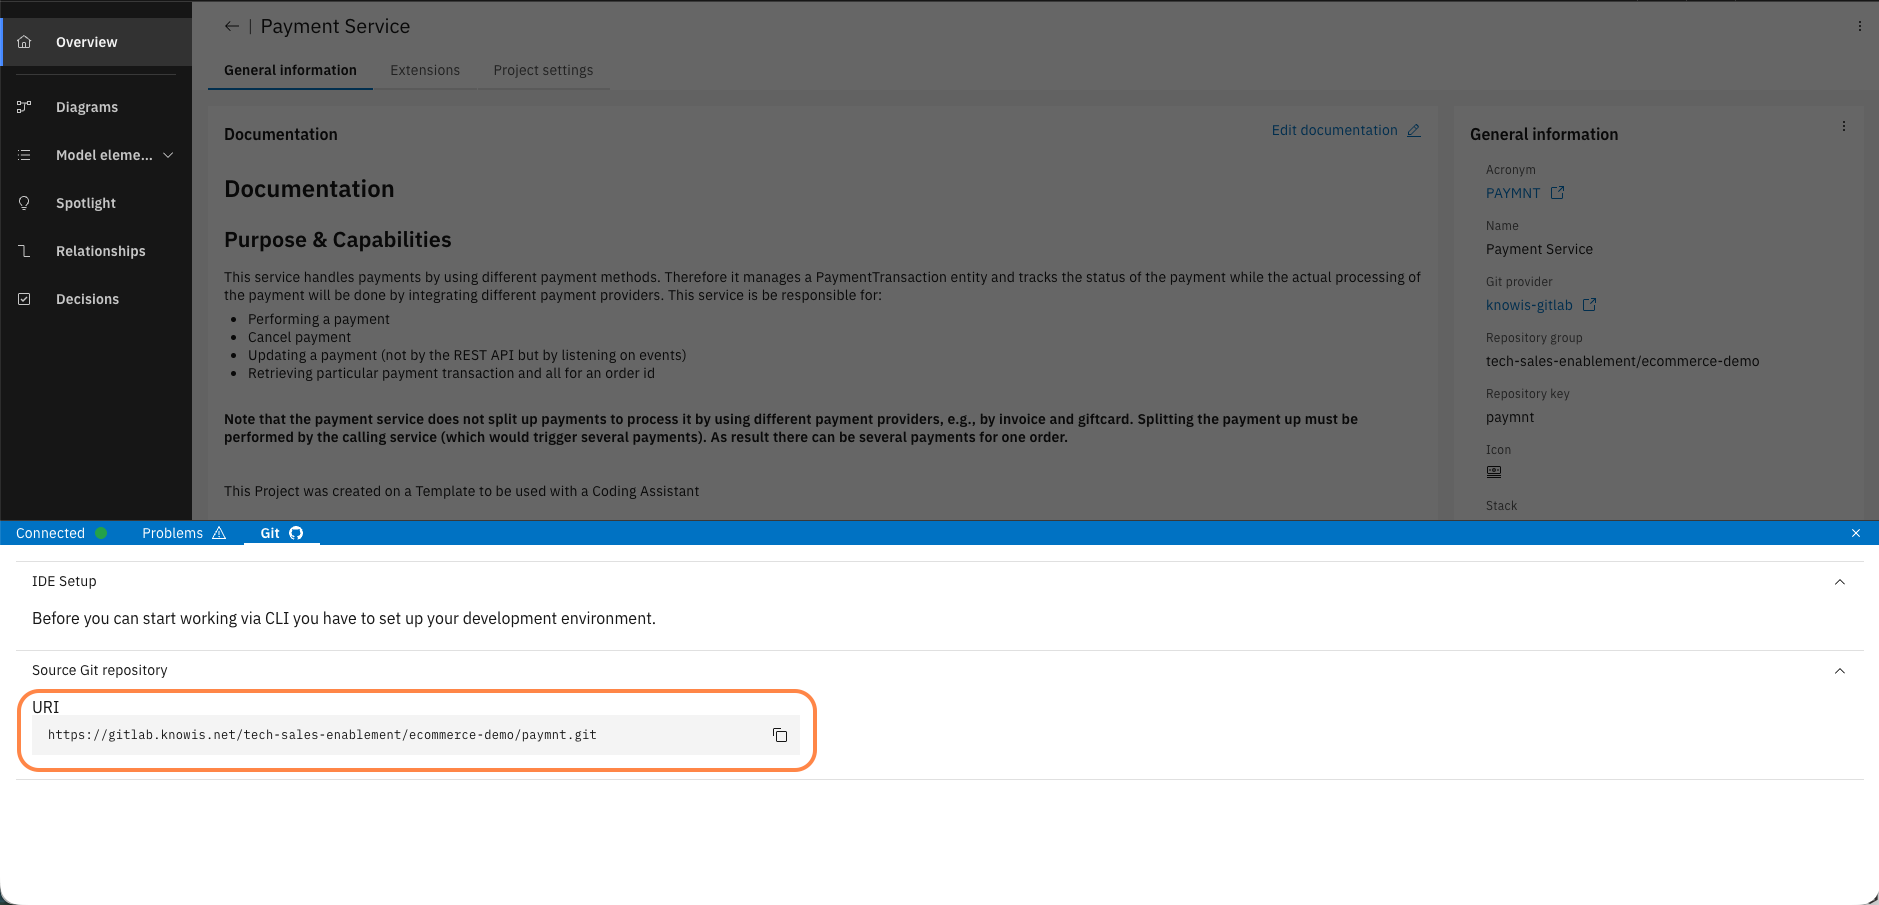
Copy the Git URI from the "Git" footer.
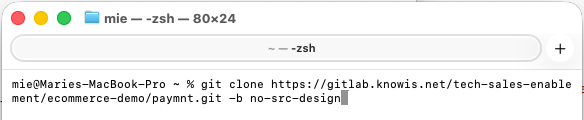
Clone the branch no-src-design to your local machine: git clone <your-git-url> -b no-src-design
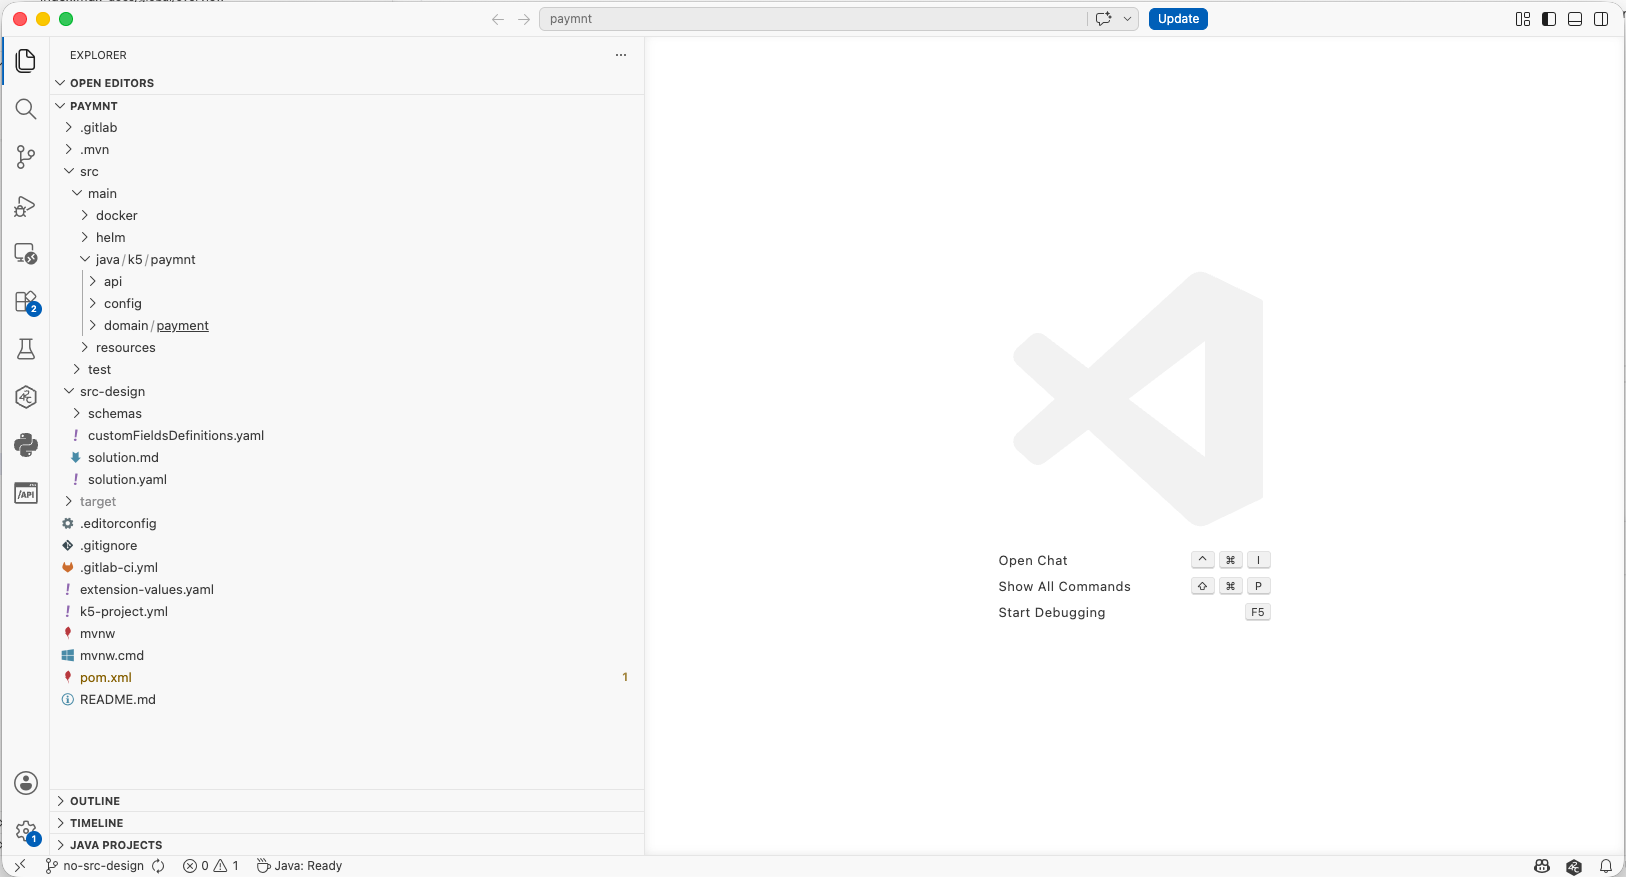
Open the project in your IDE.
Make sure you are on the no-src-design branch by adding -b no-src-design when you clone the repository. This branch does not contain design files and is what your coding assistant will work from in the first part of this trial.
Step 3 — Orient yourself in the code
Before you implement anything, spend a few minutes exploring what's already there. This is the codebase as it exists today.
The payment service follows Domain-Driven Design principles with clear separation of concerns.
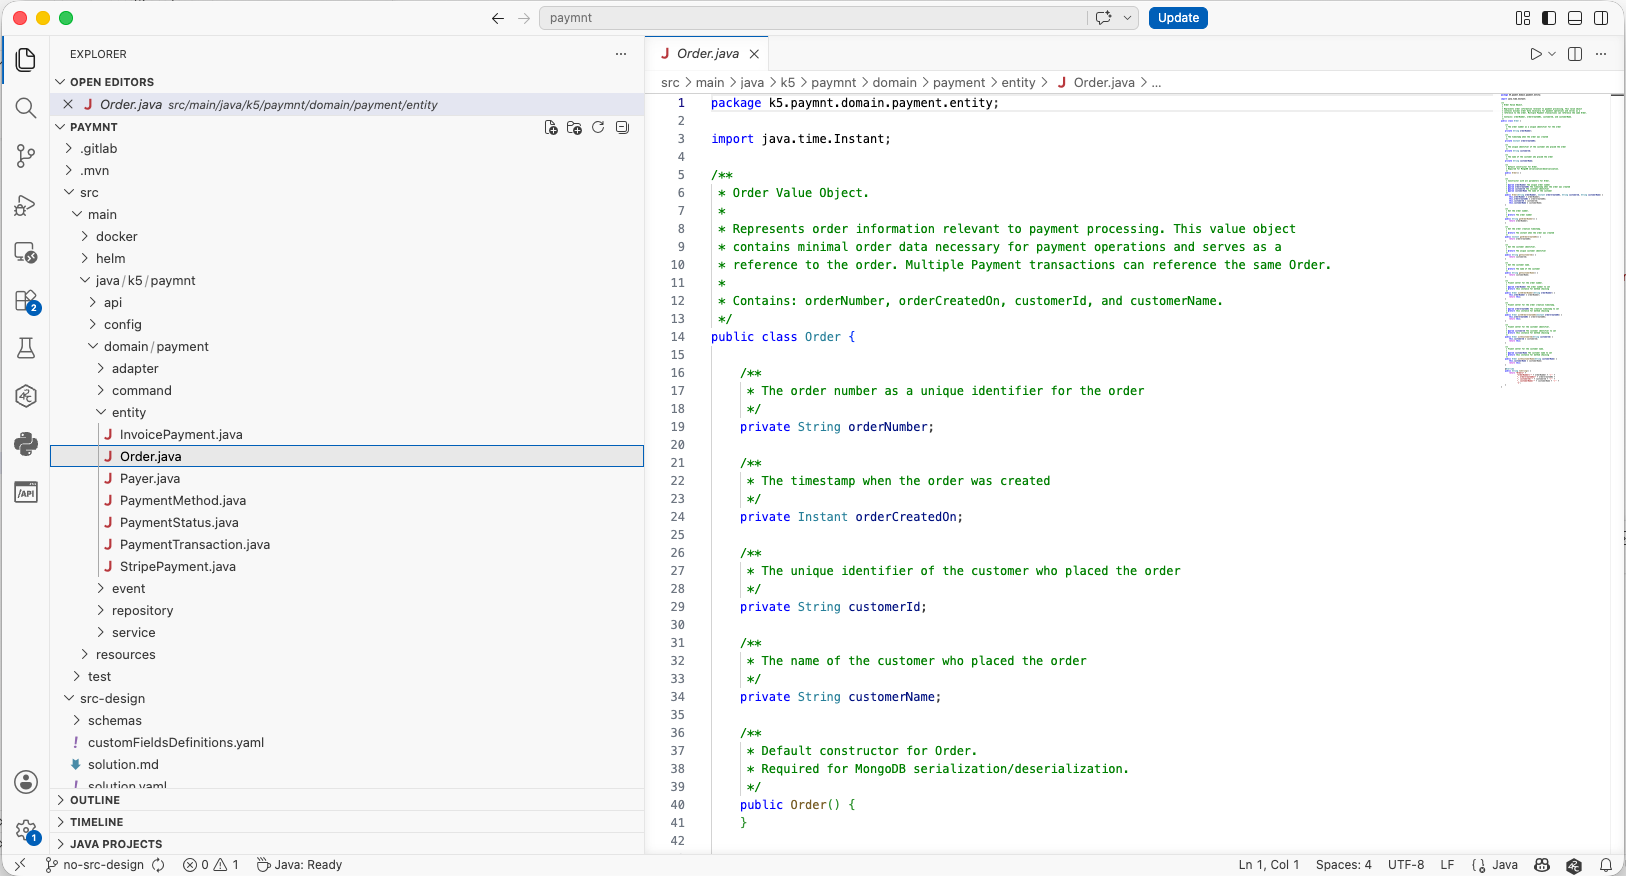
All payment logic lives under /domain/payment/ with dedicated packages for Entities, where core domain objects like Order live ...
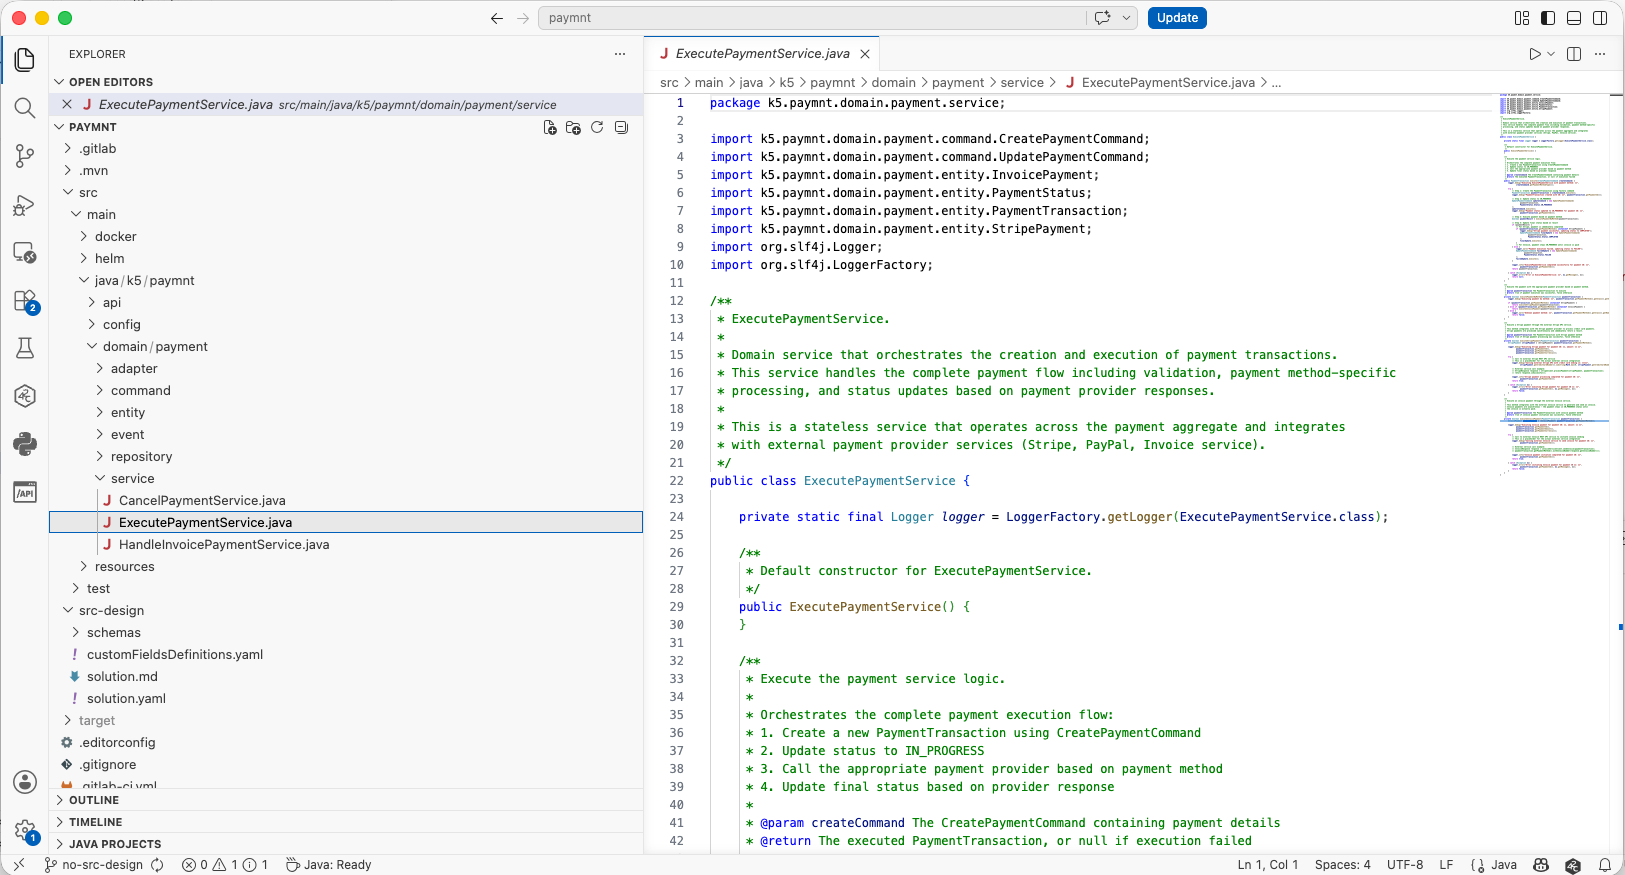
for Services that implement the business logic, e.g. ExecutePaymentService that integrates external payment providers like Stripe or internal like Payment via Invoice ...
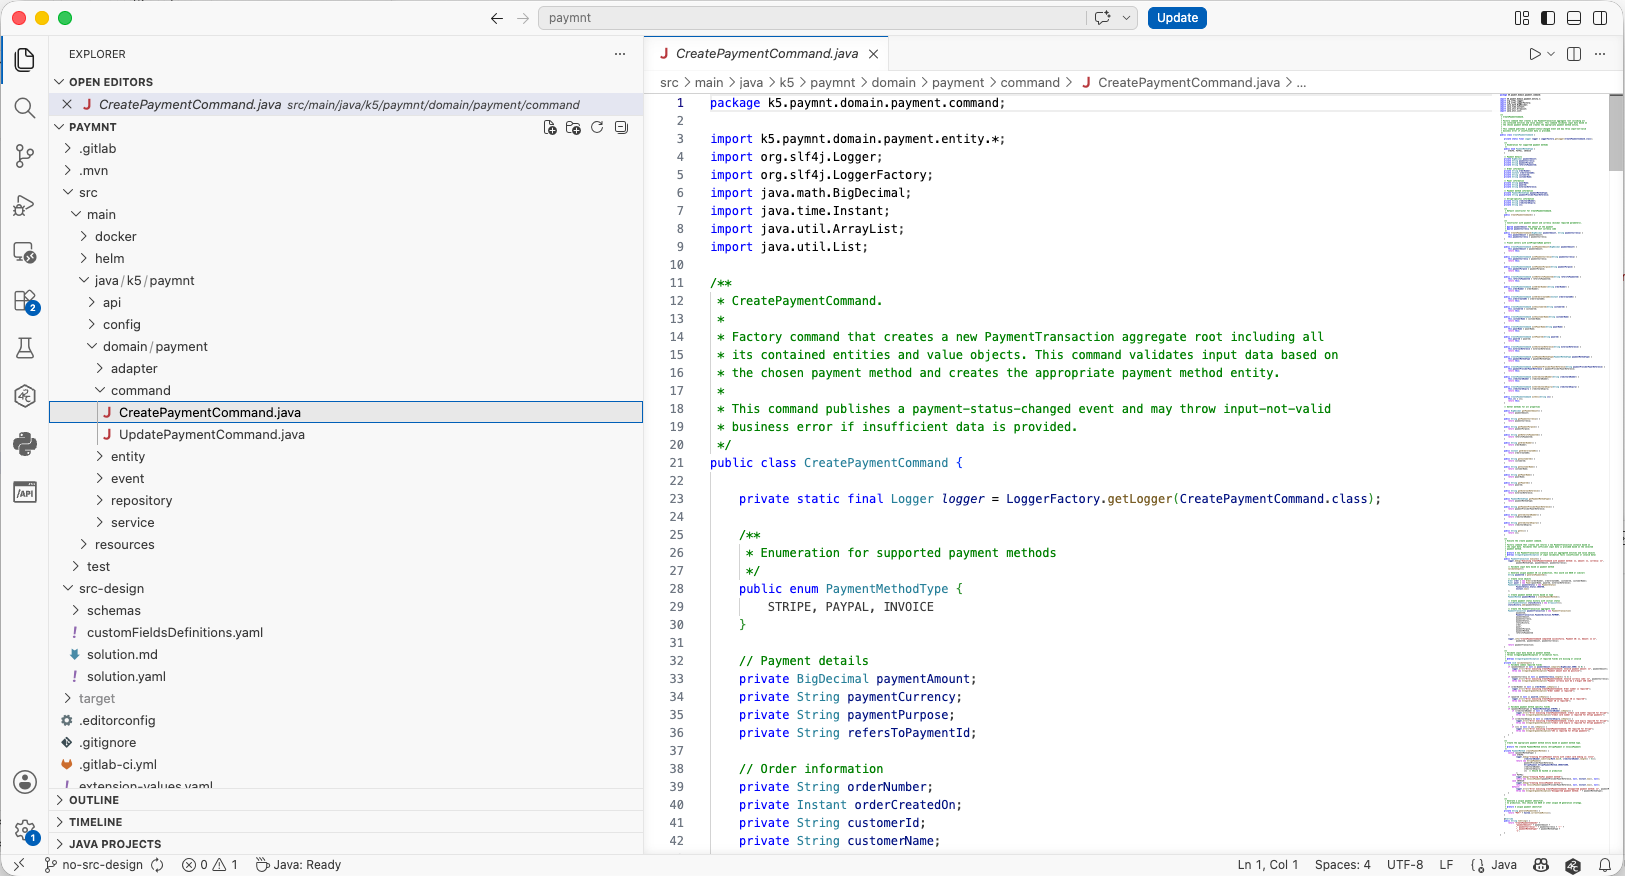
for Commands which define Factory and operation patterns for creating and updating payments ...
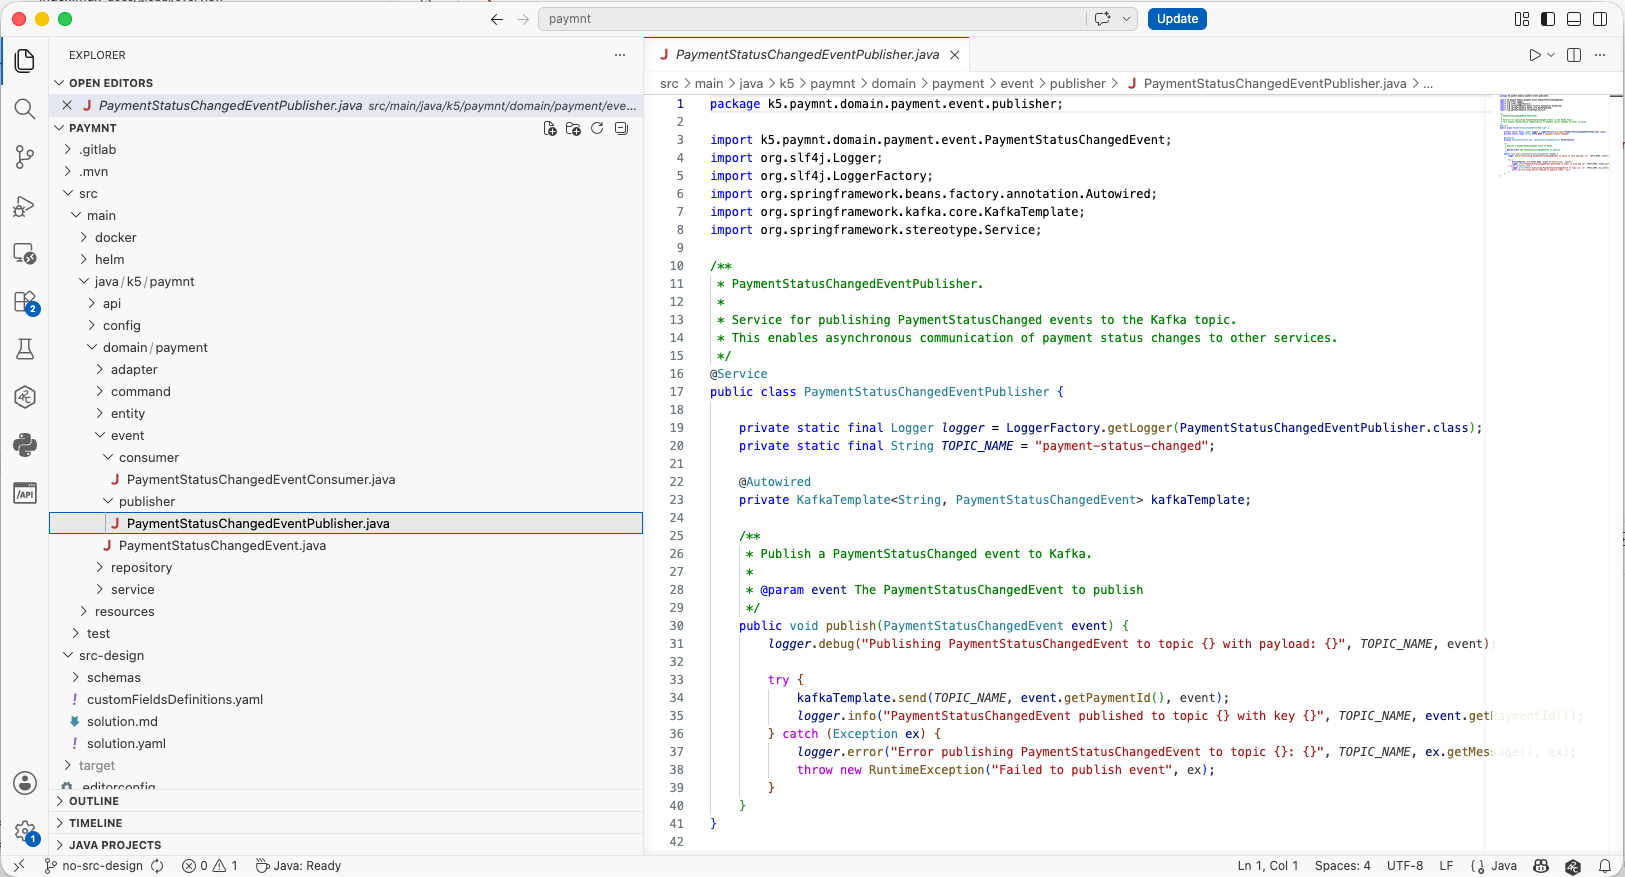
for Events that are emitted by the service and consumed by other services in the system ...
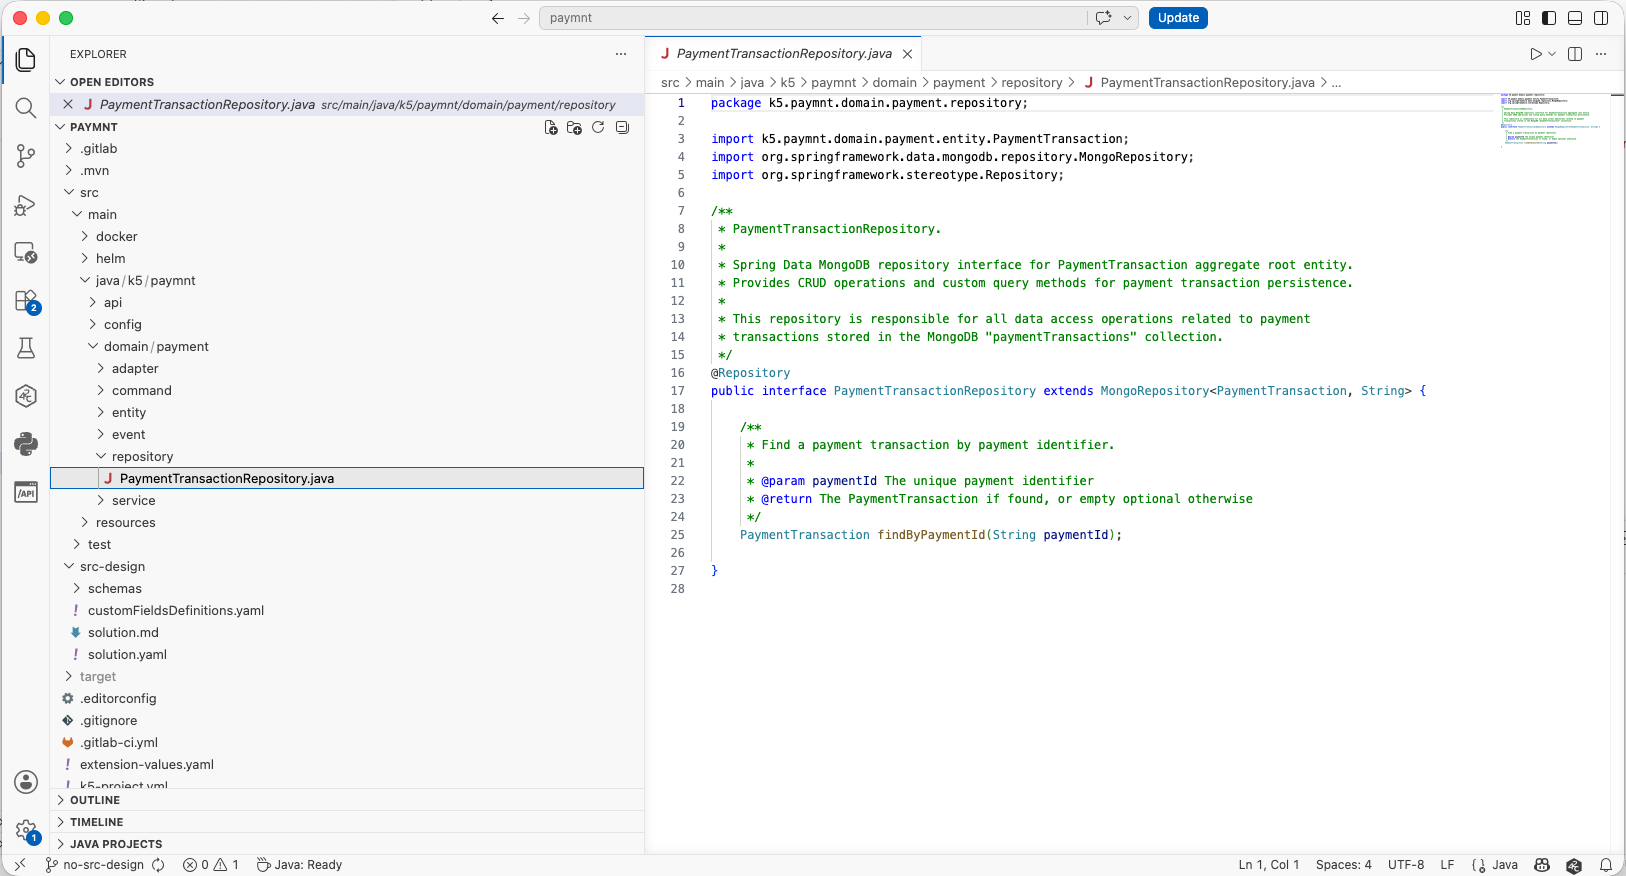
and for Repositories that handle data persistence and retrieval.
Notice how payment execution is centralised in ExecutePaymentService. Each provider has its own private method,
and executePaymentByMethod routes to the right one based on the payment type. This is the structure you're about to extend.
Step 4 — Meet your new requirement
A new ticket arrives:
"Add gift card as a supported payment option."
Take a moment to think about how you would approach this. You have seen the existing implementation and you have the ticket. That is all the context you have.
Step 5 — Prompt your coding assistant
Open your coding assistant and send the ticket text as your prompt. Let it generate an implementation.
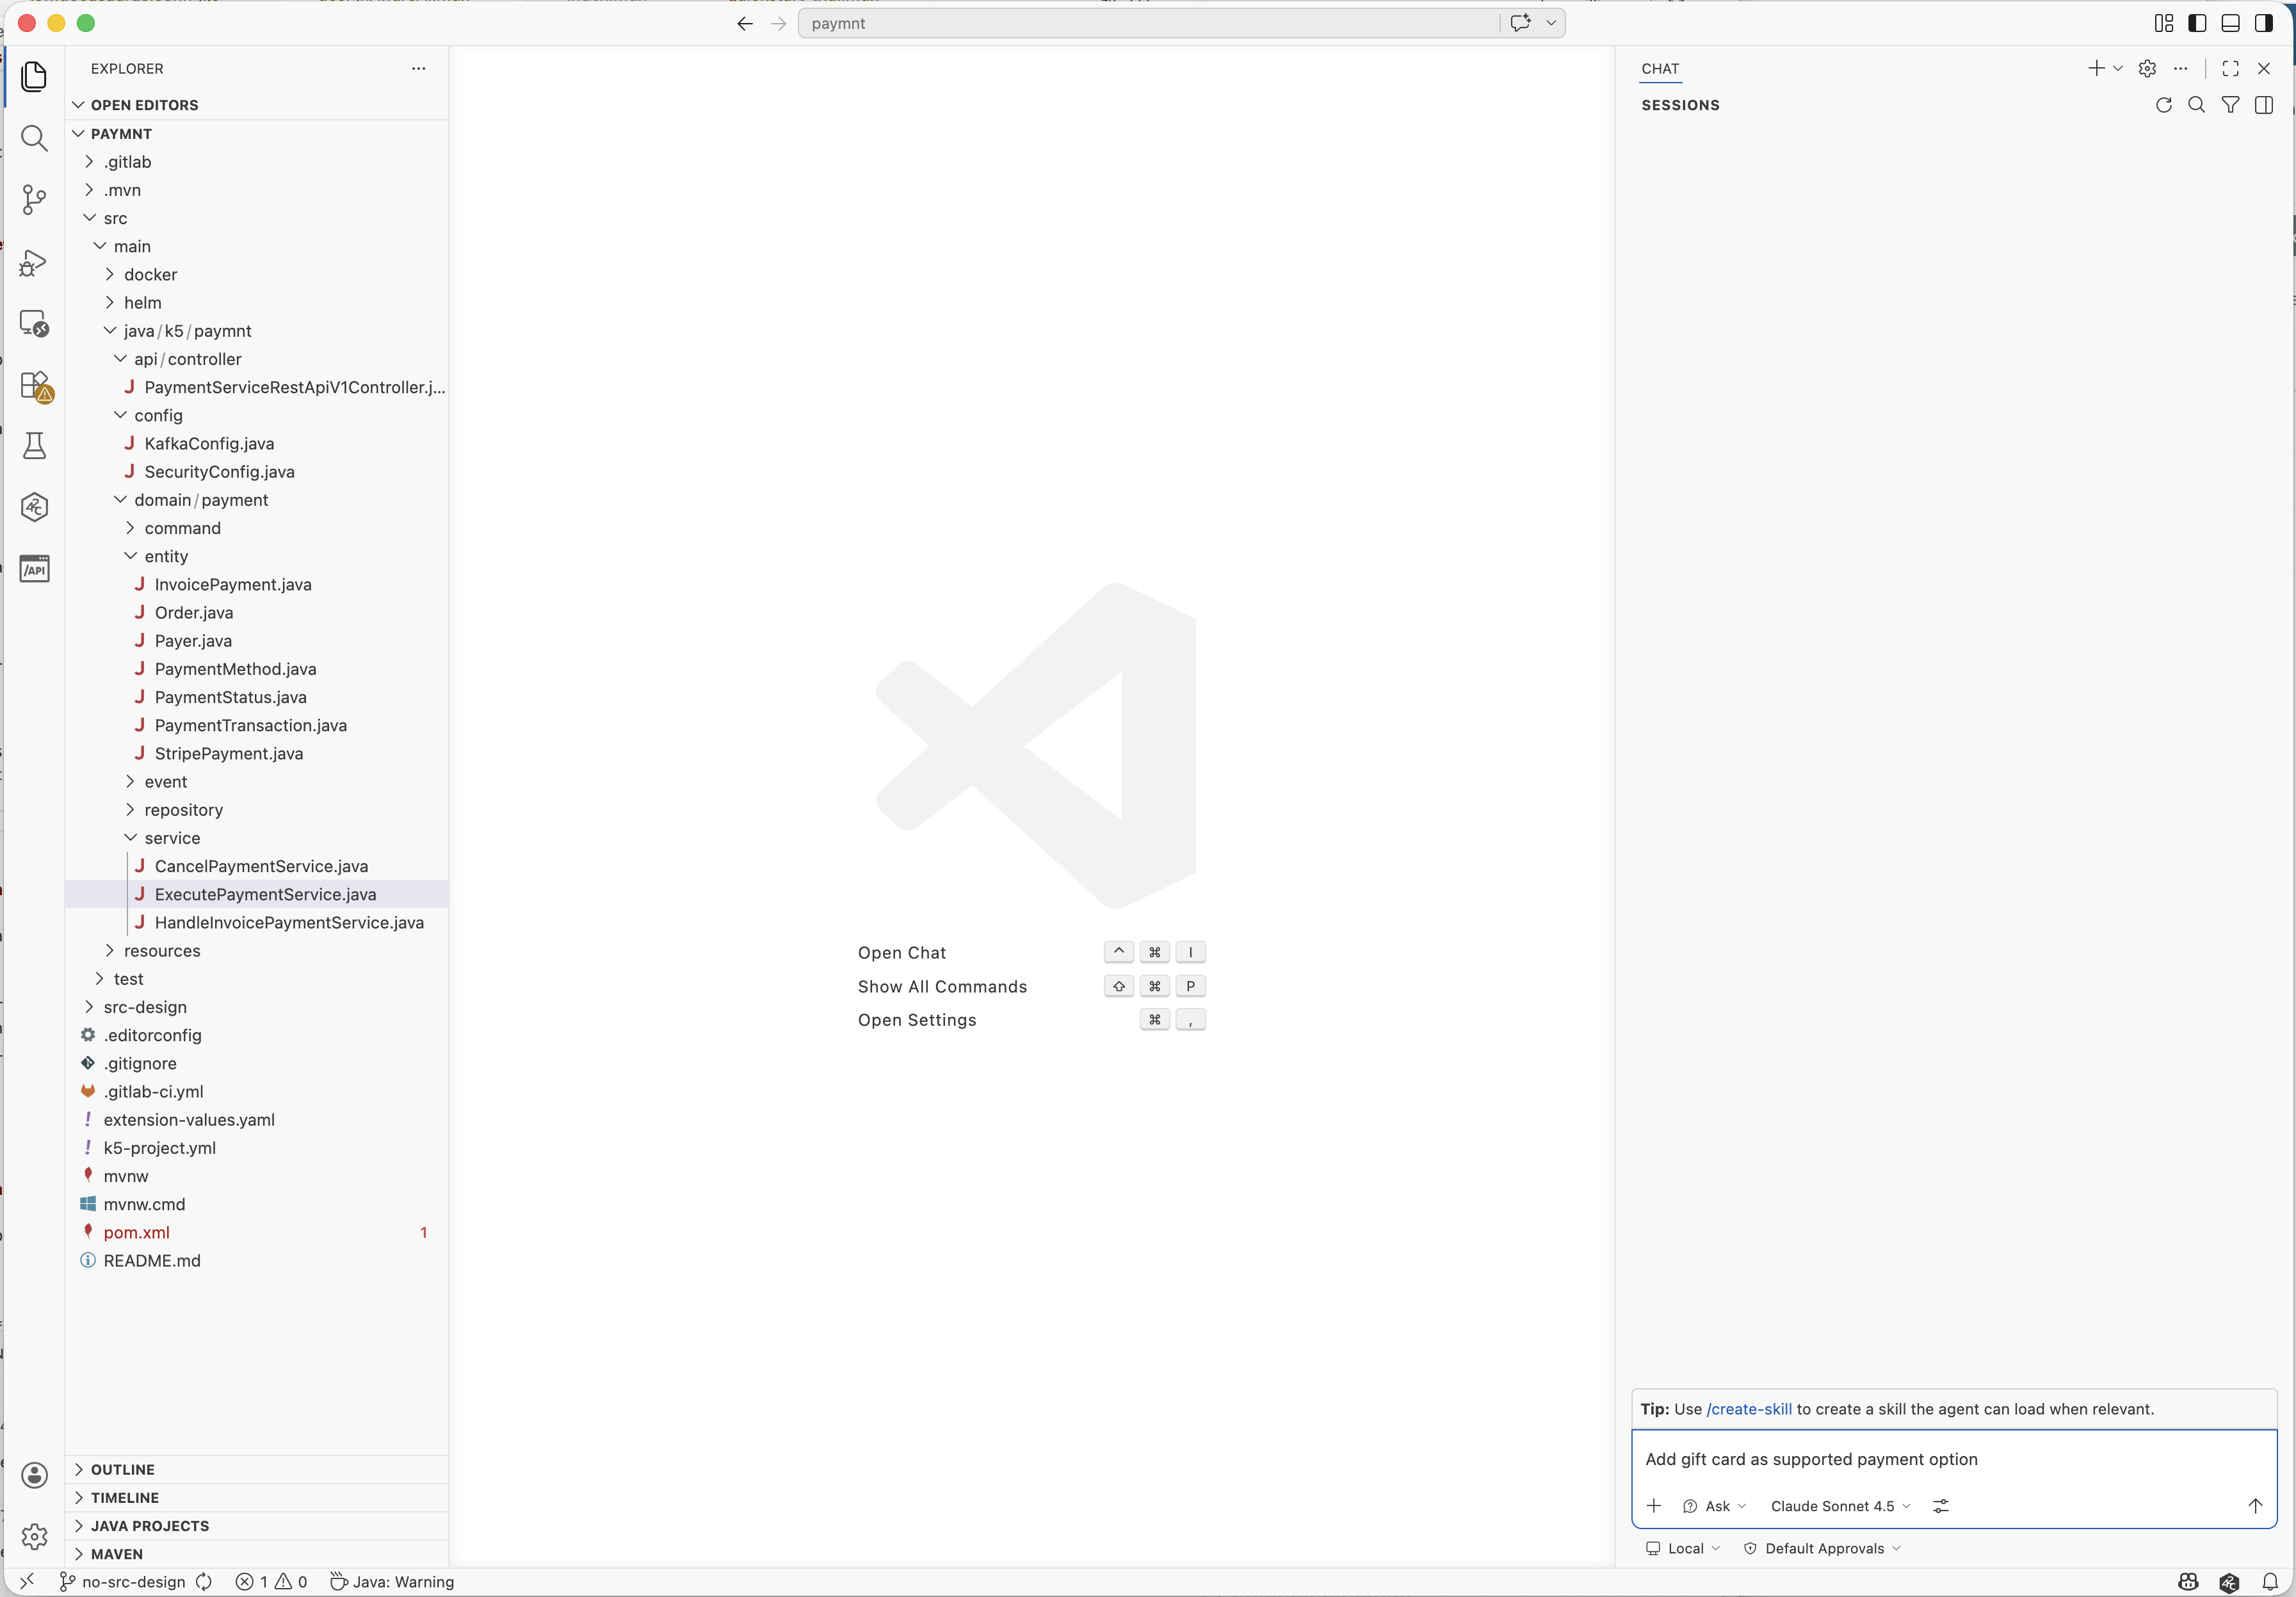
Use the context you have and prompt "Add gift card as a supported payment option." to your coding assistant.
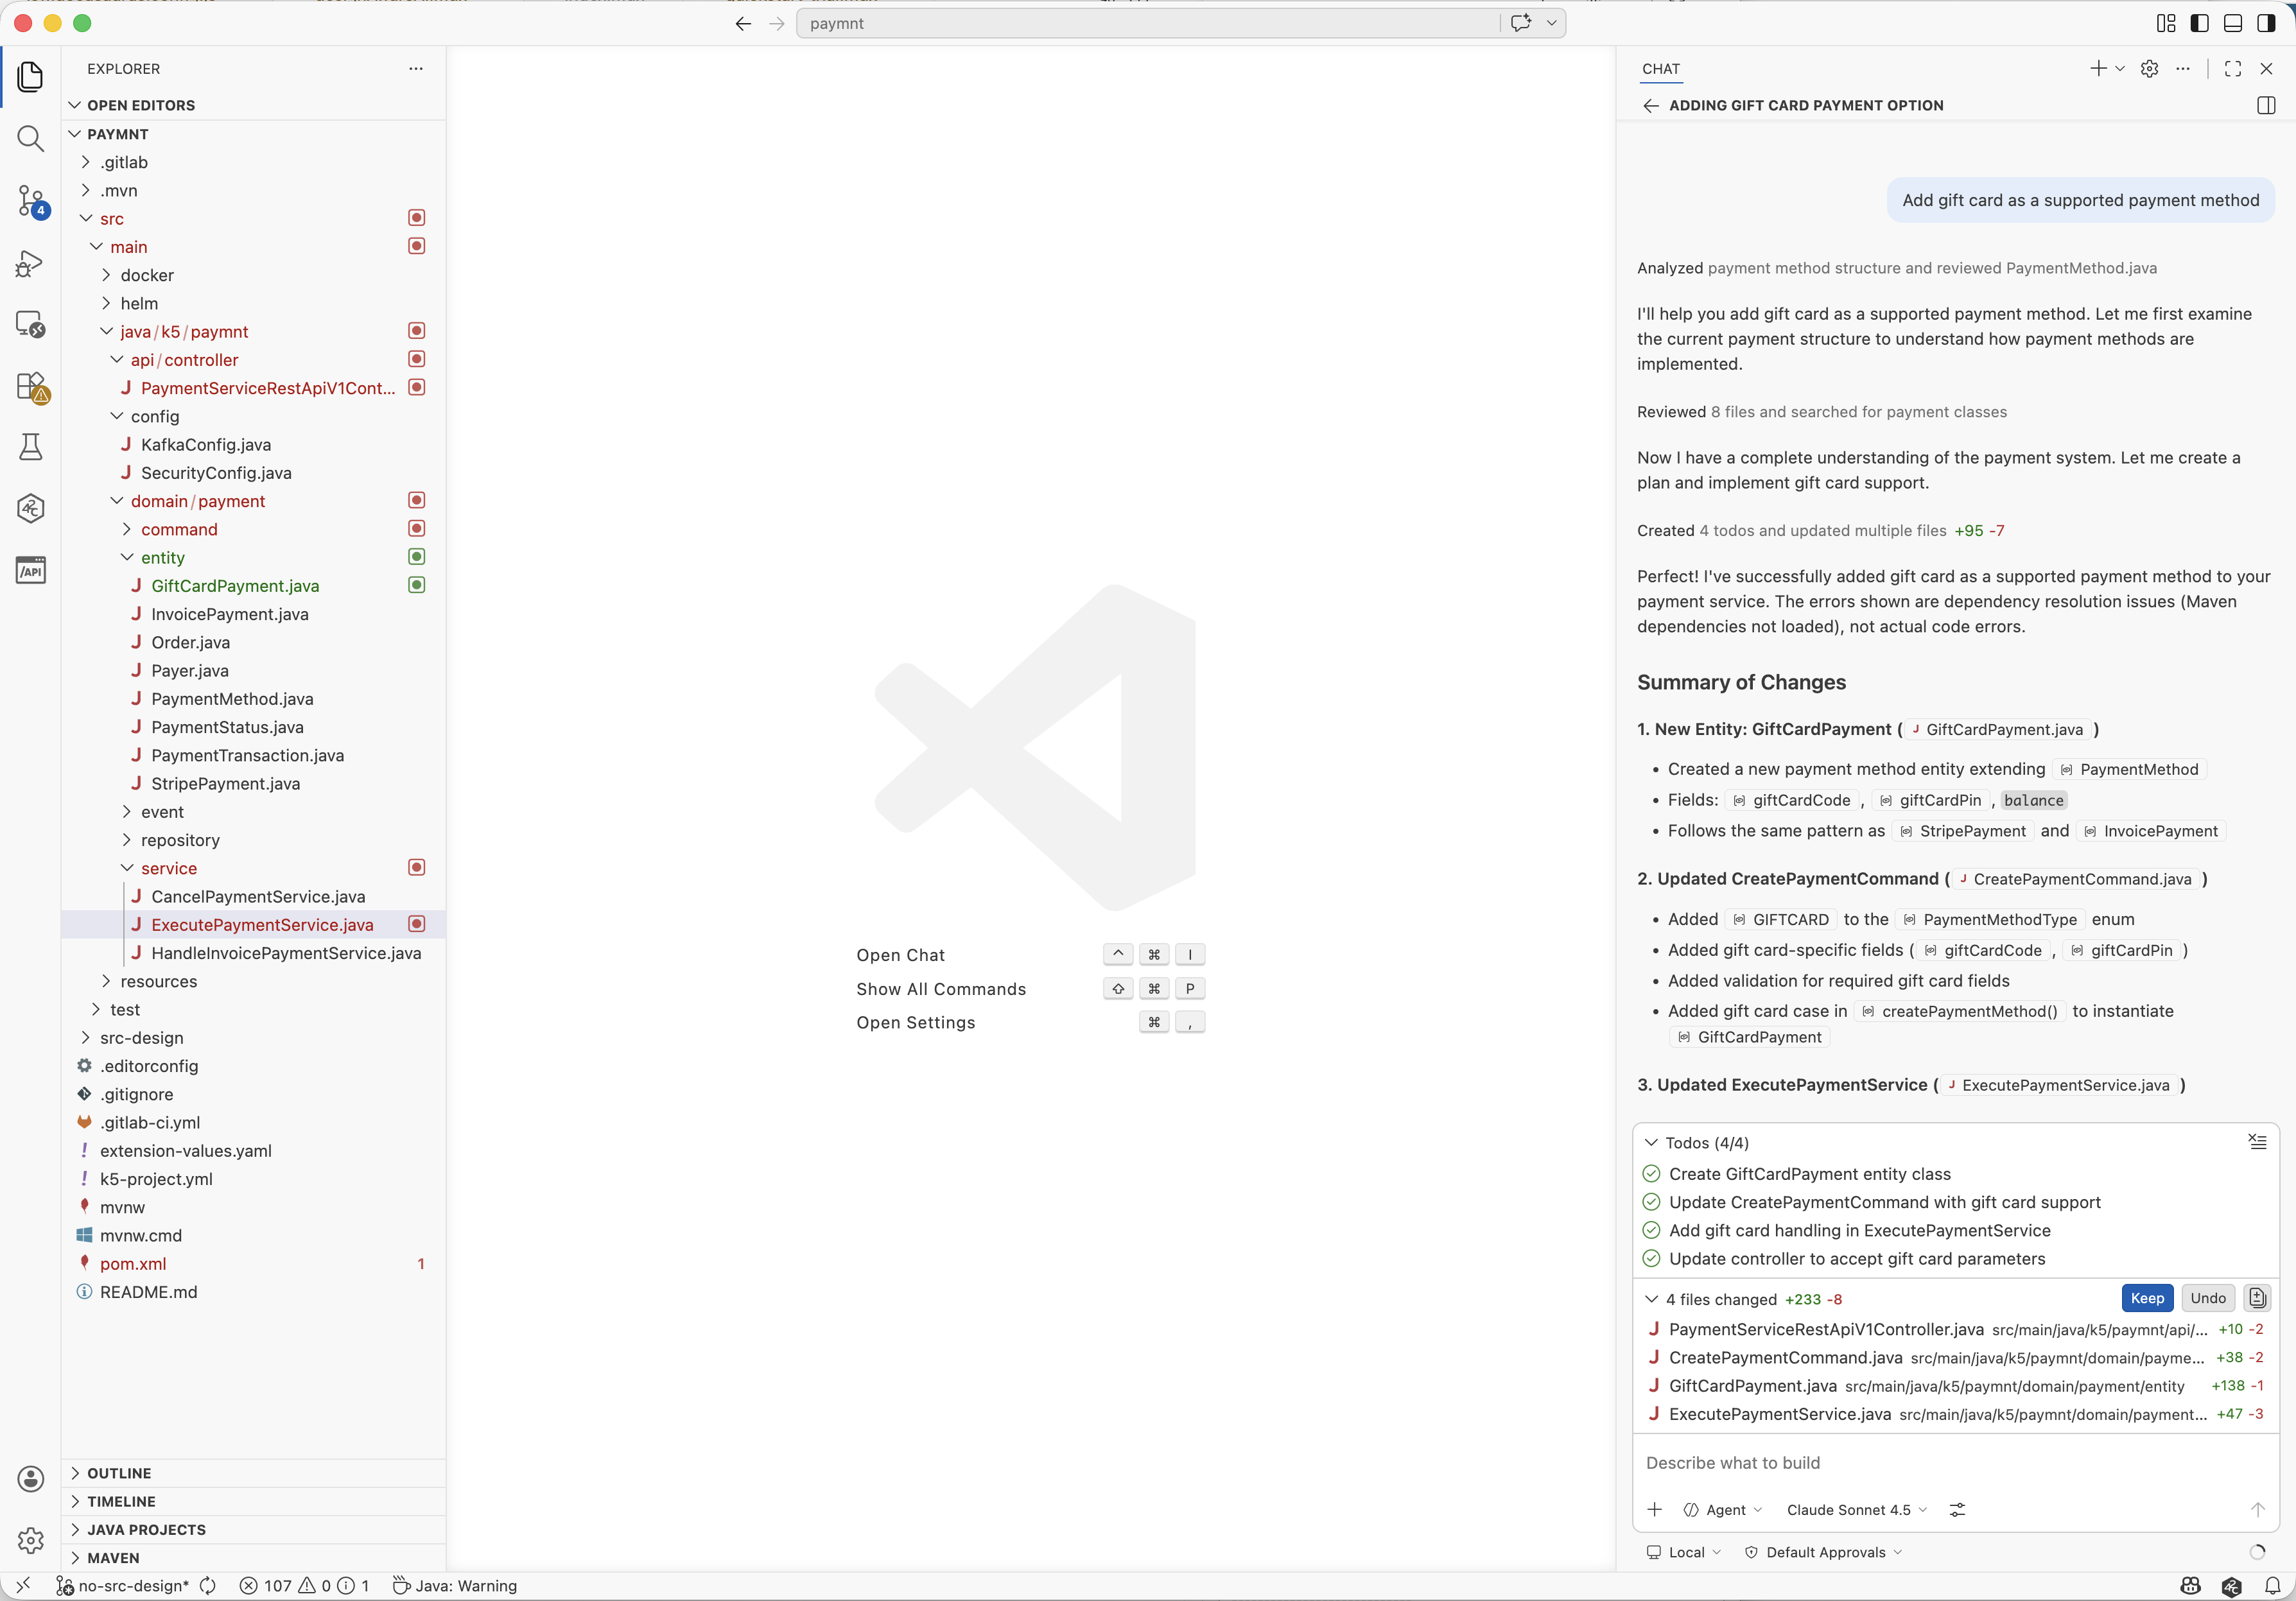
Your coding assistant creates a new GiftcardPayment entity, a command, a domain service, and a new controller endpoint to handle gift card payments. It also adds the necessary logic to the ExecutePaymentService to process gift card payments.
Take a look at what was generated. It compiles and looks reasonable. The gift card logic is implemented directly in the Payment Service, following the pattern of the existing providers.
Is this what your architect intended? Is it consistent with how payment methods should be structured across the system? Without more context, there is no way to know — and neither does your coding assistant.
Step 6 — Switch to the branch containing the design
Now switch to the main branch of the same project. In Workbench, solution architecture is defined and described in the Solution Designer using our
Open Modeling Language (OML).
These models are connected to coding assistants through Project Baselines,
which provide reusable generation skills, commands, and coding policies that help the assistant interpret model context consistently during code generation.
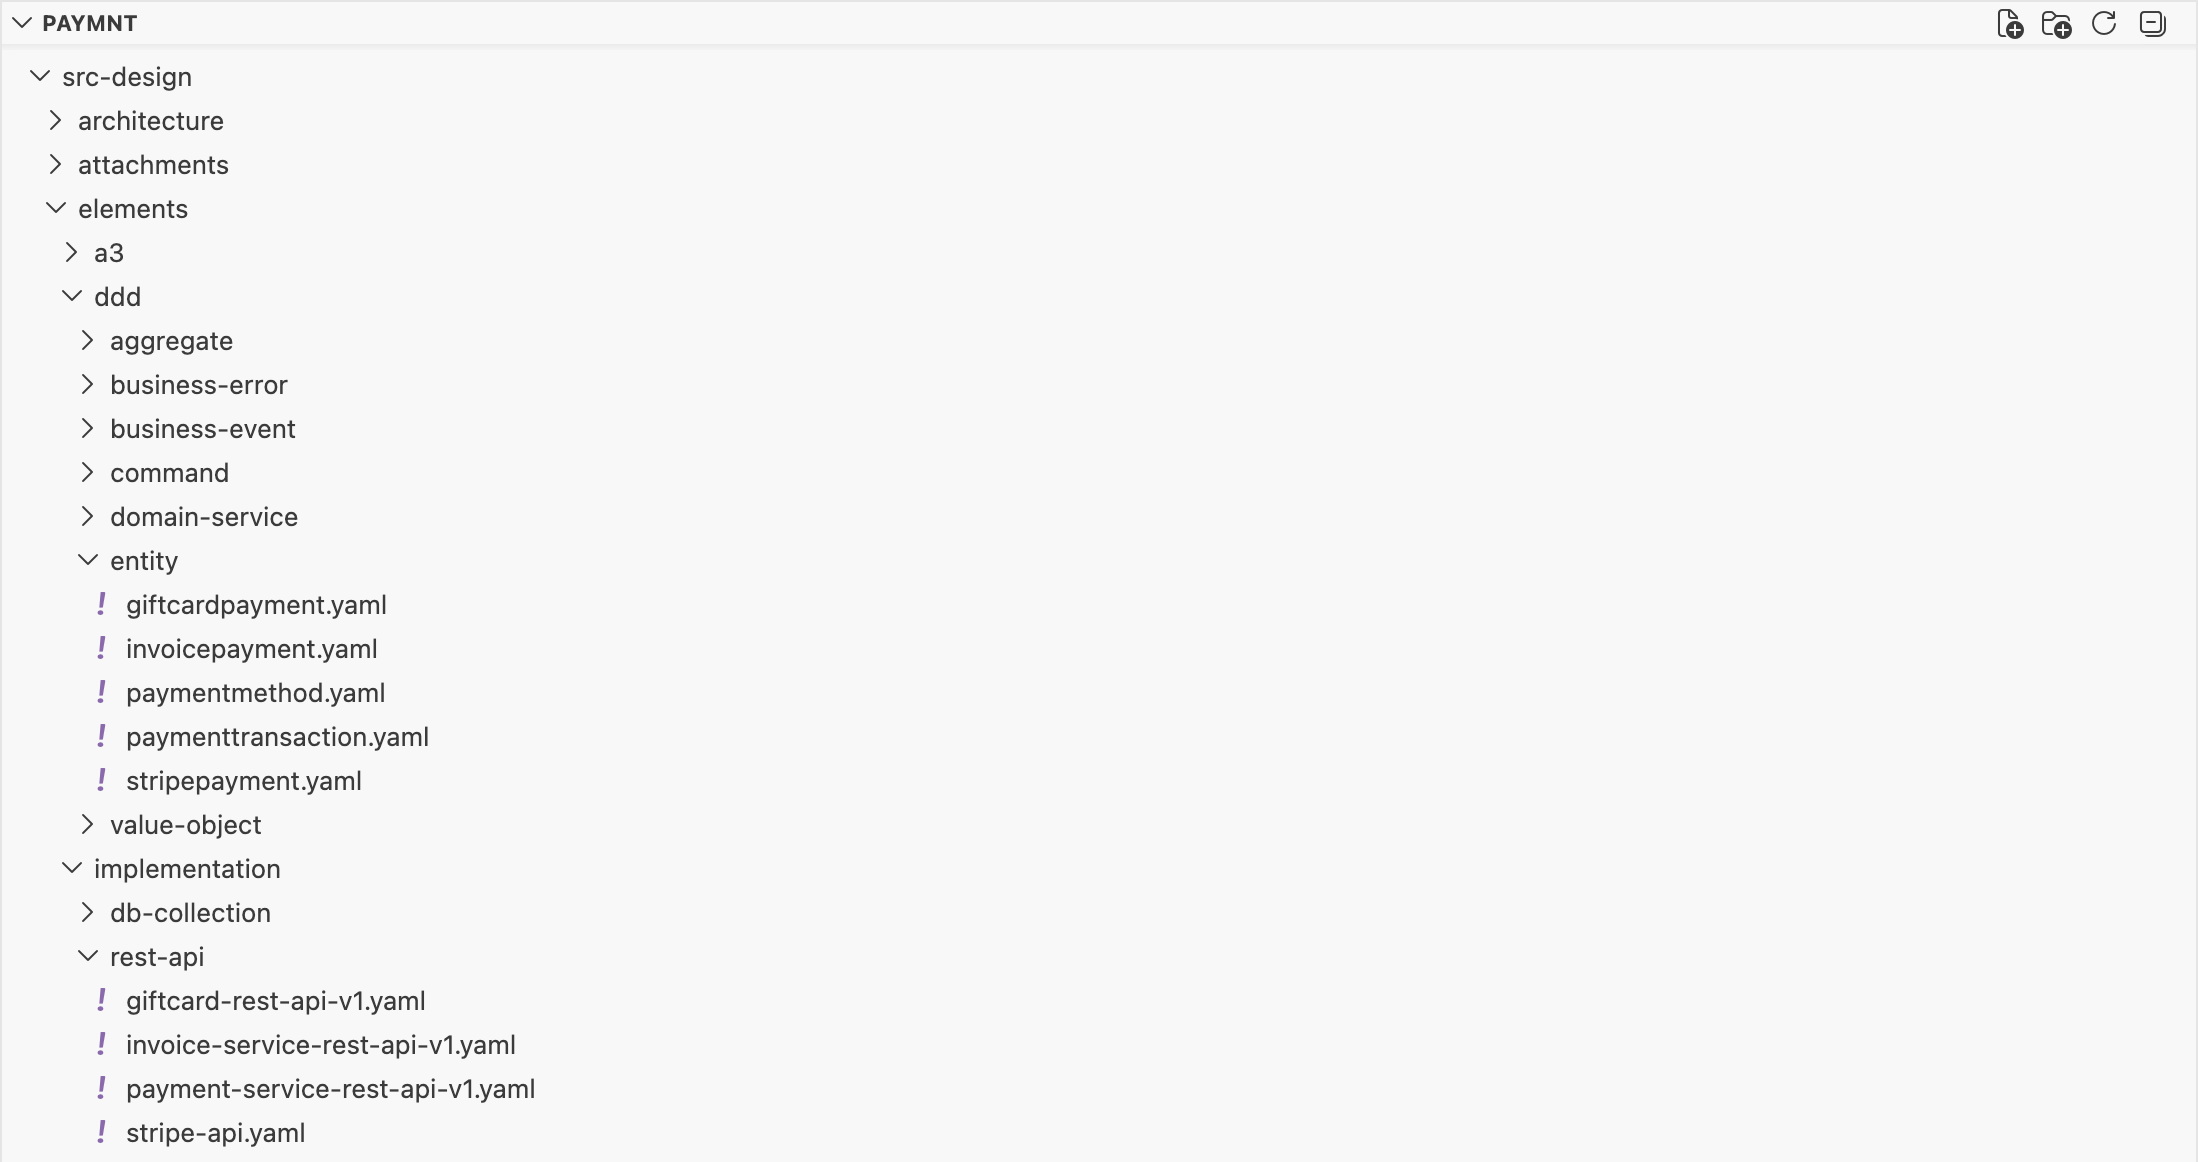
In src-design you find the design files for the Payment Service. These files are representations of model elements created in our Solution Designer. They contain structured information about the specification of the service.
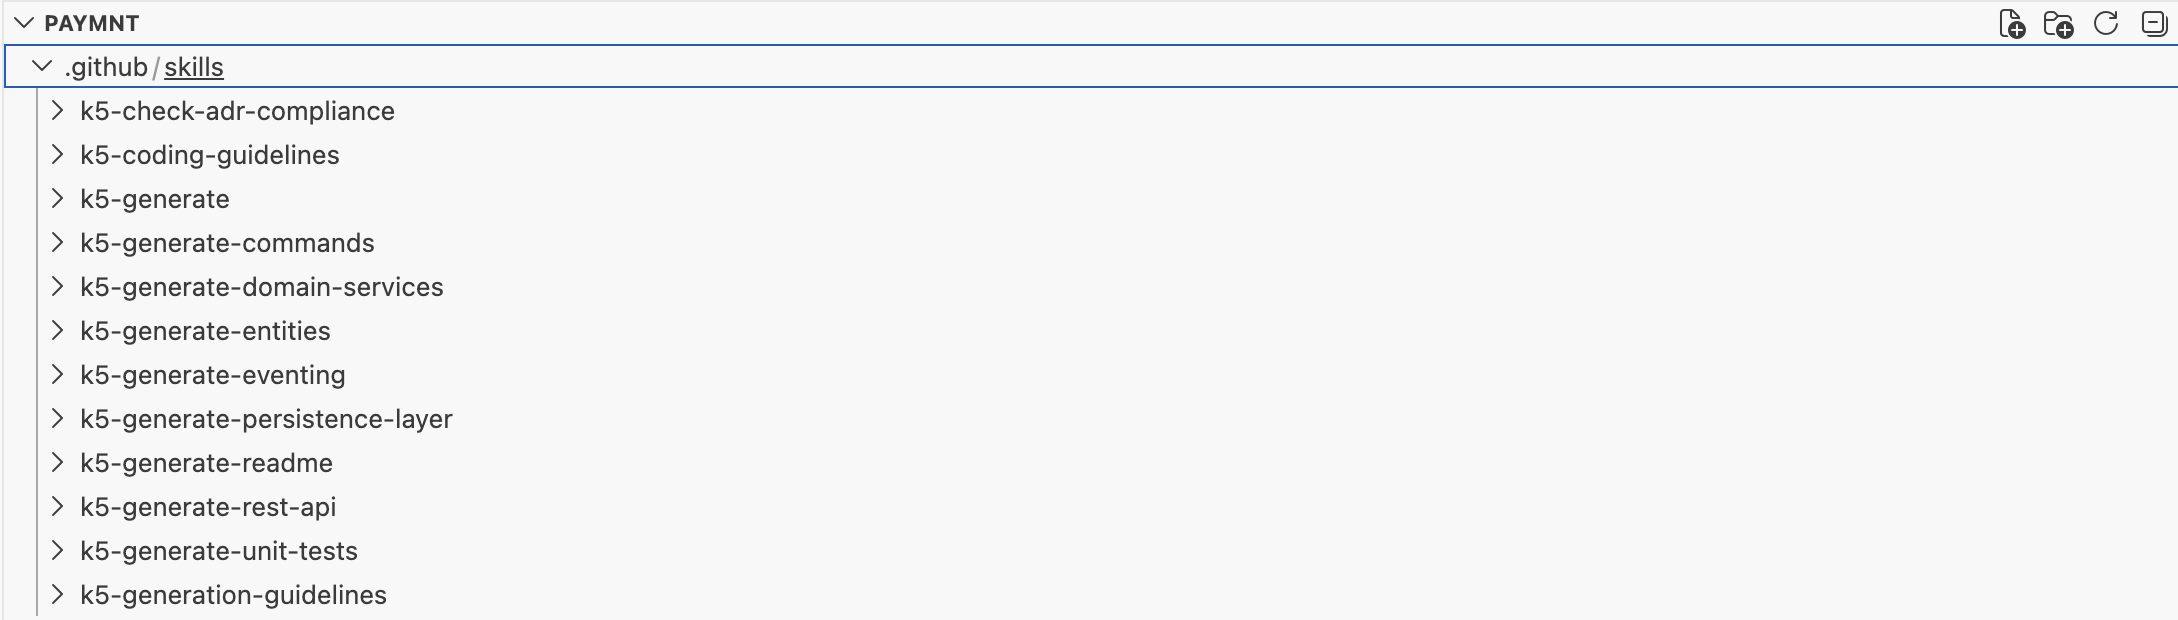
Through our Project Baselines, your coding assistant has access to predefined skills, commands, and other resources that guide its code generation behavior. To access those, we add the k5-generate prefix to our prompts.
You do not need to read or understand these files in detail. Just open your coding assistant and send the exact same prompt as before just adding the k5-generate prefix.
Step 7 — Prompt again
We still have the same requirement, except now we add the k5-generate prefix to invoke the Workbench-provided generation skills that enrich the simple
prompt with structured design and implementation policies:
k5-generate Add gift card as a supported payment option.
Send it.
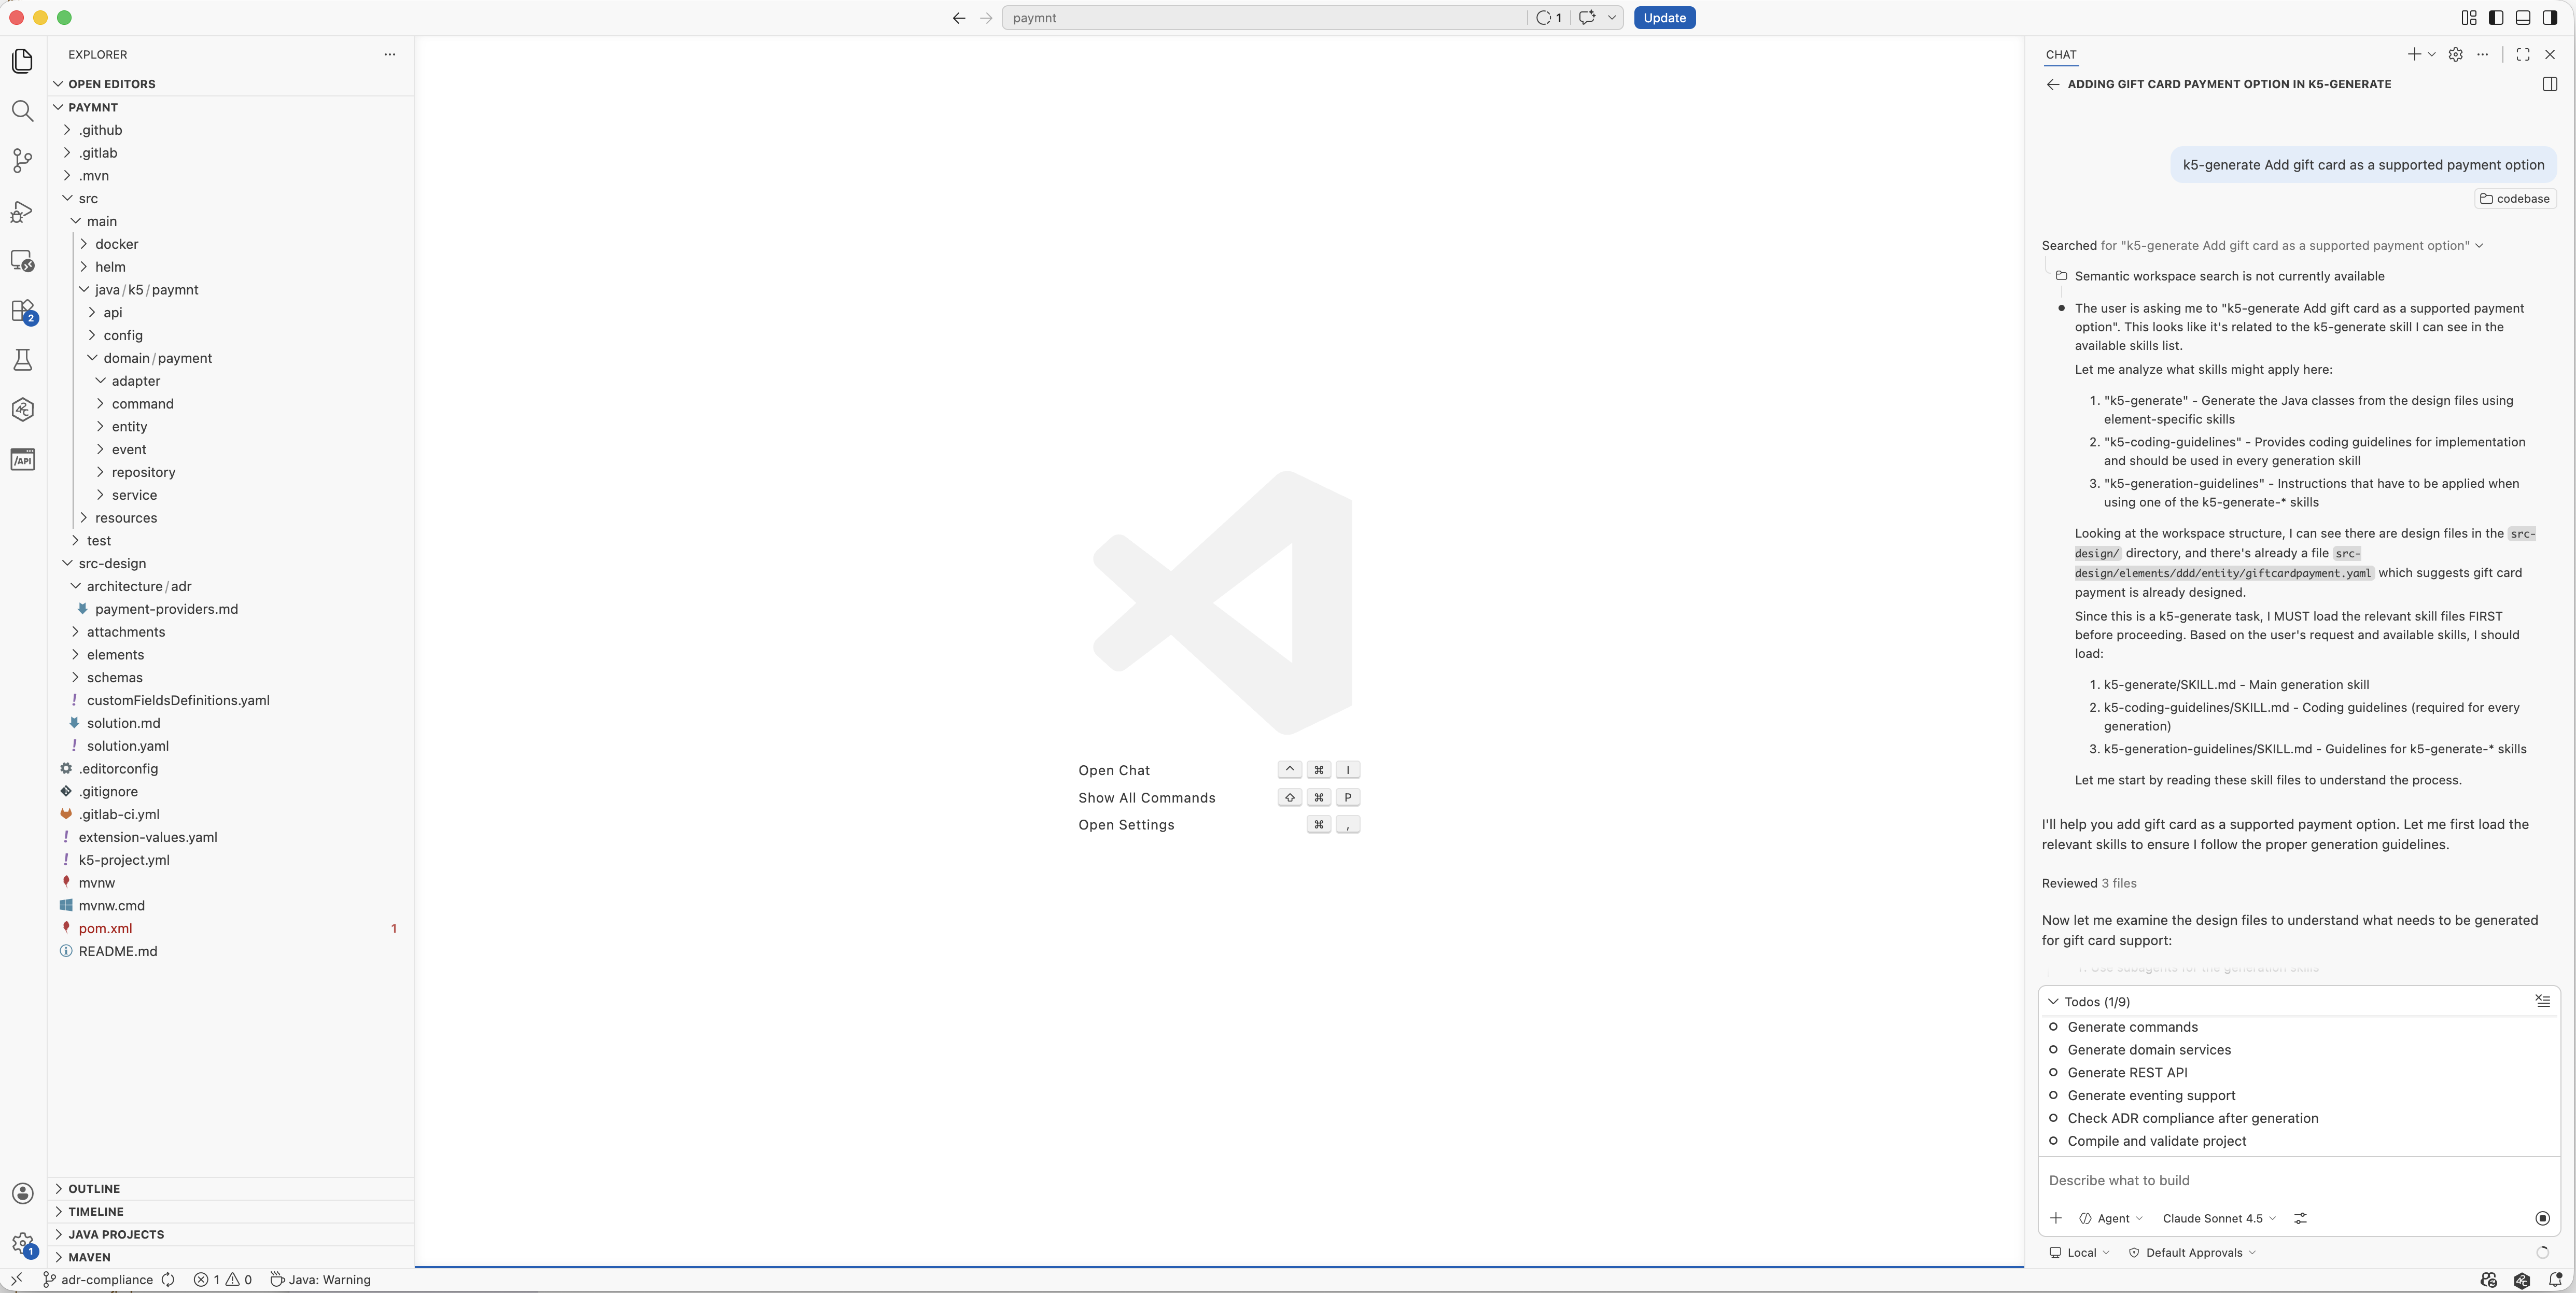
Use the k5-generate prefix and add our requirement to it.
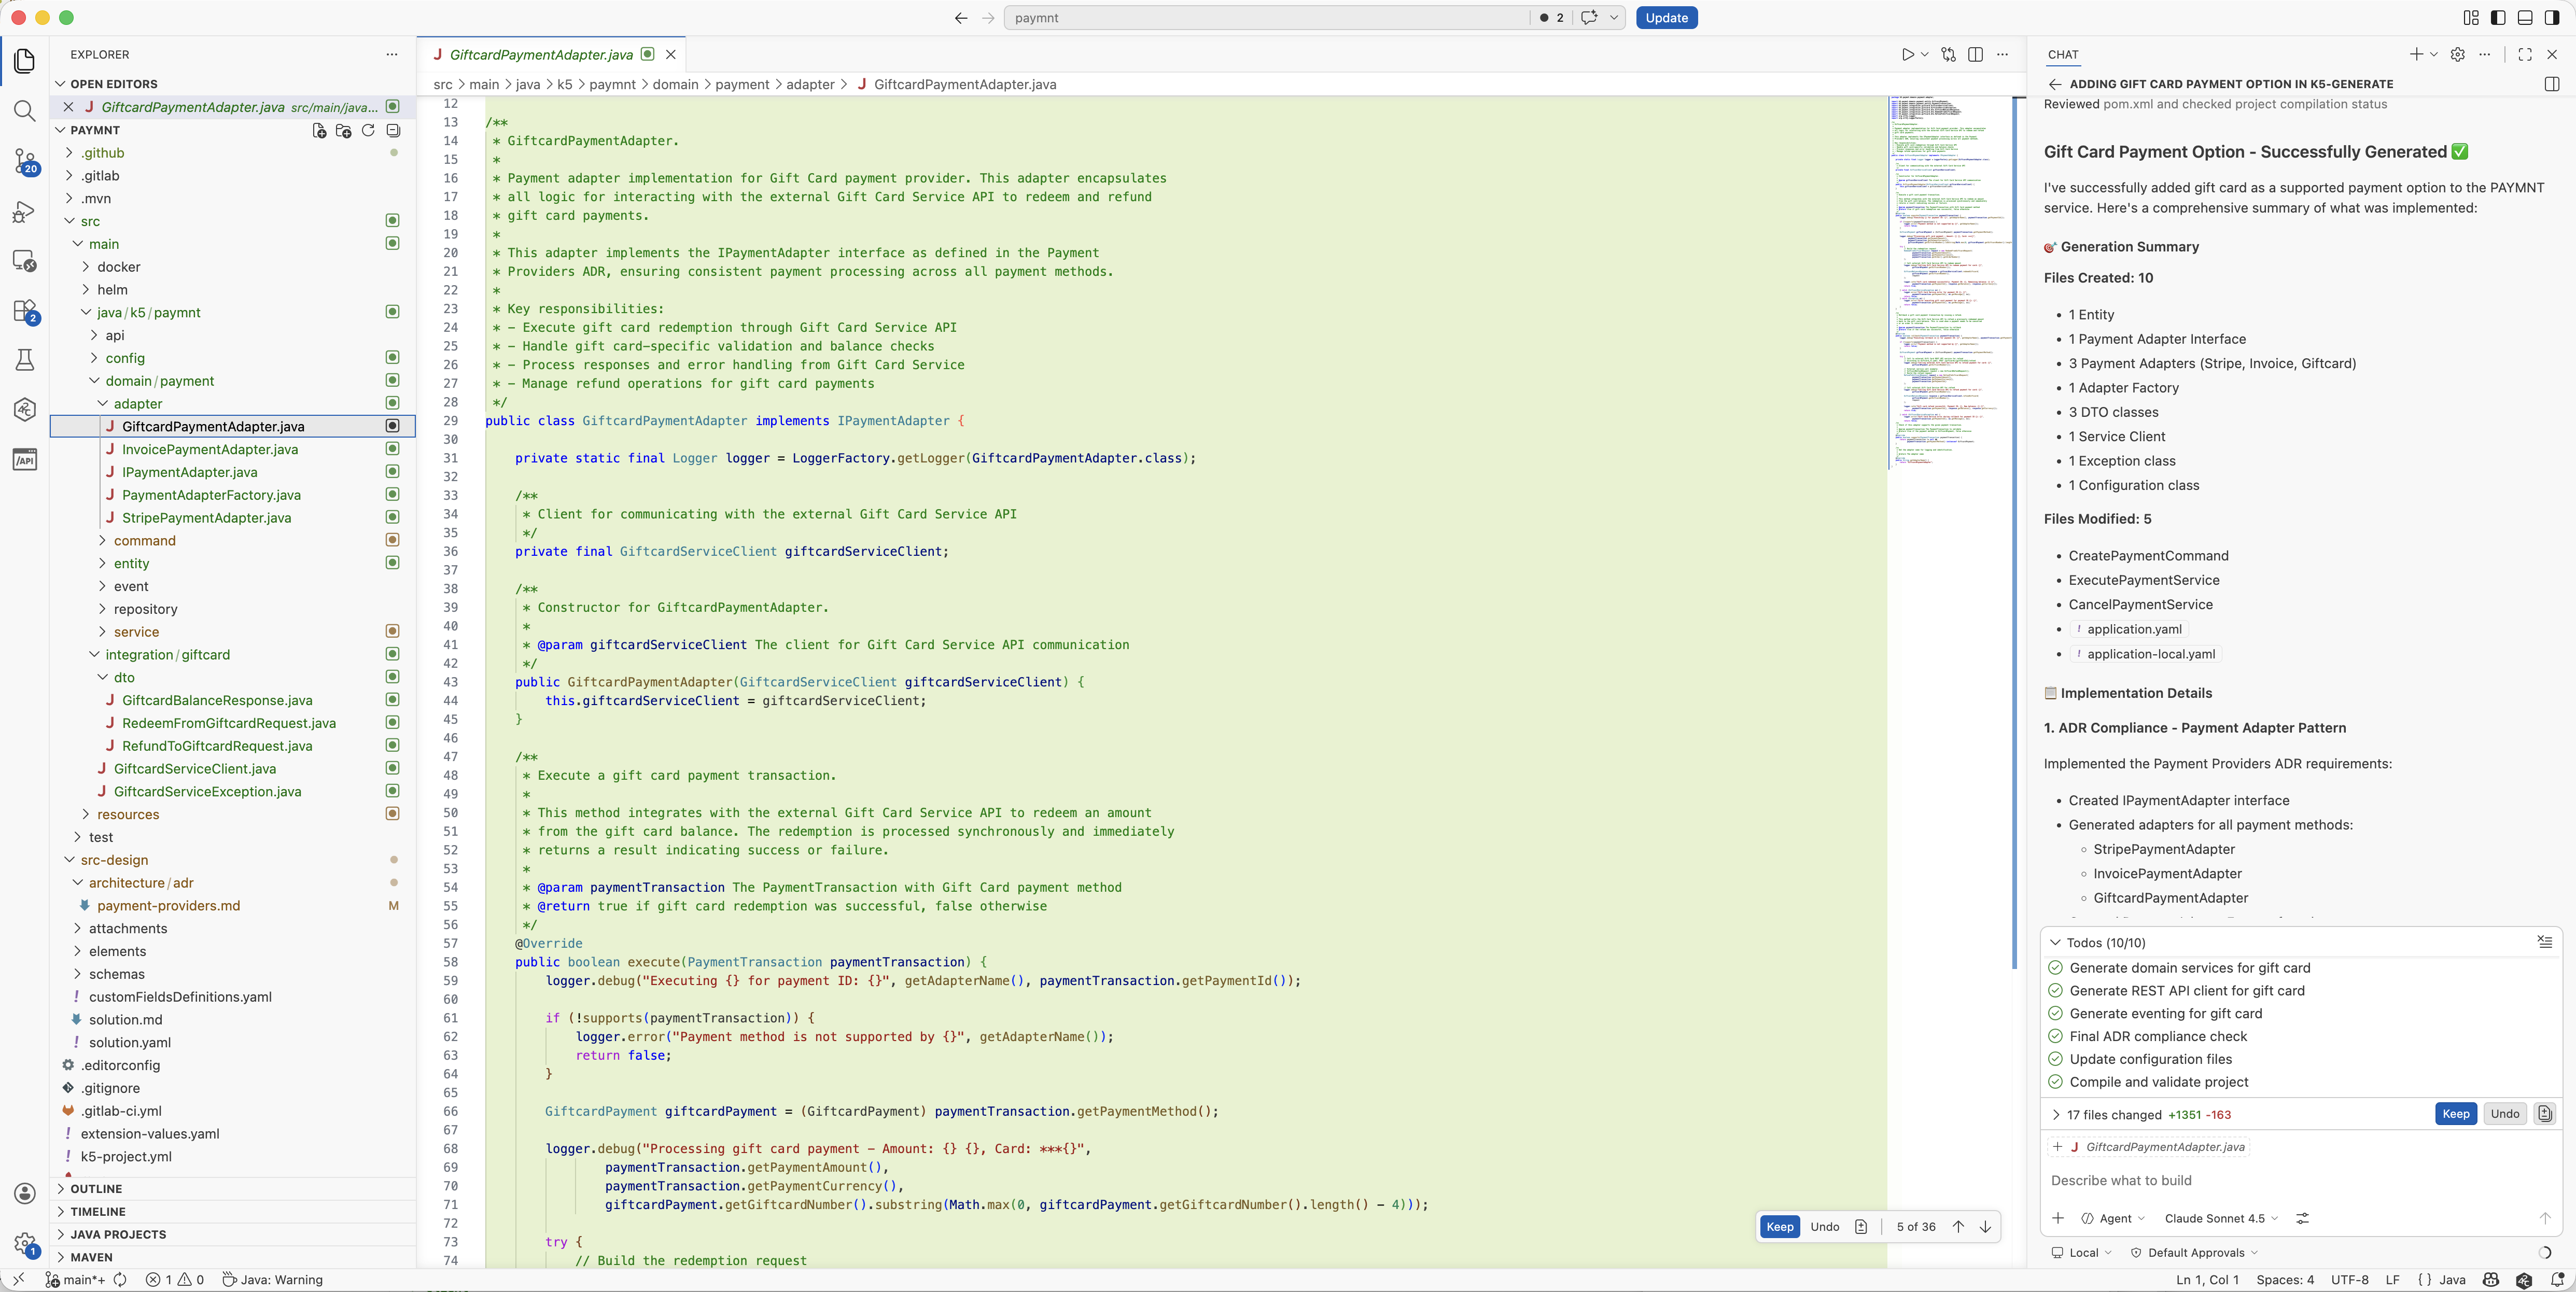
Your Coding Assistant generates a GiftCardAdapter that implements an IPaymentAdapter interface. It also adds the necessary logic to the ExecutePaymentService to process gift card payments, but this time it follows a structured implementation pattern defined in the design files.
Look at what changed. Instead of generating another provider-specific implementation inside ExecutePaymentService,
the coding assistant introduced a GiftCardAdapter implementing IPaymentAdapter.
The existing codebase did not use this structure yet. The assistant generated it because it had access to additional design context beyond the source code alone.
So where did that context come from?
Step 8 — See what the AI read
Go back to the Workbench's Solution Designer and open the Payment Service. This is our tool for designing solutions and giving AI access to structured design context. Based on a customizable Open Modeling Language (OML), it allows you to create precise, machine-readable models of your solution. The Payment Service is already modeled here using one of our default OML profiles tailored for Domain-Driven Design.
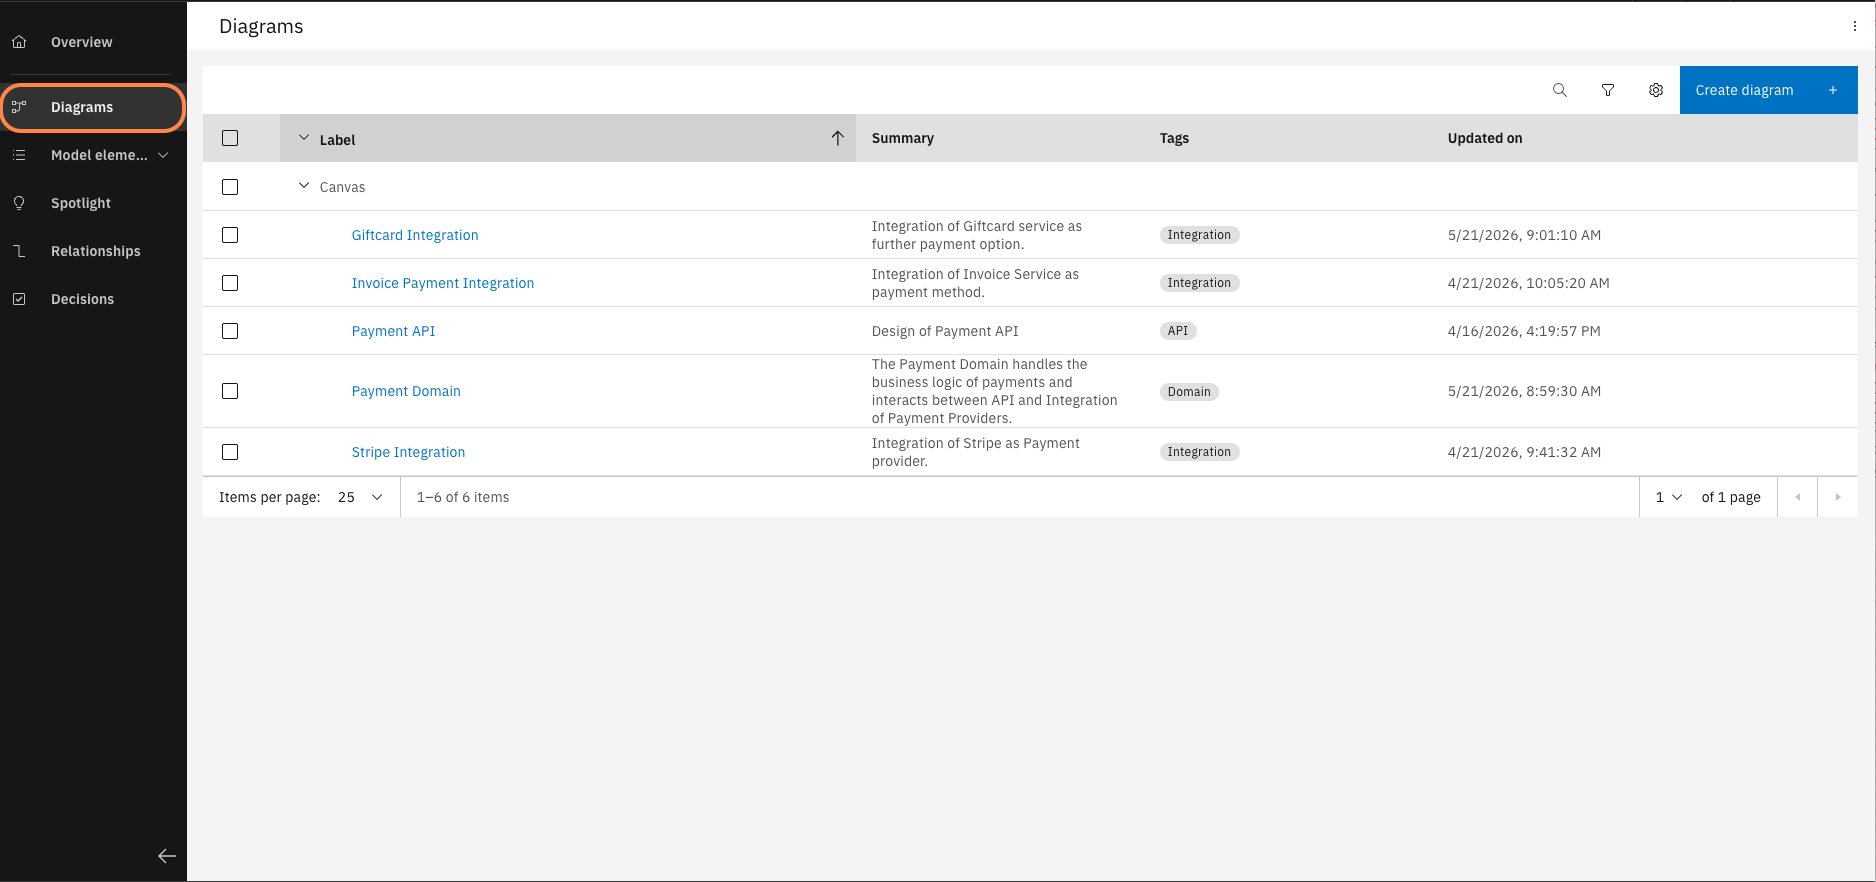
On the left, navigate to "Diagrams" and open the "Payment Domain" diagram.
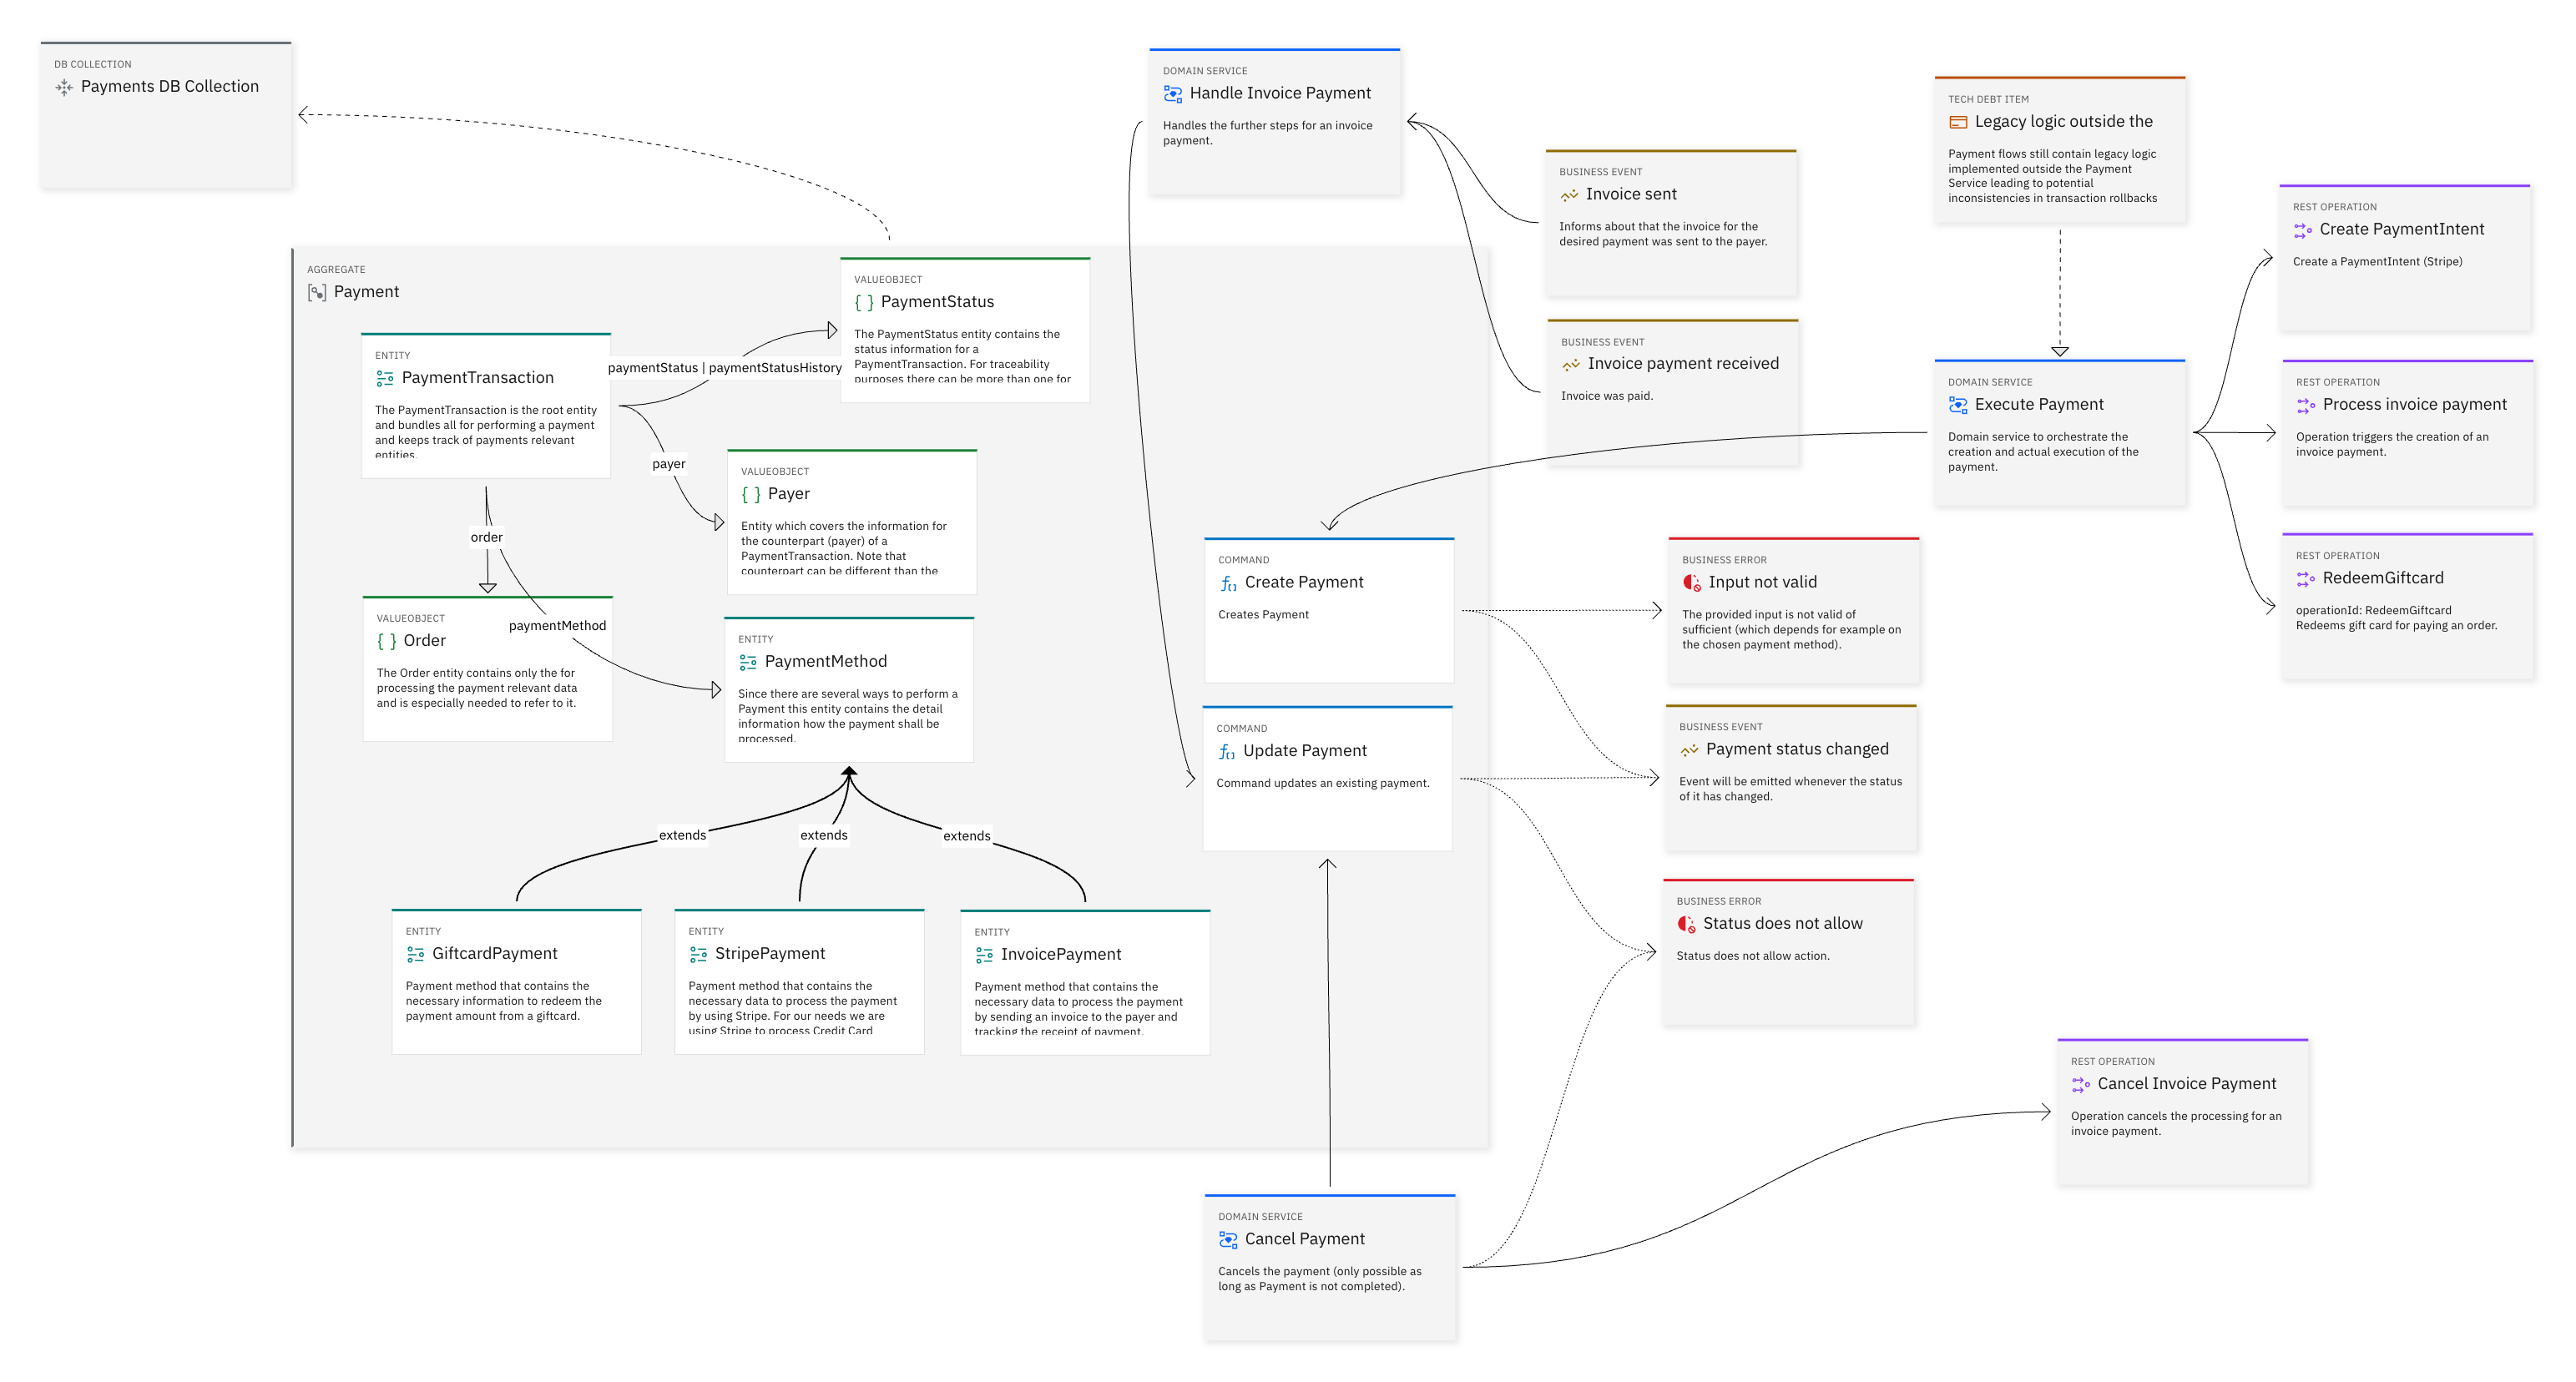
This is the full domain model of the Payment Service — entities, commands, events, errors, and REST operations, all with relationships. This is the structured context supplied to your coding assistant. On the right hand side of the diagram, you can see that the Execute Payment domain service now connects to a REST operation integrating the Giftcard API.
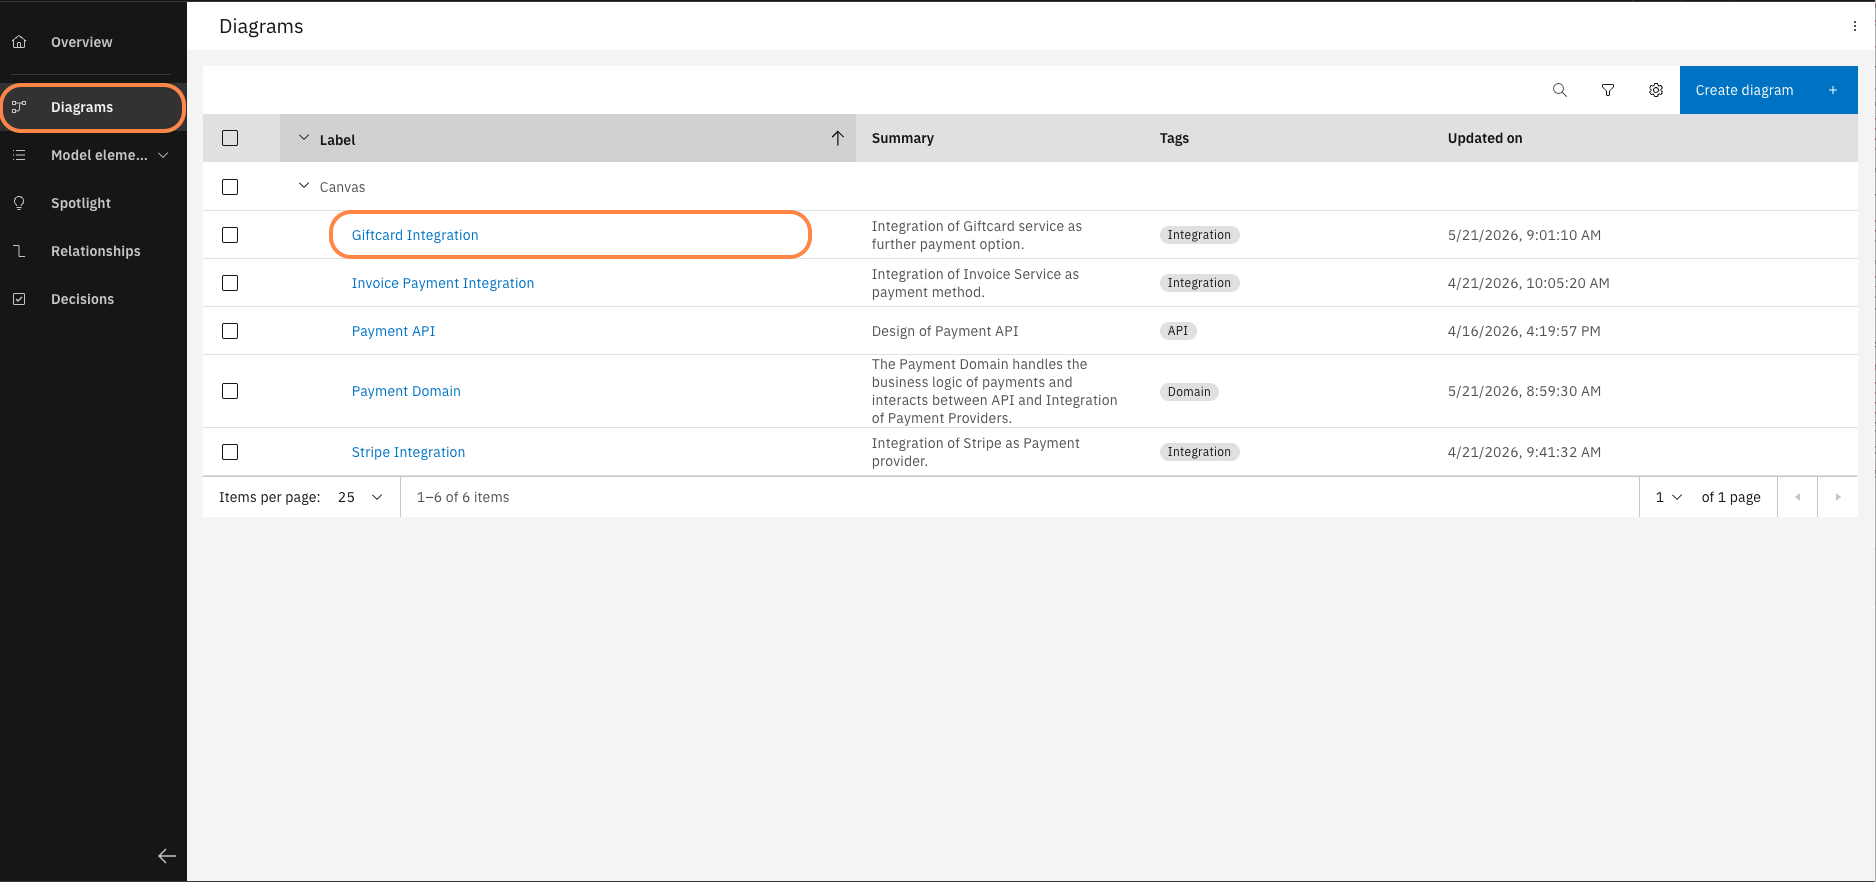
Go back to "Diagrams" and now open the "Giftcard Integration" diagram.
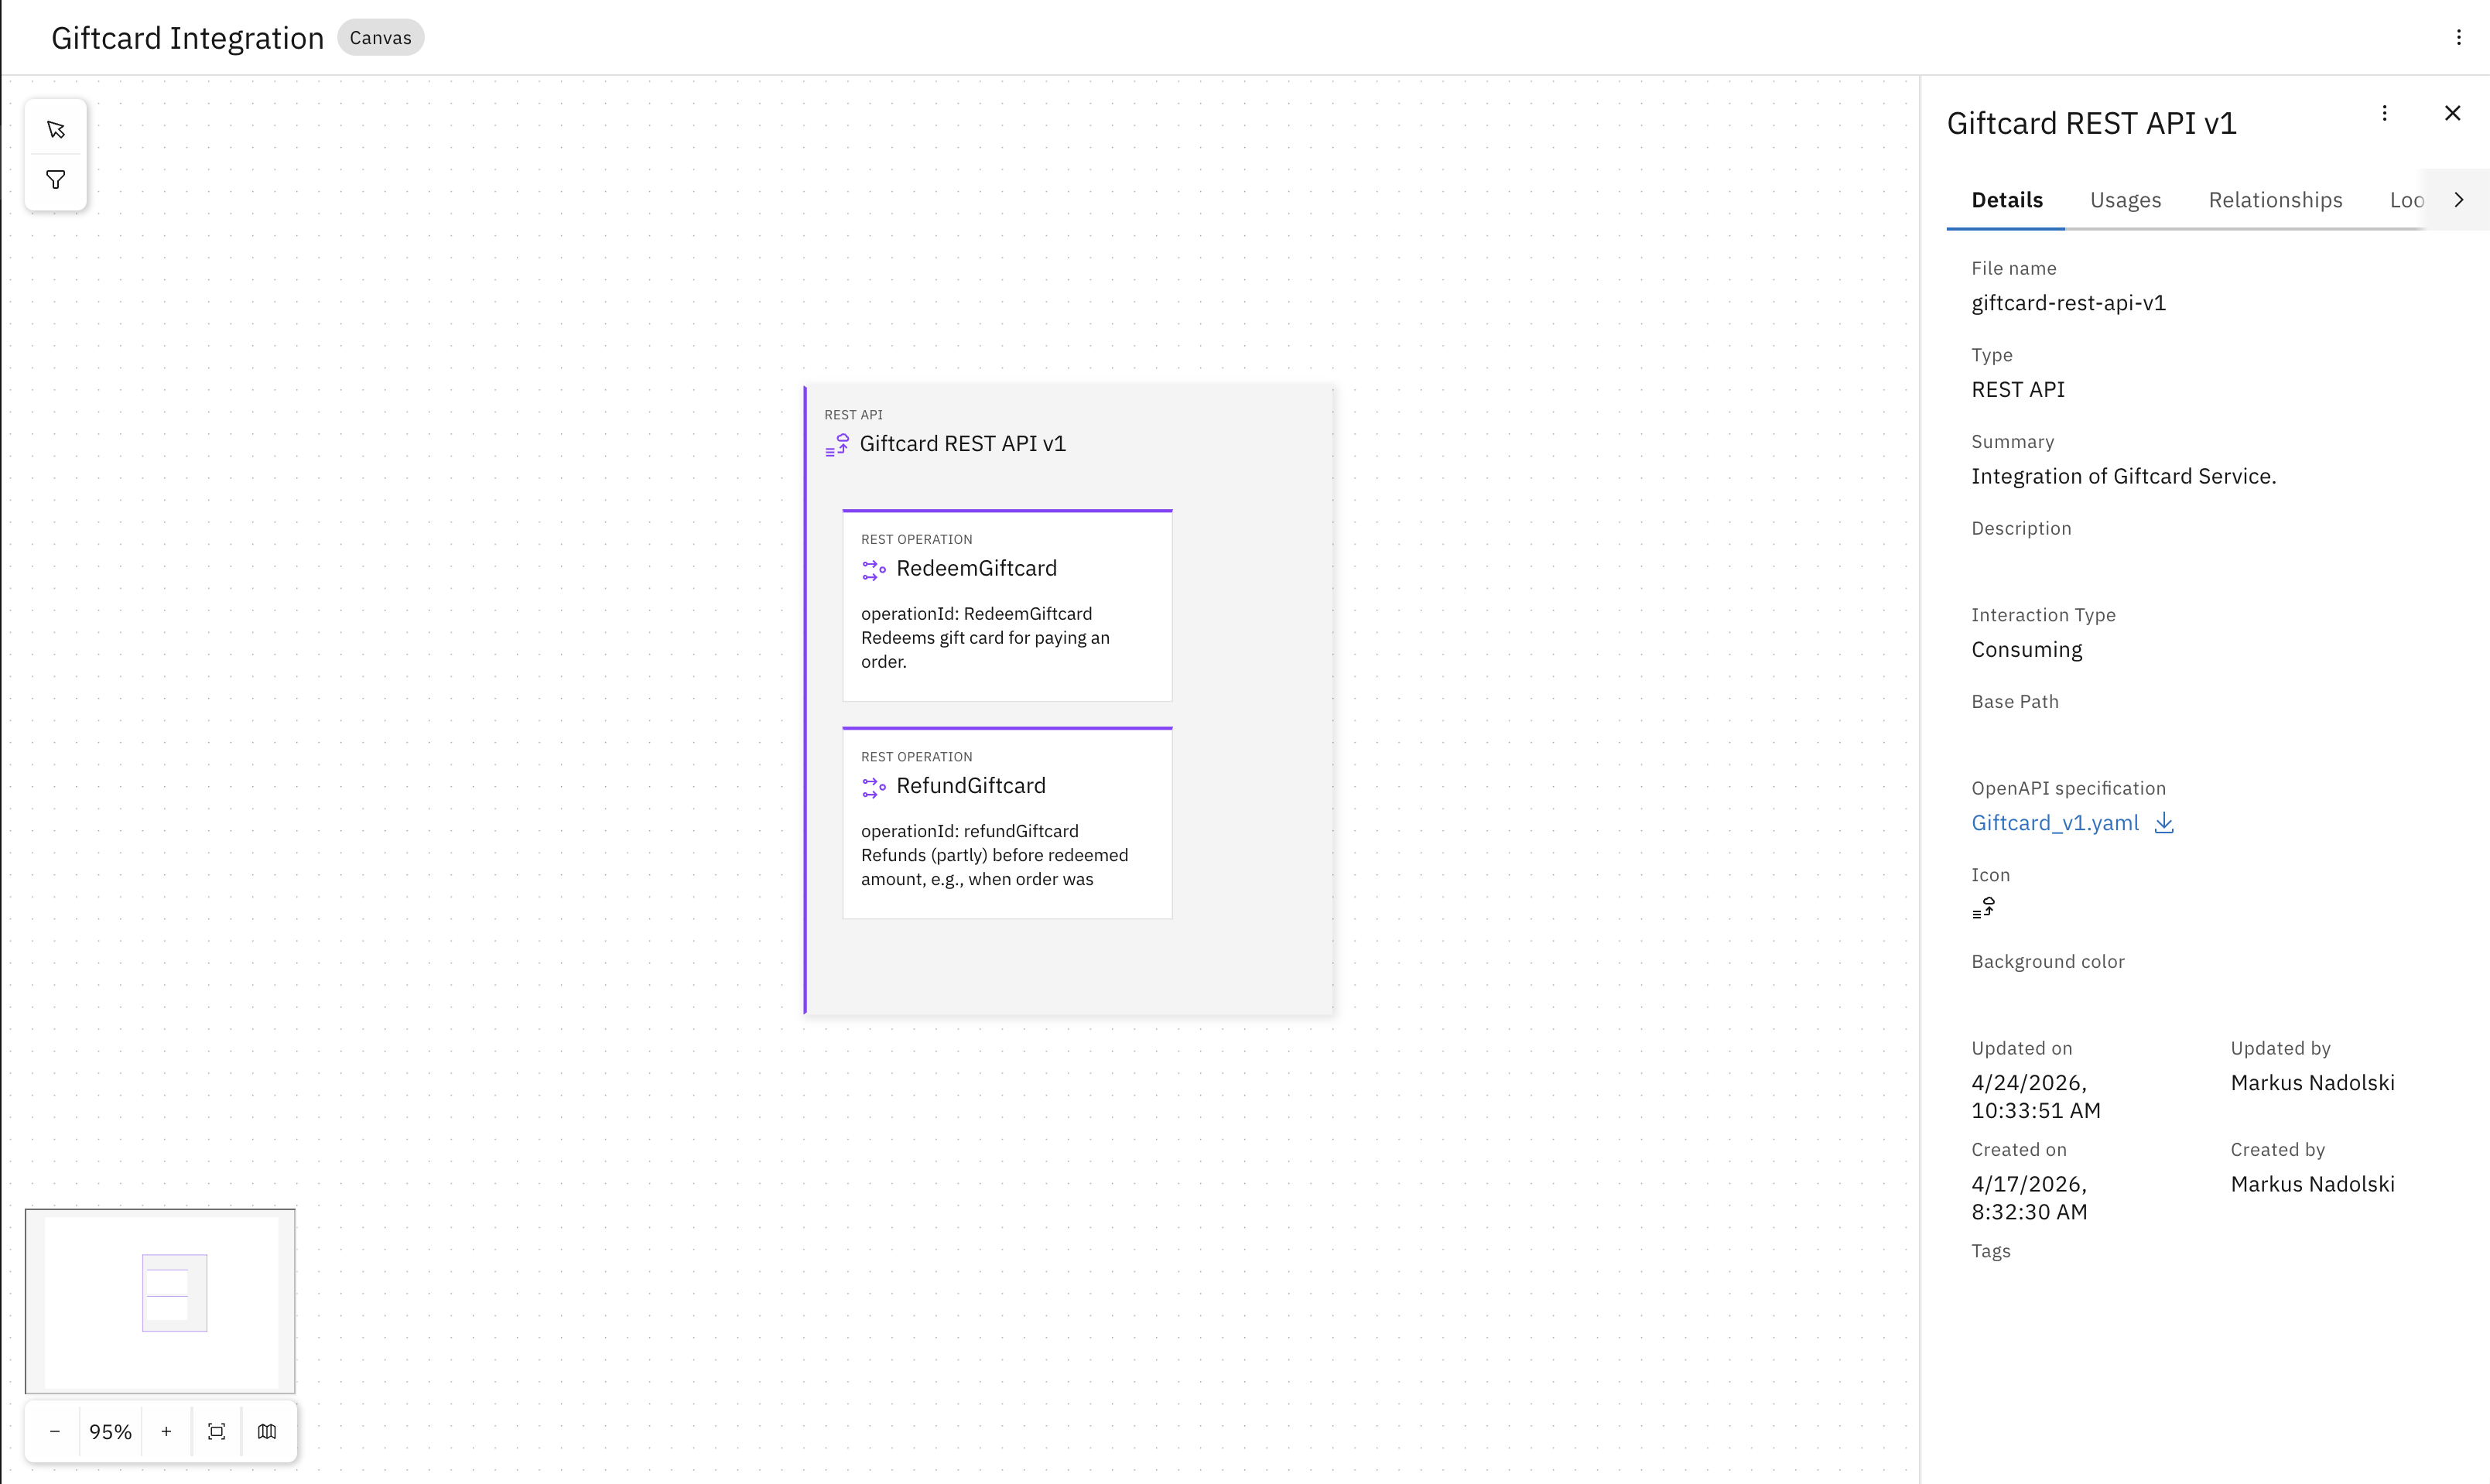
The Giftcard REST API is modeled as an external integration the Payment Service consumes — with operations RedeemGiftcard and RefundGiftcard and a linked OpenAPI spec. This is why the AI generated an adapter calling an external service instead of implementing gift card logic itself.
This structured model context gave the coding assistant access to information that did not exist consistently in the source code alone: domain relationships, integration boundaries, external APIs, and intended service interactions. Together with the skills and commands provided through the Project Baseline, this allowed the assistant to generate an implementation aligned with the designed architecture of the Payment Service — not just its current implementation state.
Your coding assistant did not have to guess. It followed a defined structure that was already there — without you explaining it.
Step 9 — Find what you never read
The design model explains why the coding assistant generated a different structure. But there is another difference that is easier to miss: the assistant also incorporated organizational knowledge that was never mentioned in the ticket, prompt, or source code and refactored existing code to apply a known solution pattern for the new requirement. Let's look at what else was attached directly to the Payment Service.
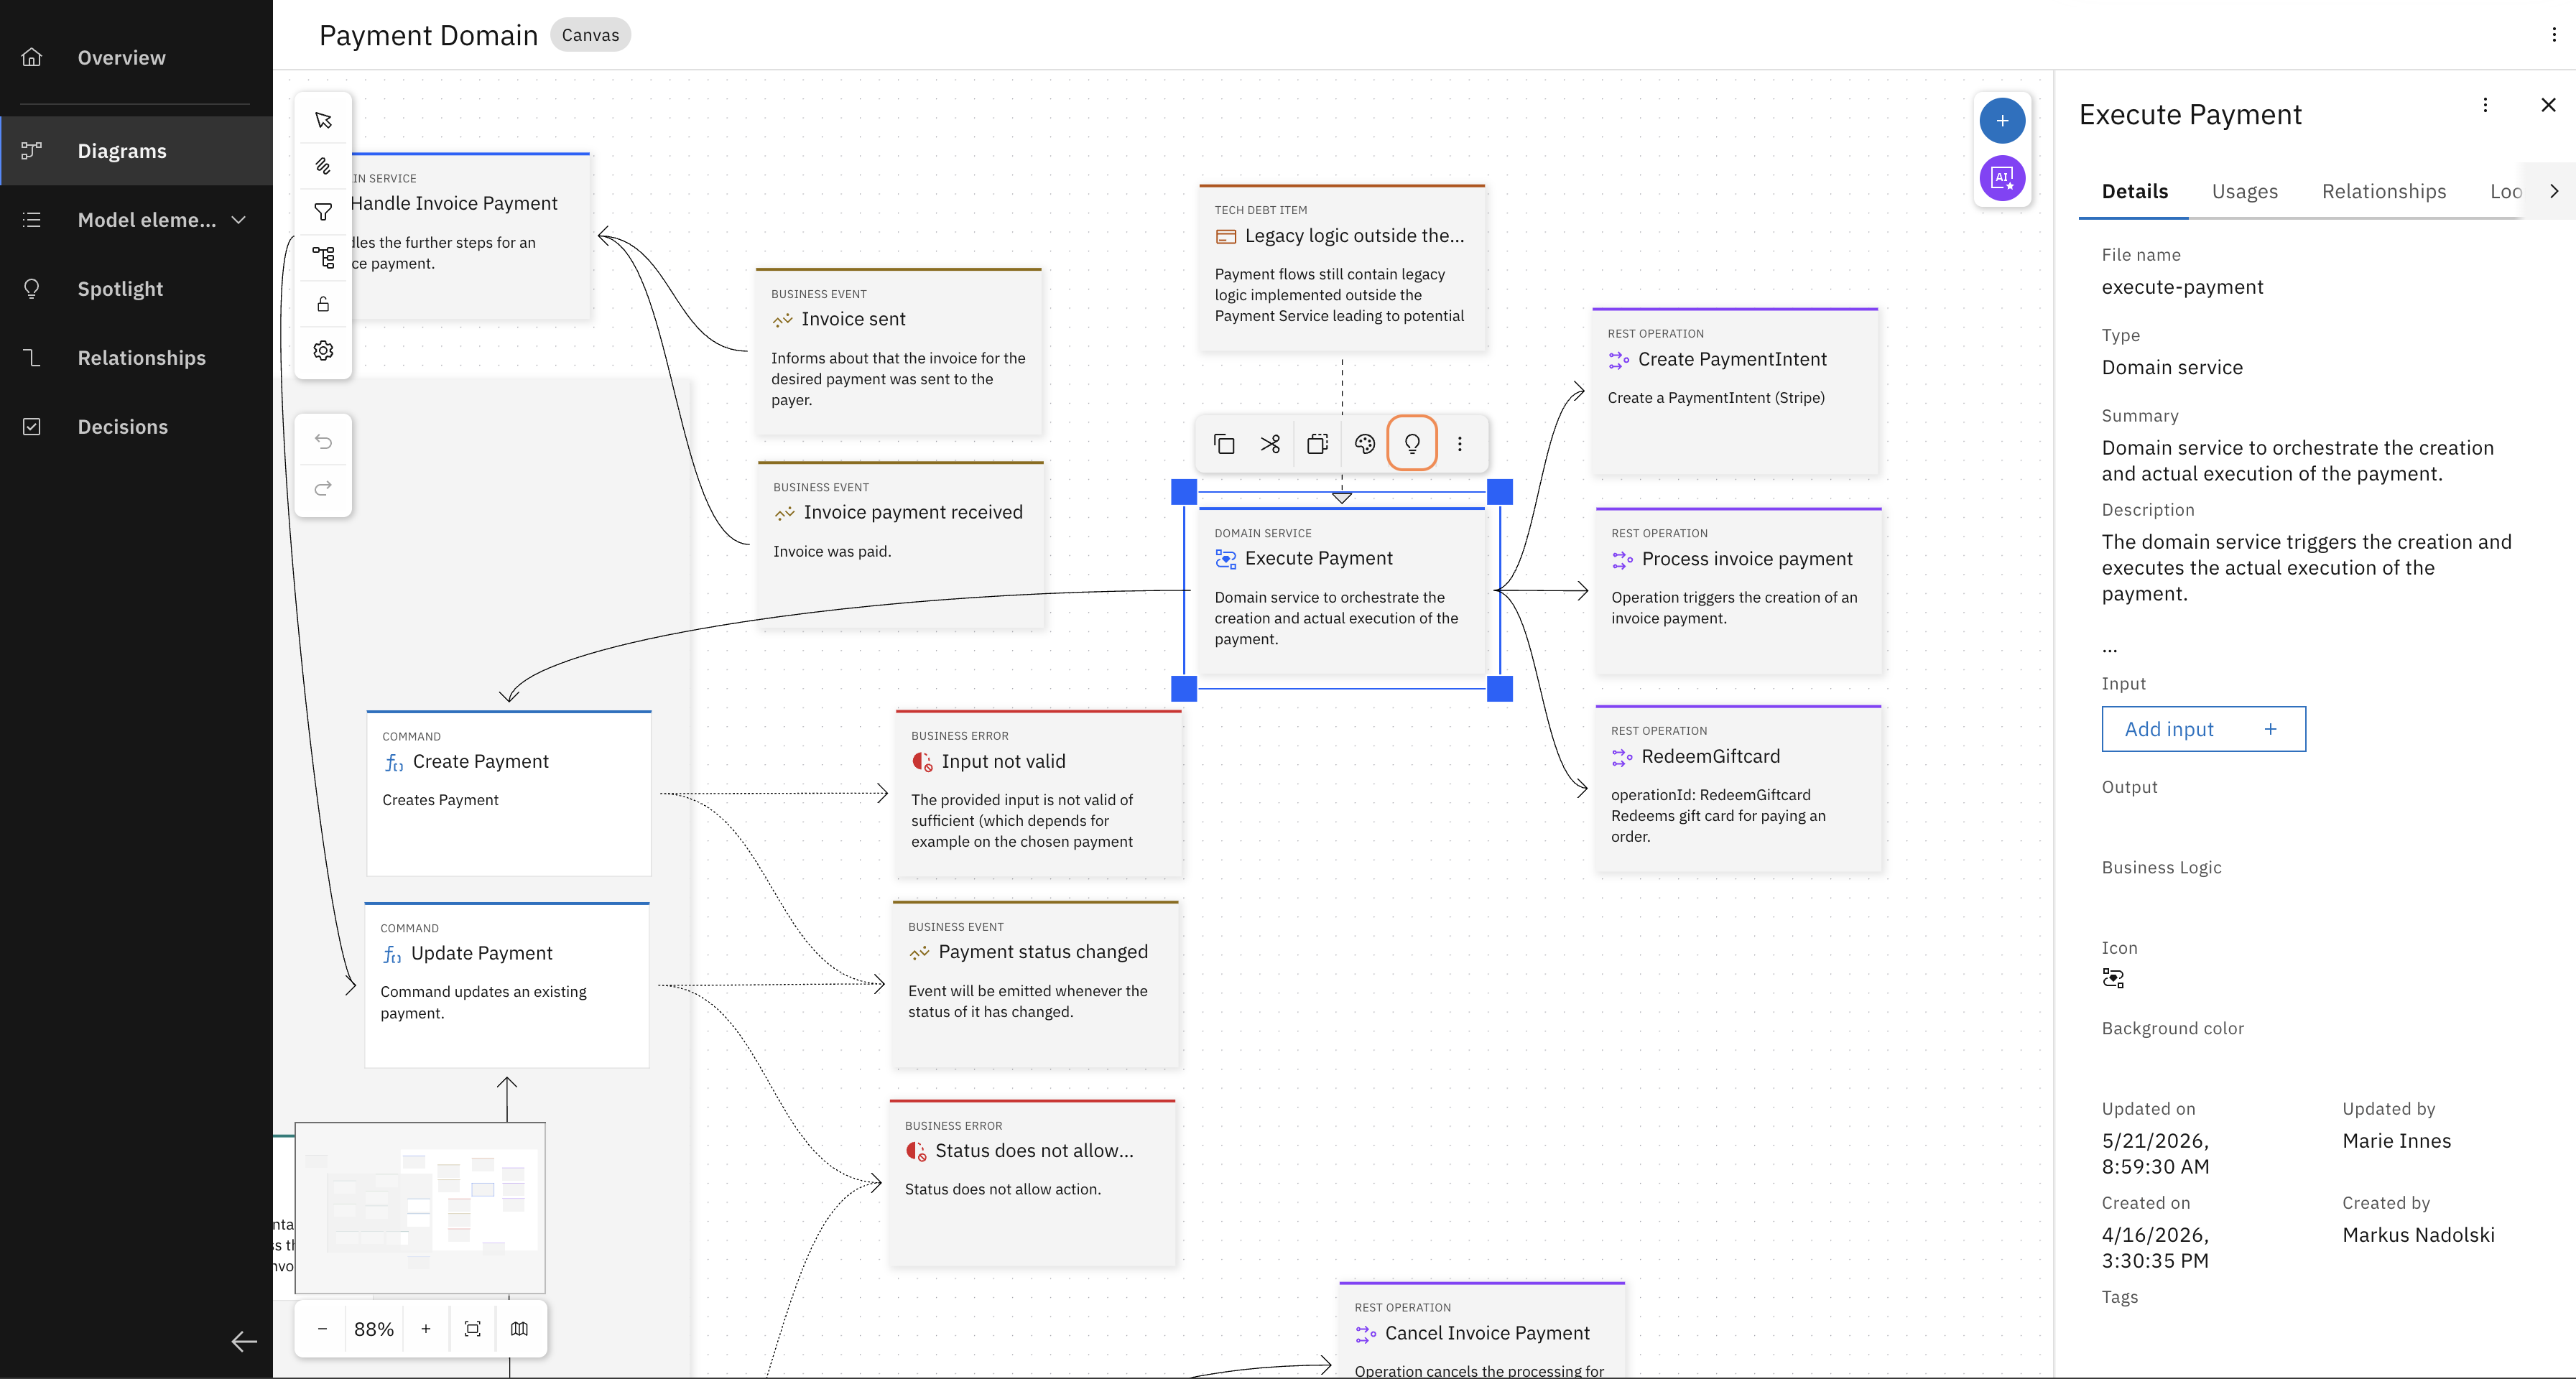
If you select the "Execute Payment" model element and click on "Spotlight" (bulb symbol) in the context menu above the card, you can see all the model elements that are directly connected to it.
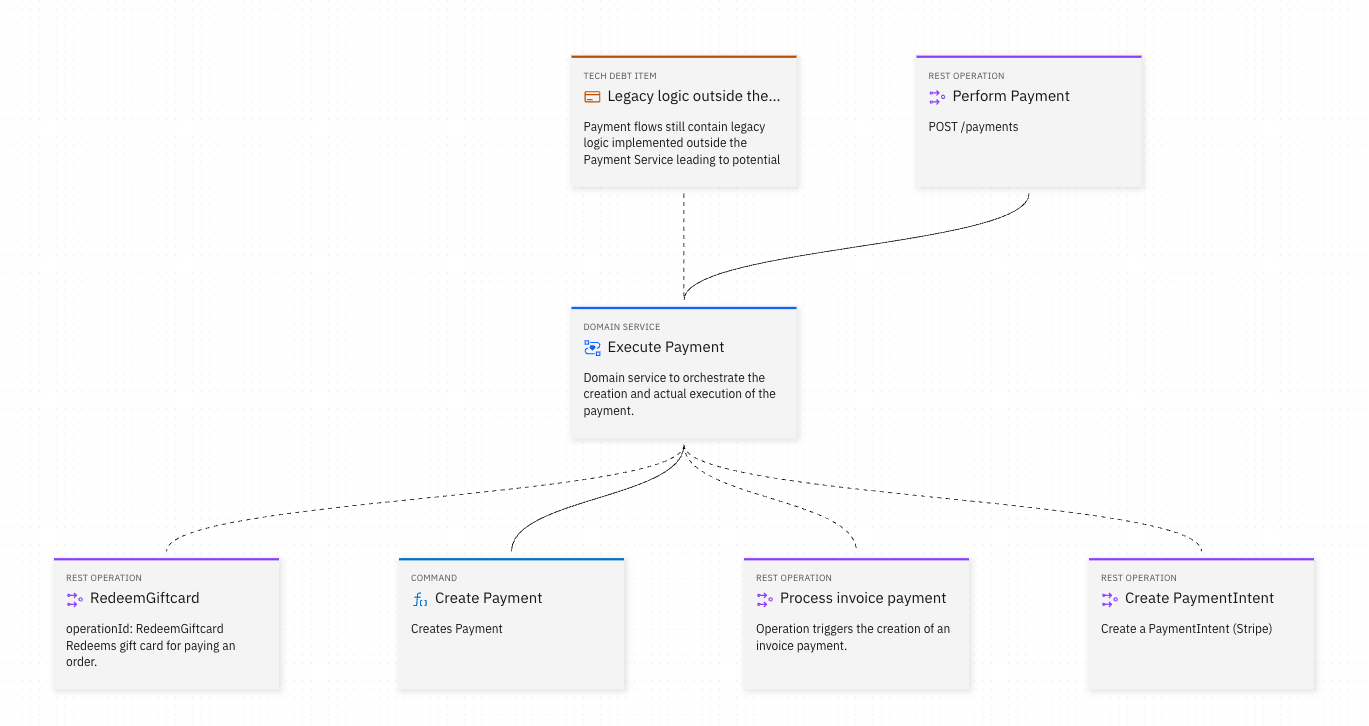
The spotlight feature reveals technical debt that was previously unknown to you. In this case, there is a known gap attached to the Execute Payment service: "Payment flow still contains legacy logic". This is a note left by someone in your organisation who identified this gap and attached it to the relevant part of the design model. Your coding assistant found this and took it into account when generating the code.
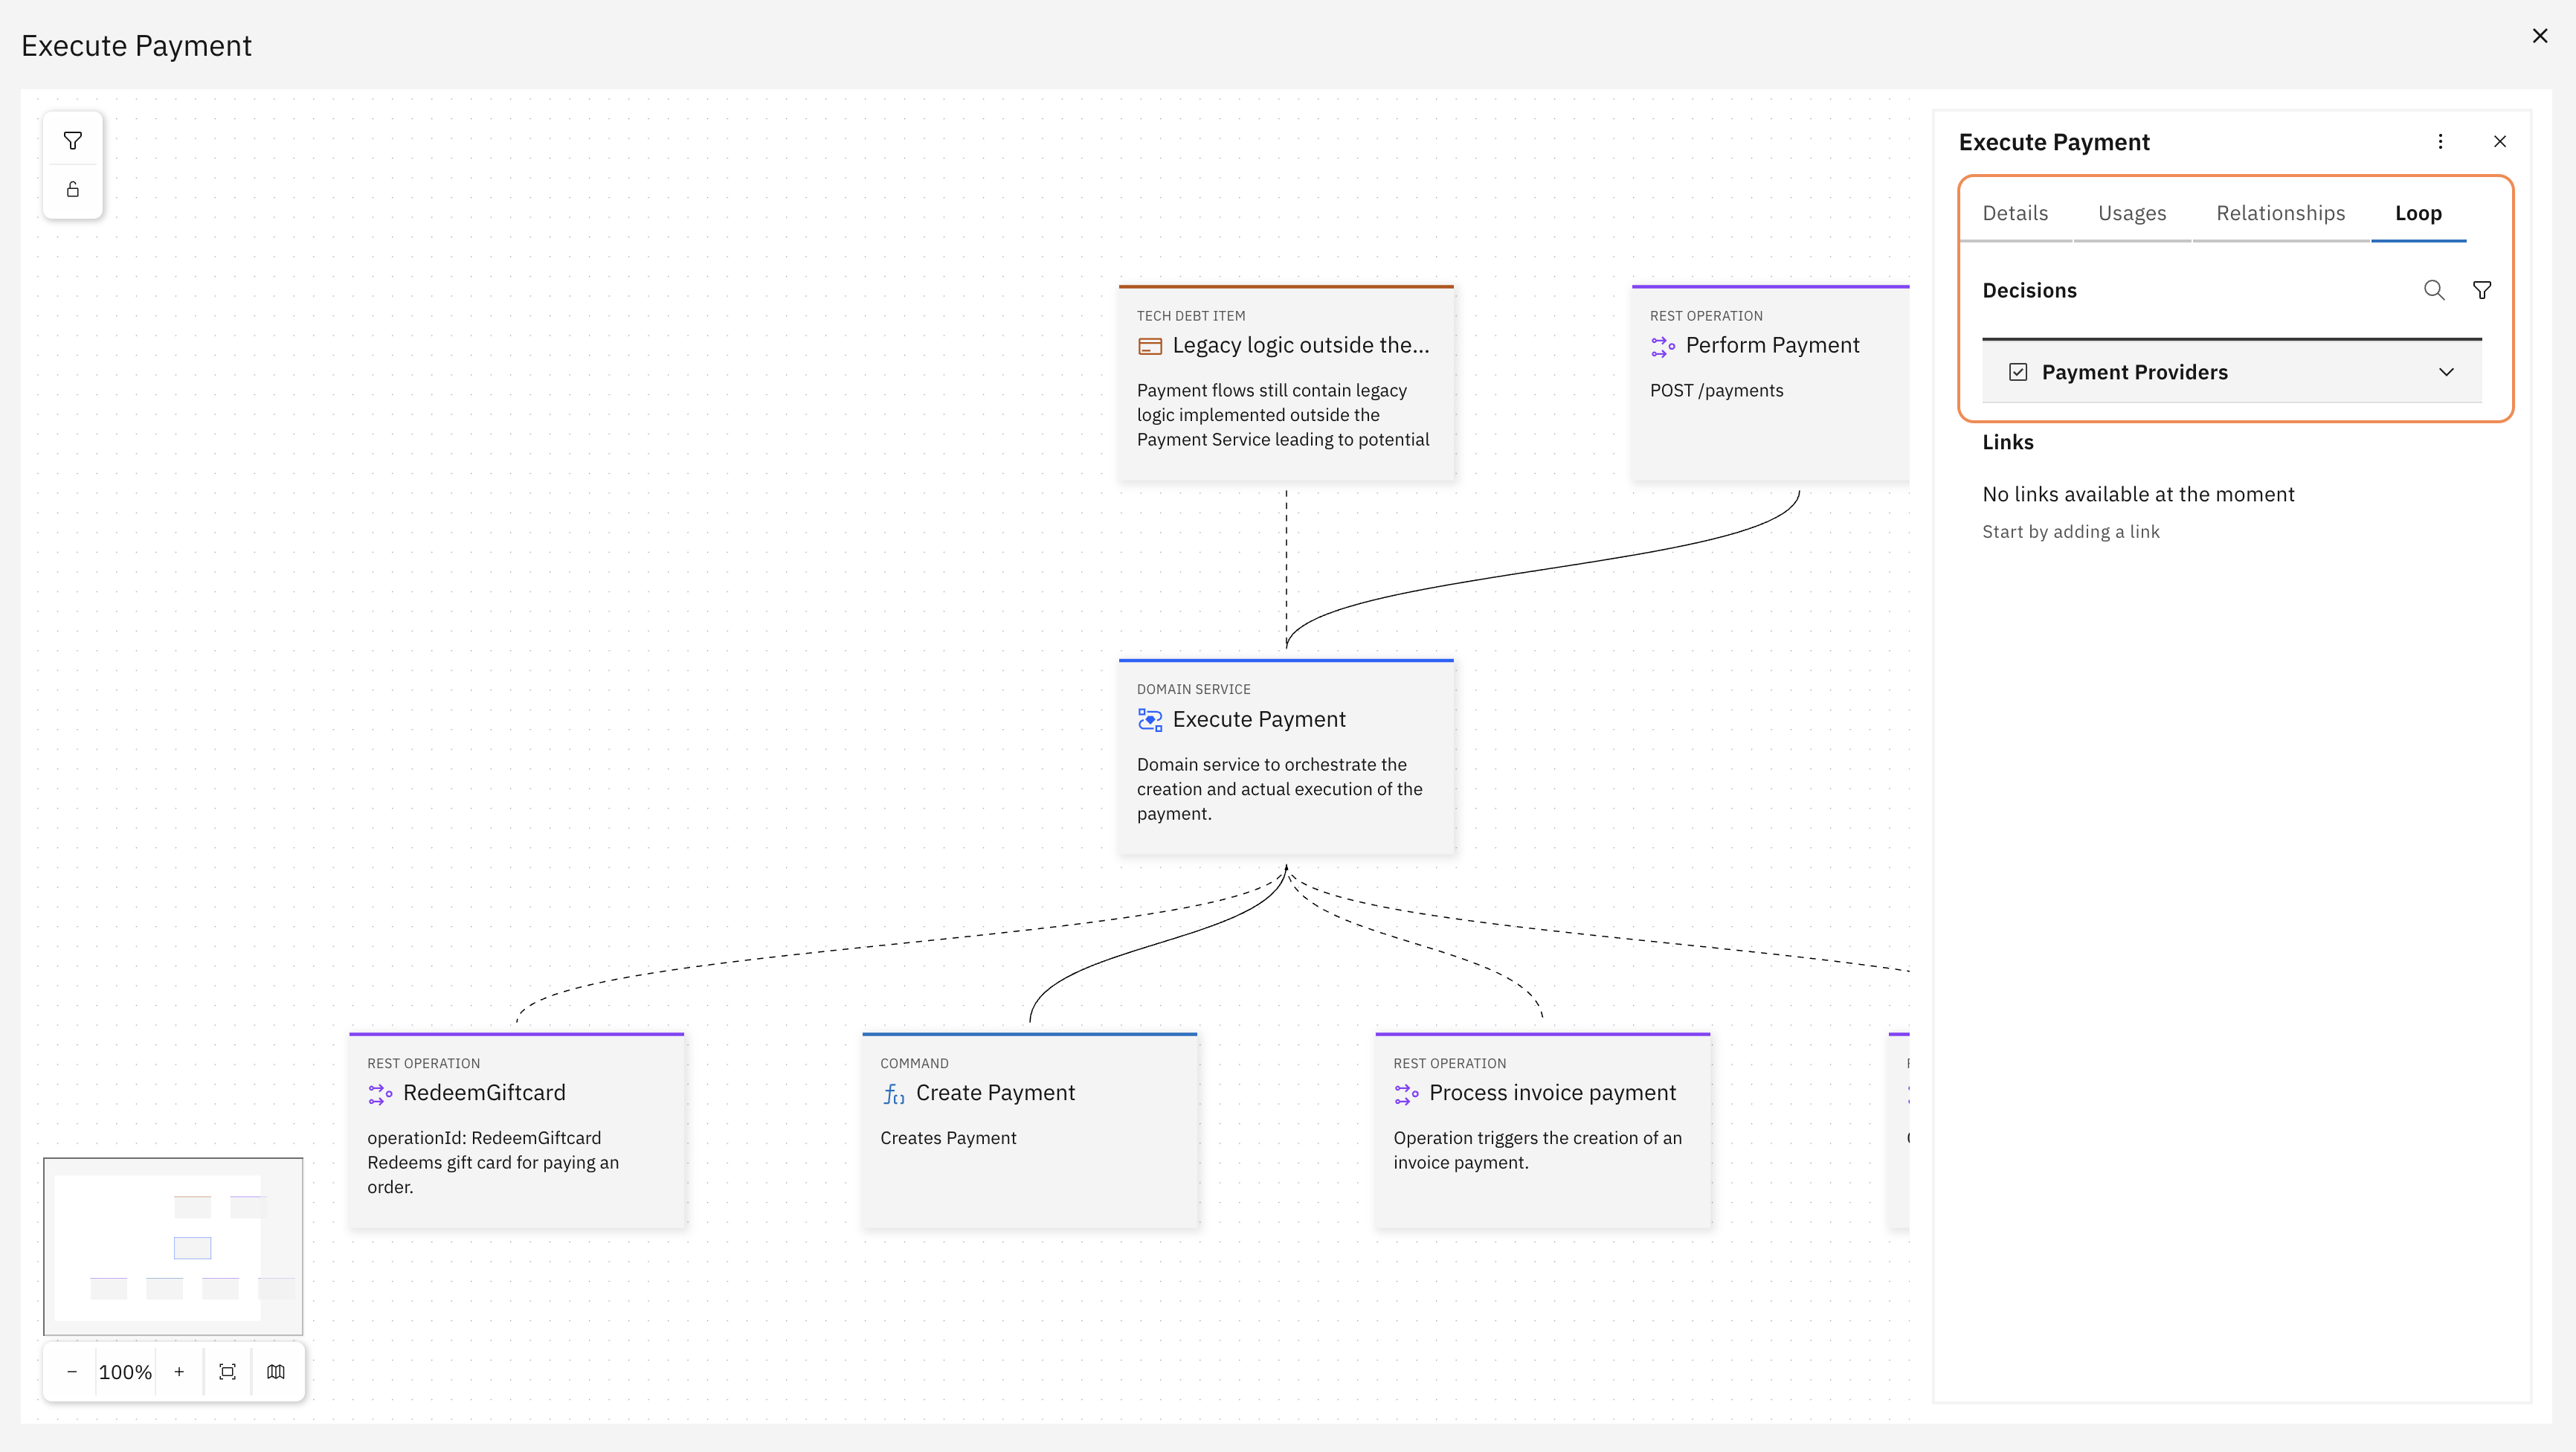
Open the "Loop" tab on the Execute Payment service to see attached decisions. Here, the "Payment Providers" architectural decision record is linked directly to the service — this is how your coding assistant knew to apply the adapter pattern.
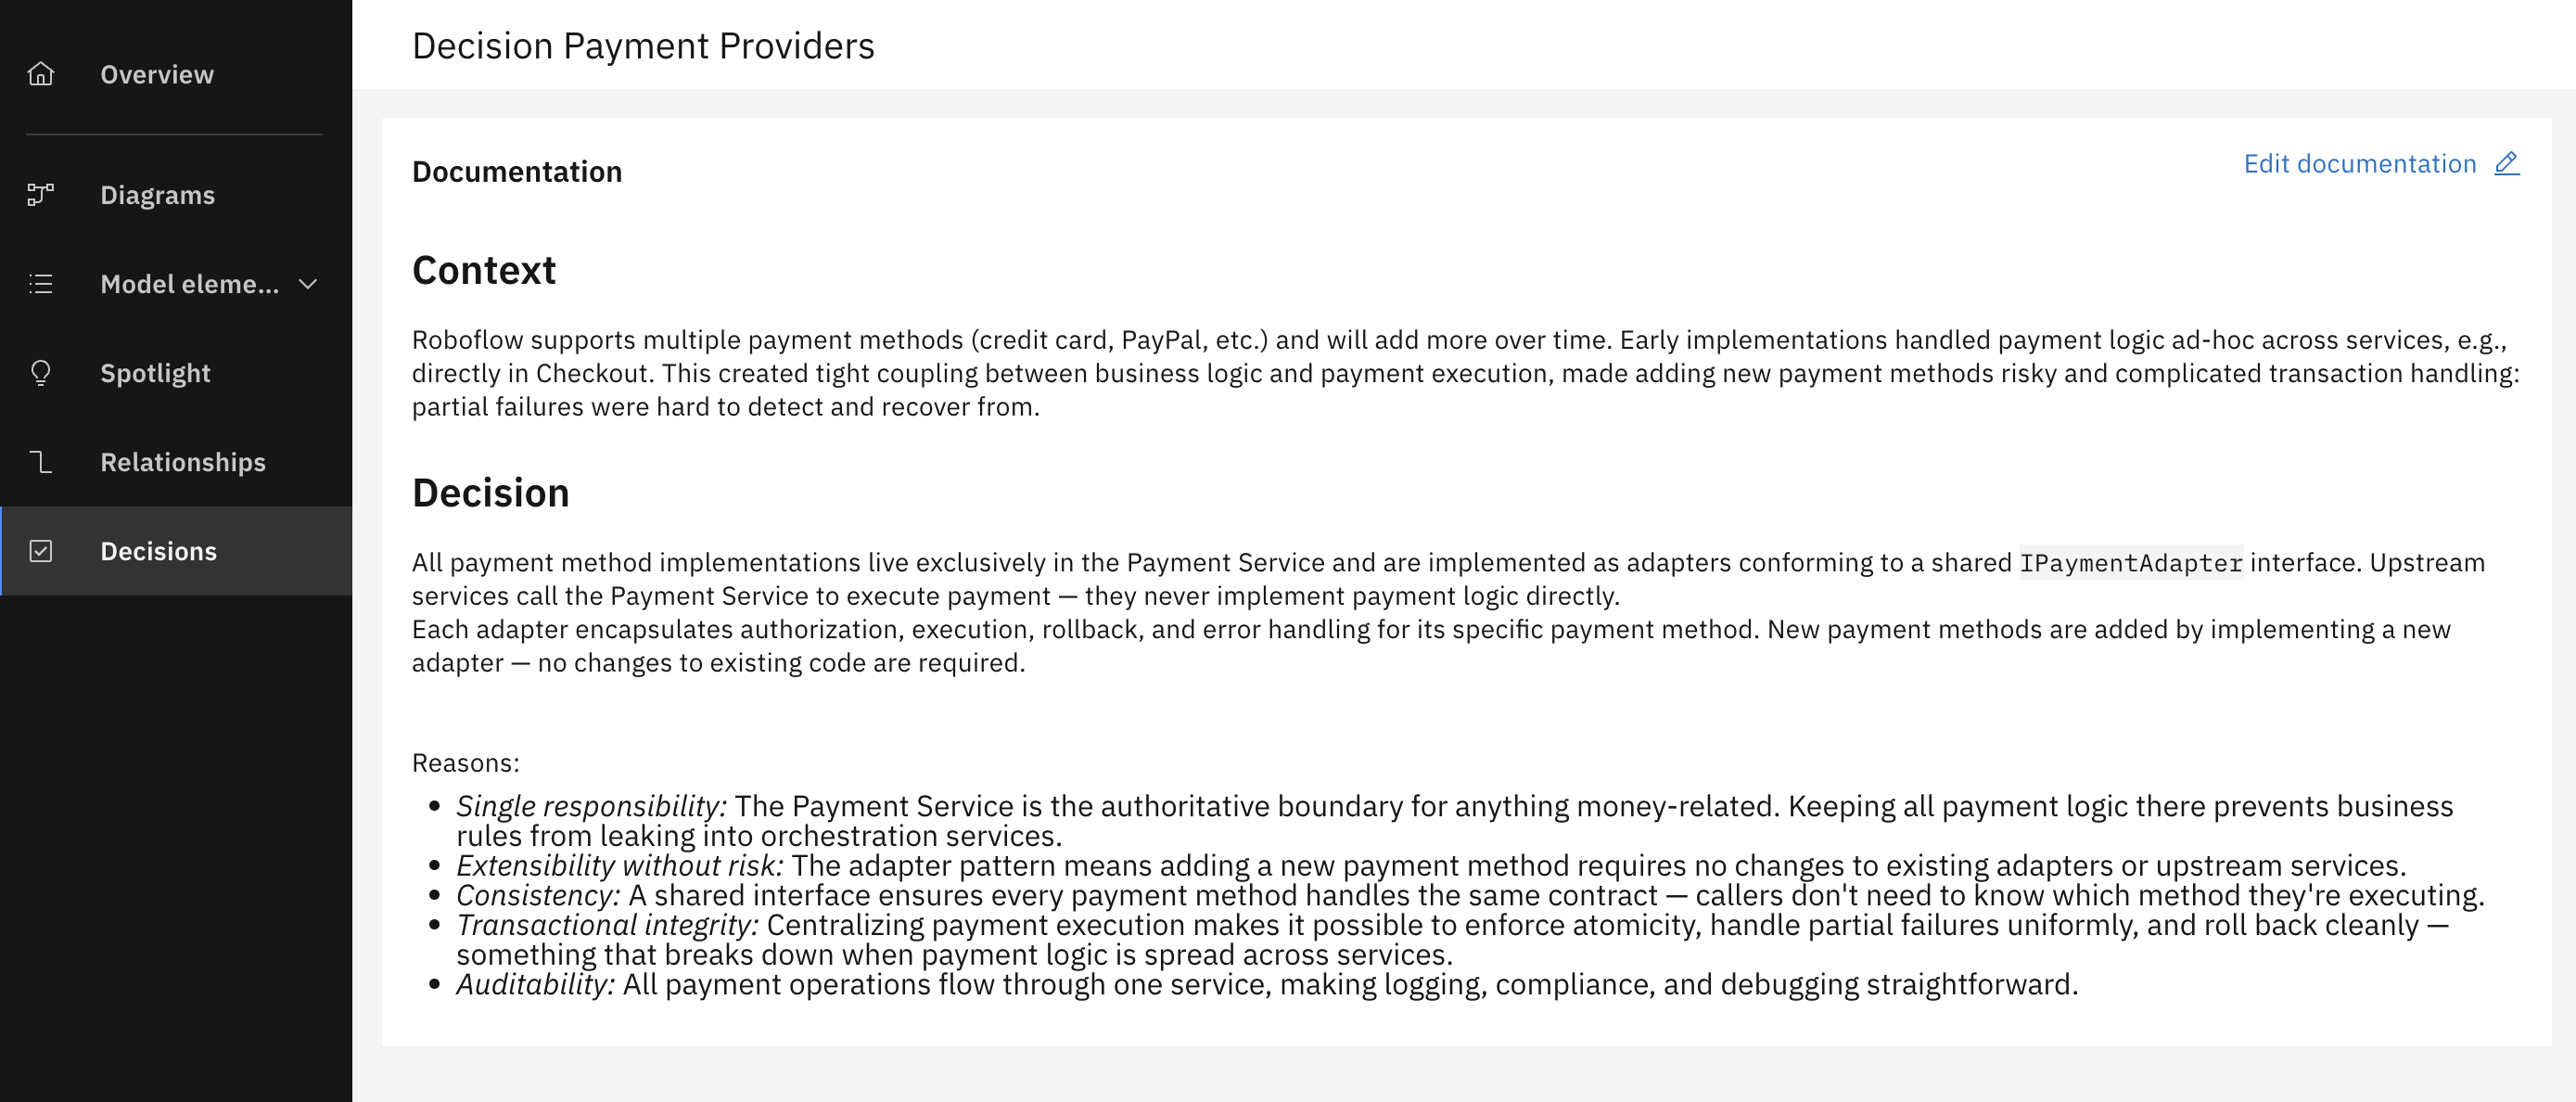
The "Decision: Payment Providers" documents that all payment method implementations must conform to a shared IPaymentAdapter interface — with each adapter encapsulating authorization, execution, rollback, and error handling for its specific payment method.
The coding assistant incorporated architectural decisions and known technical gaps that were attached directly to the affected domain service. You never referenced these decisions in your prompt, and they were not discoverable from the implementation alone. But because they were connected to the design model, they became part of the generation context automatically.
Decisions made by others — decisions you never knew existed — ended up in your code. Not because you asked for them. Because they were attached where the AI could reach them.
What just happened
You gave the AI something real to work from.
You did not have to iteratively work out a prompt that gives you the result you intended. Instead, your coding assistant had access to the structured design context of the Payment Service: with its entities, services, integrations, and even known gaps.
The second implementation is not just different. It is consistent with what your organisation already decided and aware of a technical debt your team already identified. Without you doing anything differently.
Go deeper
Bootstrap a Service from a Shared Design Model
Generate a complete microservice from a shared design model — entities, persistence, endpoints, tests. One command, no instructions required.
Customize OML Profiles
Learn how Open Modeling Language (OML) profiles control modeling behavior in Workbench and how to extend or customize them.